CREATE PLANS FOR A LEAN TO SHED FOR YOUR YARD, PLUS I SHARE MY PLANS
Gardening tools, out-of-season patio furniture, your kids’ inflatable pool (that took hours to fill but they only used once)…does it seem like your garage is a magnet for everything under the sun?!
And it’s not the first time you tripped over your snowblower when pulling out your lawn mower for the first cutting of the season.
It’s time to prioritize what you need, reorganize what you have, and build a better storage solution.
Lately, we attempted a lot of big projects, ones we didn’t feel qualified to do. But even with some bumps along the way, we finished them and the results surprised us!
One of our most rewarding DIY projects was building a lean-to shed from the ground up.
This addition allowed us to move the most frequently-used items to a central location, so we could access them in any kind of weather.
This is a big project so I will be breaking the process into multiple posts. This post will talk about how to create a shed plan.

Please remember, we are NOT professionals but, with some planning and research, we were able to build our own shed so I know you can too. Still, we are not responsible for the outcome of your project so please adjust where necessary to fit your needs.
A lean-to shed, adjacent to your home, is ideal if you have a small, out-of-the-way space to place it.
Unfortunately, that was one of the biggest obstacles we came across while building this shed – having it right next to another structure.
It made things a little difficult when building the walls because we had to fully assemble the wall (paint the exterior siding) before it could be installed. If you have other choices, I would suggest NOT building it right next to another structure.
Disclosure: This post contains some affiliate links or referral links for your convenience. It is a way for this site to earn advertising commissions by advertising or linking to specific products and/or services. Click here to read my full disclosure policy.
A PLAN FOR YOUR SHED
First, you will need a plan that outlines the size & design for the shed.
Please remember that these plans are for a lean-to shed. The size of our shed is approximately 6ft x 10ft and 8ft at the tallest peak (it’s all the room we had in our yard so feel free to adjust if you have more space).
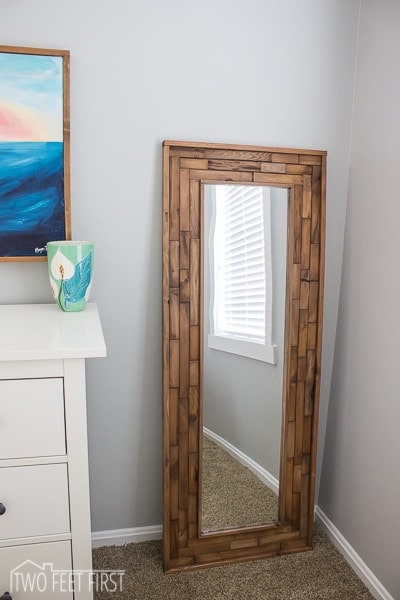
We also wanted to include some old wooden windows we had on hand (we have been saving them for years!).
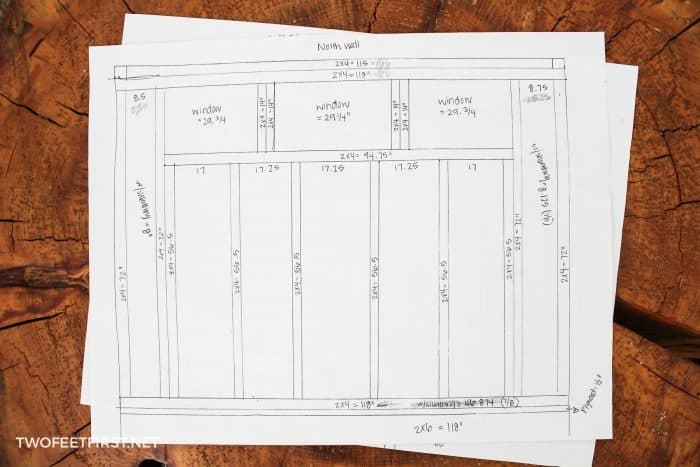
Here is the diagrams for our shed:

But enough about ours – let’s talk about a shed for you!
Here are some questions you need to answer to create a plan:
- What is the size of the space you currently have? Or maybe you want a specific size for the shed.
- You will want to check your local building code for exterior structures. A larger shed will require you to get a building permit, so check your local building code to see what size of shed requires a building permit.
- How tall do you want it at the tallest peak and lowest? For example, we wanted to be able to add a door so the tallest peak would be 8 ft and the lowest 7 ft
- What size door do you want?
- How long of a roof overhang do you want? All sides should have an overhang but the lean-to part should be at least 12″. Our lean-to part only has one overhang because the other side is covered. That overhang is 12.5″ but the other sides have only a couple of inches overhang (7″).
- Something else to note: we used metal for the roof. If you decide to use metal roofing, the metal comes in 3ft x 8ft or 10ft or 12ft (or longer).
- Do you want any windows and if so, what sizes? This could add an additional cost to the project unless you could find some used windows.
- All of our windows are approximately 14″ x 29.5″
- Do you want to use sheathing on the walls? Sheathing is a plywood applied to the outer studs to strengthen the structure and to serve as a surface to apply other materials (siding). For a house, you would use this but with a shed it is not always needed (depends on the siding). For example:
- LP Smartsiding you DO NOT need sheathing.
- Hardie Board siding you NEED sheathing.
- Vinyl siding you again NEED sheathing.
- So we should now ask, what siding will you be using?
- I would recommend LP Smartsiding. It cuts with a regular saw blade and it’s easy to install. Plus, it’s what we used!
- What type of roofing do you want? Shingles or metal? If you do not have a good slope on the roof and it snows or rain a lot in your area, I would recommend metal.
- Lastly, how far do you want the shed door off the ground? 4.75″ or 6.75″?
- We used 6″ treated lumber for the base of the shed with a 3/4″ plywood for the floor.
THE BASIC SKETCH
You should now have a good idea of how you want your shed to look. It’s time to create a sketch of that shed.
To help you with this project, I have created a free printables. You will have to subscribe to my newsletter to receive the FREE PDF, just fill out the form below if you’re interested. Or if you have questions, please visit the Q&A page on free printables/plans.

Print off the pages you need (read the instructions on the second page) and start filling in all the measurements on page 5. You should also add where you want doors and windows. To help you keep everything organized, put North, East, South, and West on the side it applies to.
TAKE THE SKETCH A LITTLE FURTHER
Now that you have your sketch, let’s add in the studs.
SIDE NOTE: Doors and windows need extra bracing (the 2×4’s around the opening).

TIP: You will be building one wall at a time.
You will notice that on page 6 of the shed printables it gives you some examples – be sure to look over that before doing your sketch.
THINGS TO NOTE:
- You will have a top and bottom plate with wood between (the stud). The top and bottom will be the length of that wall, as shown on printable.
- The walls with the low and high points will have studs for the other wall on that side (they wrap around) – see pictures.
- Studs should be 16″ on center. This means the distance from one 2×4 center to the next is 16″; sometimes it will be less to finish a wall.
- Once the shorter walls are built, there are some 2×4 double plates that will brace the walls together. See sketches for the double plate!
Here are examples of another one of our sketches.
CREATE A SHED Plan
Once you have your plan created, you should now have a very good idea of what materials you need (at least for the wood!). All the other posts that I will be sharing will have a material list so you can see exactly what we used to create our shed.
I hope this shed plan will help you feel more prepared when it comes to creating your own shed! But sure to follow along for the whole process because next is building the floor and wall of the shed!
Did you miss another step of this build?


Looks great.
One question – it looks like the roof of the shed will get some run-off from the house roof (as well as collecting its own rain of course :) ), are you planning on adding any gutters to channel the water somewhere?
(Or maybe you live somewhere that rain isn’t a problem?)
Hi, Nathan. That is a great question. With roof above the shed (it’s our garage), we actually have a gutter on that roof so that will help with run-off there. But for the shed we do not plan on adding a gutter, we have a gravel base on the ground which slopes away from the shed (we hope this will be enough and so far it has been). I guess the real test will be after winter and the snow starts melting.