When you need more storage for all of your tools and lawn essentials, you’re ready to take on a new challenge: building a shed from scratch!
And if you take your time and do it in stages, your build will not only be on schedule but you’ll enjoy working on it.
In this post, I will show you how to install the shed siding and trim – the fancy stuff that transforms your shed from an ordinary structure to something resembling a tiny house….for your power tools!
Steps before installing shed siding and trim
- You need a shed plan. In another post, I share how to create a shed plan.
- Before you can build any part of the shed, you need to establish a foundation. For our shed build, we decided on and installed a paver foundation. In addition to the pavers, we added gravel around the area to keep grass away and help with water draining off the shed roof.
- Next, you need to build the shed floor plus the walls of the shed.
- Then, you will build the lean-to roof and attach to the structure.
- In this post below, you will learn to install the shed siding and trim.

HOW TO INSTALL SIDING AND TRIM ON A SHED
Before I list all the materials we used, let’s talk about the type of siding. We chose LP Smartsiding because of how easy it is to cut and install. Please note that this is not a sponsored post.
The other siding we considered was a cement siding. However, it was heavy and required a specific saw blade that we didn’t have. Thus, we picked the LP Smartsiding.
Disclosure: This post contains some affiliate links or referral links for your convenience. It is a way for this site to earn advertising commissions by advertising or linking to specific products and/or services. Click here to read my full disclosure policy.
MATERIALS:
- LP Smart siding (comes in 4’x8′)
- 4″ composite trim
- 2″ composite trim (optional)
- 2-3/8″x.113″ exterior galvanized ring shank nails
- house wrap (if using sheathing)
- 1″ plastic cap nails for house wrap
- window flashing tape (optional)
- caulk
- paint and primer
- sill nosing weather strip
- #8 3/4″ lath sharp screws
- vent
TOOLS:
- circular saw
- Rip cut (optional)
- framing nail gun
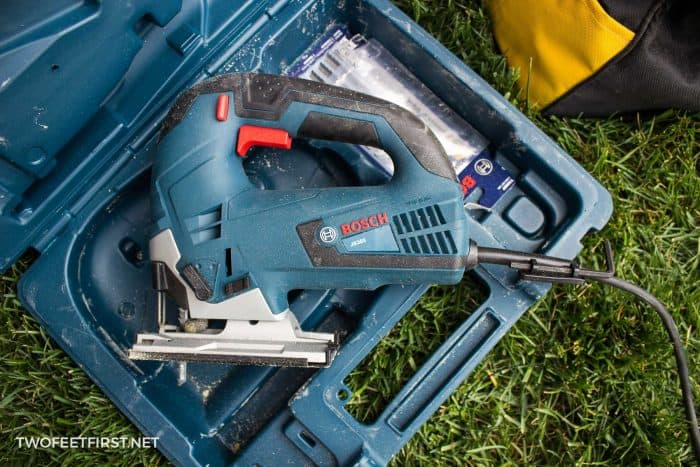
- Jigsaw (optional)
- air compressor
- chalk-line
- tape measure
- pencil
- miter saw
- razor blade
Something to note: I would recommend that you also read the install instructions on the siding you are using.
PREPPING THE WALLS WITH HOUSE WRAP
If you used sheathing on the shed walls, the first thing you should do is add house wrap. This is a plastic covering that helps to keep water out.
Use a razor blade to cut the wrap and nail into place with a hammer using the 1″ plastic cap nails.
Here is what ours looks like.

SIDE NOTE: We also covered a few inches of the door and window openings with the house wrap and window flashing tape. This is optional but it helps to keep the water out.
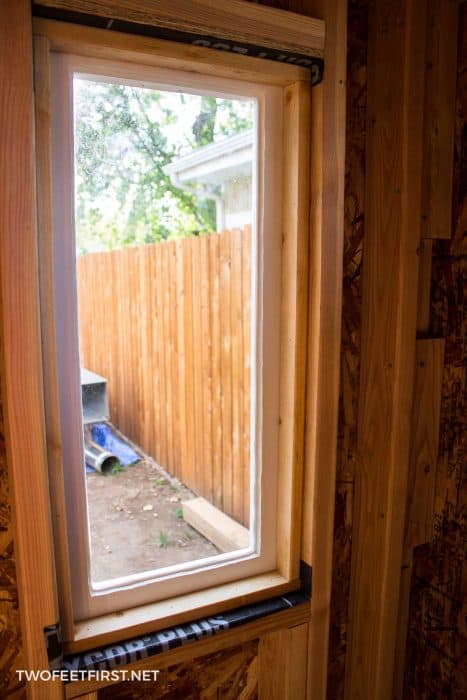
INSTALLING THE WINDOWS
If you are using vinyl windows, you will want to install them now.
The wooden windows we used were installed after the siding was complete.
SIDE NOTE: There is a metal piece, called z bar flashing, that can be added around doors and windows. This will help to protect against water damage. Use one piece on the bottom of each window and it will hang over the siding.
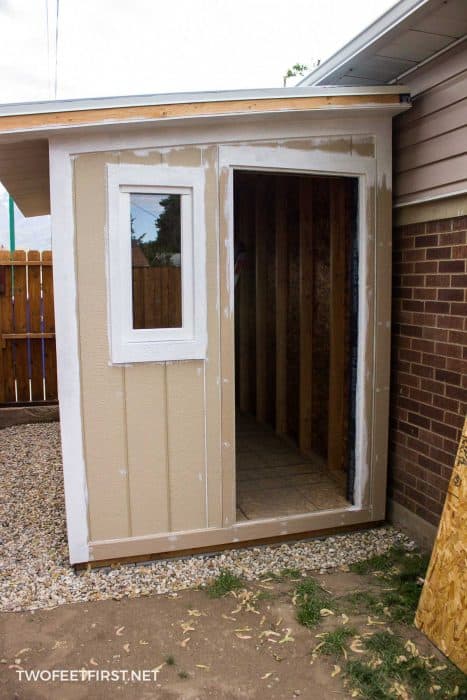
Here is how we installed our wooden windows. We put 1×2’s around the window, nailing the 1×2 to the framing, then nailing the window to the 1×2 (we used finishing nails for this).
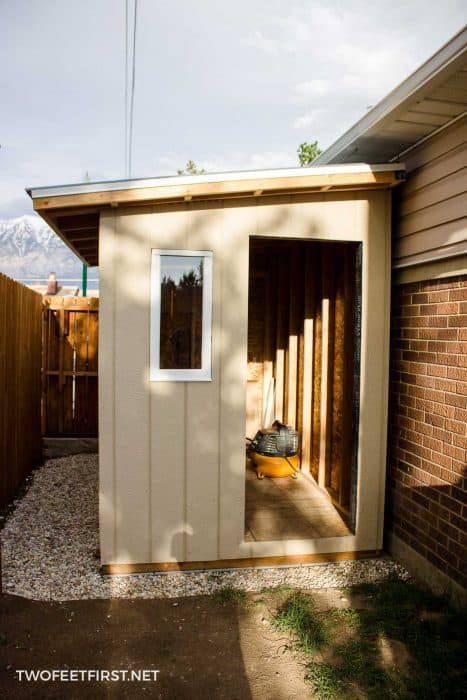
INSTALLING THE SIDING
The LP Smartsiding has tongue and grooves to help with the install. But before adding them to the wall, let’s talk about cutting the siding.
You may need to cut the length of the siding and you will want the siding to overhang the floor framing by at least 2″ but not more than 4″. We again used the circular saw attached to the rip-cut to make this cut.
SIDE NOTE: You can see what a Rip-cut is in our post about how to use the rip-cut.
TIP: Any cut you make on LP Siding needs to be primed before painting.

Once the length is cut, the siding can be added to the wall.
Starting on one corner of the wall, place the first piece. This corner will have the groove side of the panel. Next, attach the panel just like the siding company recommended.
THINGS TO REMEMBER WHEN INSTALLING THE PANELS:
- Secure using the correct type of nail and attach to a stud (2×4)
- Be mindful of the tongue and groove. Too close to the groove could create a problem
- Use a chalk-line to help you know where a stud is. We actually marked each siding panel before installing so we knew exactly where the studs were.
- Use a hammer to adjust any nails that are not flush with the siding or slightly indented.
- Remember every nail and seam will have to be caulked before painting so use enough nails but don’t go crazy.
- We precut all window and door openings with a jig saw before installing but this can be done after.
Another thing that needs to be added is soffit to the roof overhang. We decided to use all the scrap siding pieces for this but you can purchase LP Smartside Soffit from the store. We install ours the same way as the siding but on the roof overhang!


LET’S TALK ABOUT THE DOOR
Now that the siding is attached, we need to discuss the door before adding the trim. If you will be using a regular exterior house door, you will not need to worry about this. But if you are building the shed door, like us, this is something you need to do:
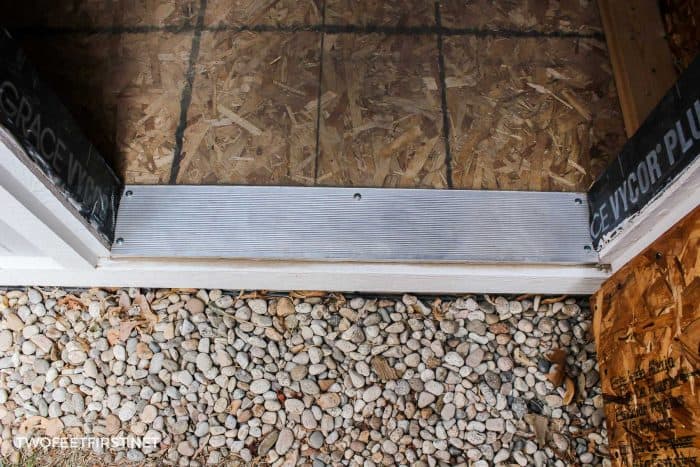
1) Add a sill nosing weatherstrip to the door opening. This will help protect the floor and edge of the siding when moving things in and out of the shed.
We had to cut ours down to the right length and overhang to fit our shed (we added it after installing the trim and this made us cut the overhang part). We did this with tin snips but I would recommend not cutting the overhang if you do not need to.
To attach the sill, we pre-drilled 1/8″ holes into the metal. Then, using the 3/4″ lath sharp screws attached to the floor. Here is ours after the install and months of use!

2) Next, you need to mark at least 1″ away from the door opening (the bottom could be different because of the metal sill).
TIP: Mark the top and bottom of one side then use the chalk-line.
This line is where the edge of the trim will sit because the door will sit on the siding here.

INSTALLING THE TRIM
Now that the door is prepped, you can add the trim. The trim we used was the same type of material as our siding.
We used the miter saw to cut them and used the same type of nails to install them.
Things to note when adding trim:
- Trim needs to be installed so water can drain correctly. Here is an example of the cuts around a window.


- On wall corners, one trim piece will overlap the other (makes an “L” shape).
- Remember the nail holes will have to be filled in. Make sure they are slightly indented or flush with the trim.
FINISHING TOUCHES
Once the trim (and windows) are added, it’s time to fill in the nail holes and seams with paintable exterior caulk. For tips on applying caulk, see this post.
When the caulk is dry, prime any exposed cuts on the siding and trim with primer.
Then, start painting the shed. I started with the trim!
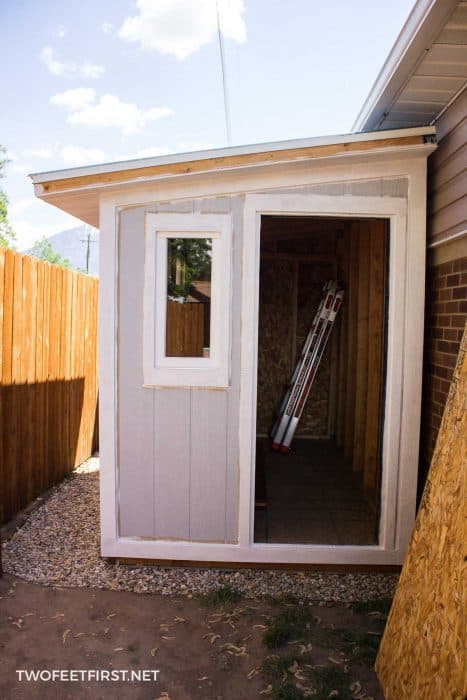
We used Behr Premium Plus Ultra Exterior in White for the trim and French Silver for the panels. I used 2 coats for each.
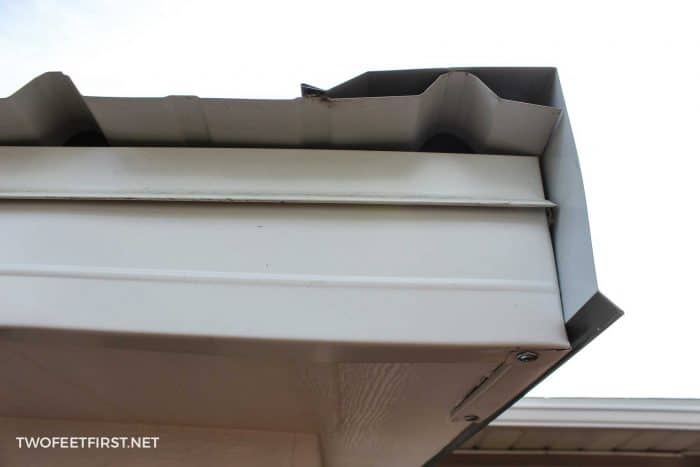
When the paint was dry, we installed the fascia (we talked about this in the roof post) to the side of the roof that is not covered. This is a metal piece that covers the 2×4’s and is installed by pushing under the drip edge then attached using screws (we used the 3/4″ lath sharp screws).

We also decided to add a vent to the shed to help with air circulation. We used the jigsaw to cut the opening (smaller on all sides than the vent). Then, we attached with screws and caulked around using clear caulk.

And that’s how we installed siding and trim to our shed. And if you are wondering what it cost to build our shed, you can see the total cost of building the shed on this post.

Install shed siding and trim
Do you need another place to store your yard tools? It's time to build a shed and here is how to install shed siding and trim on your shed.
Materials
- LP Smart siding (comes in 4’x8′)
- 4″ composite trim
- 2″ composite trim (optional)
- 2-3/8″x.113″ exterior galvanized ring shank nails
- house wrap (if using sheathing)
- 1″ plastic cap nails for house wrap
- window flashing tape (optional)
- caulk
- paint and primer
- sill nosing weather strip
- #8 3/4″ lath sharp screws
- vent
- safety glasses
Tools
- circular saw
- Rip cut (optional)
- framing nail gun
- Jigsaw (optional)
- air compressor
- chalk-line
- tape measure
- pencil
- miter saw
- razor blade
Instructions
- Add house wrap, a plastic covering, to help keep water out.
- Install windows to the shed (optional).
- Secure the LP Smartsiding to the shed.
- Prep the door area with a sill nose.
- Install trim around the opens and corners.
- Prep the shed for paint.
- Paint the siding of the shed.
- Install fascia around the roofline.
- Cut out a vent.