Have you ever walked into a cinder block basement in the winter? Let me tell you it can be cold, cold, cold. And if you did not notice our basement is all cinder block, so in winter it gets cold. In the closet that is right below our front porch (which is also known as a cold storage room) it is completely surrounded by cinder block and cement and it gets cold in the winter. But along with the cold, we also get condensation on the ceiling and walls because of the warmer basement air hitting the cold cinder block or cement. We had originally talked about adding a vent to the room and installing an exterior door. But after lots of research, we were finding that this did not solve the problem most of the time. It was suggested to insulate the room and make it part of the basement. So here we are insulating our cinder block walls under our front porch.
Here is a great website on info on how to finish a basement wall, this is where we found our info from. *** Plus we are NO experts, this is the process we used after lots of research.
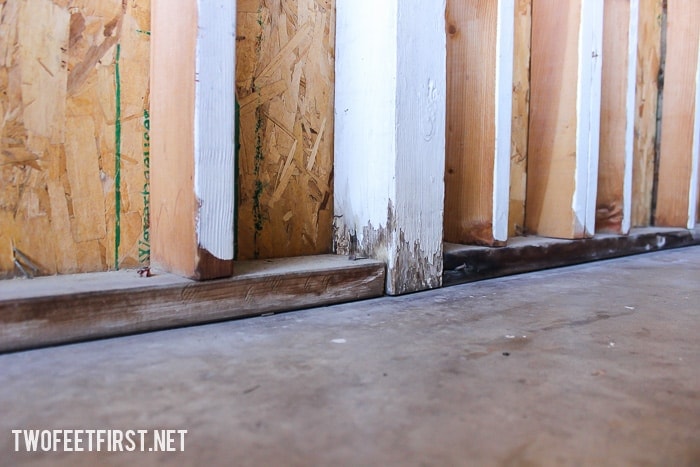
But before we could insulate we had to do some prep work by repainting the cinder block walls to make sure the walls are waterproofed.
We want to save all the floor space we can in our basement so we decided to use 2×2’s instead of the normally used 2×4’s. So we will be showing how we saved floor space and insulated our basement walls.
Disclosure: This post contains some affiliate links for your convenience, click here to read my full disclosure policy.
Materials Needed:
- Waterproofing Paint & Hydro Cement (this step here)
- 3/4″- 1″ Foamular 150 Insulation (we used 1″)
- 1 1/2″ Polystyrene Insulation
- Foam Tape (make sure it’s waterproof)
- Foam Adhesive (we used Liquid Nails Foam Adhesive)
- 2″ x 2″ boards
- Treated 2″ x 4″ boards (used for the bottom of the framing)
- 3 1/4″ Cement Screws
- 4″ Cement Screws
- Drill plus wood drill bit
- Rotary Hammer Drill plus masonry drill bit
- Level
- Tape Measure
- Miter Saw
- Window Foam
- Sheetrock
- Sheetrock Screws
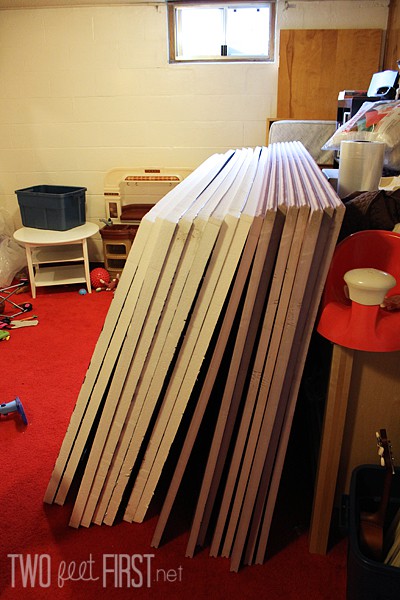
Here is our stack of insulation, plus our messy room…
The first step of adding the insulation was adding the pink/purple Foamular 150 Insulation. To do this we used liquid nails panel & foam (you want to make sure it says foam on the adhesive).

We cut the insulation to the size of the wall and make sure it fit into place before adding the adhesive. We used our razor blade to cut the foam. To add the adhesive, we applied a 1/4″ bead from the top of the foam to the bottom, one straight line. Adding a bead 1″ away from the sides and about every 10″ in-between. Then we pressed the foam into place. Here is our closet with all the pink foam added, you can see where we cut things a little short at the bottom of the foam but nothing a little window foam cannot fix…

Next, we taped the insulation sides together, in other words we taped every seam… We also applied the window foam to the bottom of the foam panels. This process is to make sure no air seeps in-between the foam and the foundation.

Next, is adding the framing for the walls, to do this we needed to drill into the cinder block to attach the wood. To make life so so much easier we used the Bosch Rotary Hammer, you can see more of our adventure here.

First, we placed the treated 2×4’s on the floor having the 2″ side on the floor. We measured the space, cut the wood and then checked to make sure everything would fit. After we were sure the wood would fit, we used our regular drill, with a wood drill bit, and drilled holes into the wood (this is for the screws). Making sure we placed a drill hole at the edges of the wood plus about every 12-18″.

After drilling through the wood, we then used the rotary hammer drill and drilled into the cement/cinder block. The nice thing about our drill is that it has a depth gauge on the drill, so you know when to stop drilling. To do this, we would place the wood in the desired location and drill the hole using the previous hole drilled as your guide. After drilling the hole, we then attached the wood with the 4″ concrete screw. It may seem that you could skip the previous step but using a masonry drill bit on wood will only dull the drill bit quicker.
After attaching the 2×4, we then attached the 2×2 using the same drilling method but used the 3 1/4″ screws. But placing two at the corners and placing every 12-16″ apart, also making sure the boards are level. We also adding more liquid nails to each board before screwing into place but this was overkill… We placed two boards at the corners to give the Sheetrock something to screw into.

After adding all the framing, we then adding the white insulation foam in-between the 2×2’s just like we adding the other insulation. Filling any gaps with window foam…

After adding all the foam insulation, we added our drywall or sheetrock, whatever you want to call it. And there are so many cuts in the sheetrock because we had to get the sheets into a small door opening.


Now we need to finish the sheetrock and it has been sitting like this for about 2 months. Maybe we will get to it soon. But does anyone else want to insulate their basement? Because I want to insulate my whole basement…