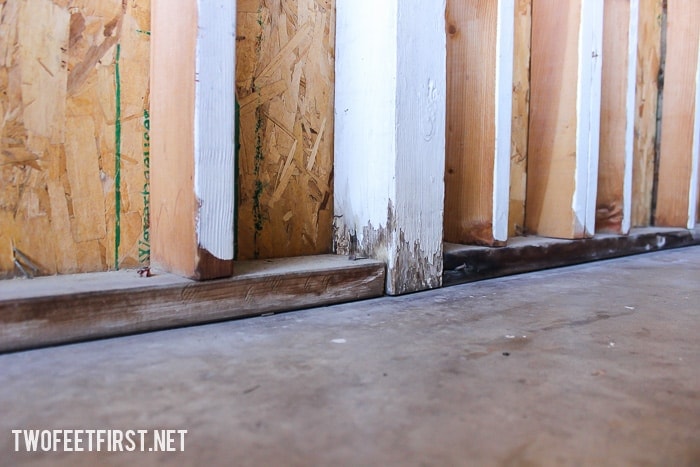
Our garage was converted many years ago from a carport to a garage. But a problem we were having was that any water that would drip off the car would run to the wall (it was wood). This wall looked really sad because of the water damage.
We finally decided to solve the problem by adding a vinyl trim to protect the wood from any more damage. This solution was very simple and only took us an hour to install plus less than $40!
Disclosure: This post contains some affiliate links for your convenience, click here to read my full disclosure policy.
SUPPLIES:
- vinyl trim wall base
- liquid nails
- wood: 1x4xlength of the wall (optional depending on your garage)
- clear caulk
- nails (to install the wood)
- hairdryer (this seems funny but it will help!)
- razor knife
- cloth
HOW TO INSTALL VINYL COVING TO A GARAGE
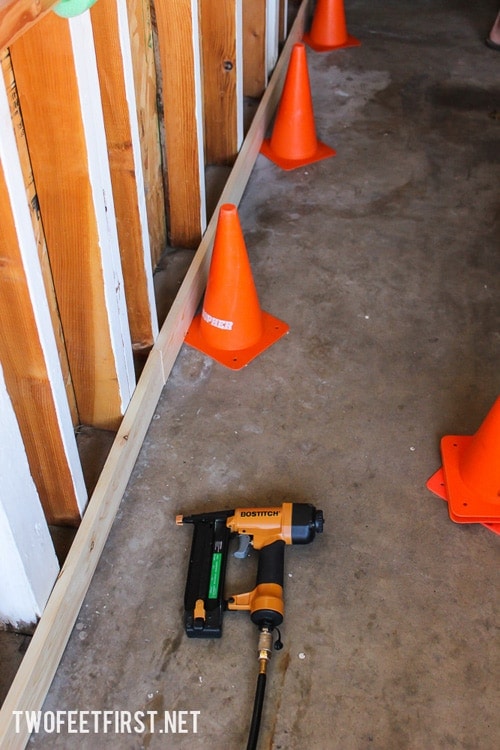
The first thing we did was vacuum the wall we were going to install the vinyl. Then we installed the wood to the wall. We added this because the other wood was sad plus the vinyl needed something to stick to. If your wall is finished you could skip this step.

To install the wood, we left a 1/8” gap from the floor to protect the wood from the concrete (the wood was not pressure treated). We used our kid’s orange cones to give us the gap we wanted. Then we nailed the wood to the wall with 1.5” nails.
Next was installing the vinyl base, the instruction does suggest letting it sit in a warm room (70 degrees) for 24 hours. But guess what, we did not read those instructions until we were installing the vinyl and we found a way around that. We were installing our vinyl in probably 40-50 degree weather and this method worked just fine.

We measured the space then cut the vinyl to that size (used a razor knife). Please Note: that corners will need to be cut differently. The bottom of the vinyl pops out slightly and will need to be cut at an angle (45) to make the corner flush.
The vinyl we were using had its own glue but we wanted to make sure it would stick in all temps so we used liquid nails also. We knew the liquid nails would hold because we used it when we added a Tsunami Seal to our garage about three years ago. And it looks exactly the same as the day we installed it. This is another great way to keep dirt/water out of your garage.
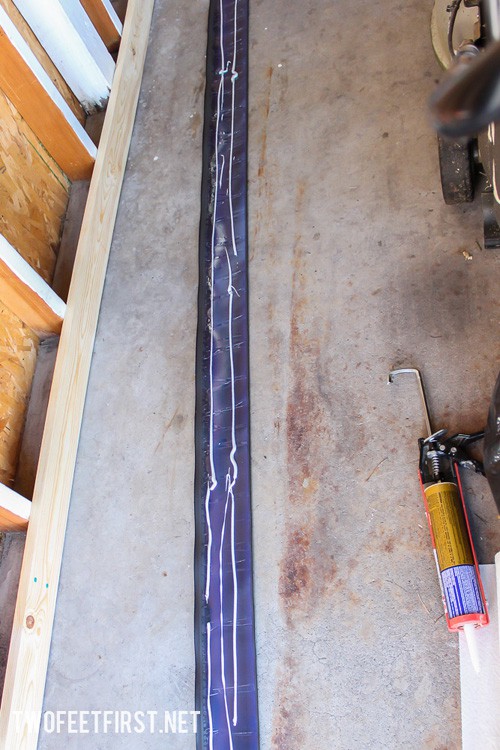
So we removed the backing from the vinyl then added liquid nails in a straight line (staying 3/4″ away from all edges). Then we placed it on the wood, having the bottom of the vinyl hit the concrete.
Now for the hairdryer! Turn on the hairdryer and warm up the vinyl with it (make sure it does not get too hot that it melts the vinyl). Then using the cloth, rub the vinyl with it to help it adhere to the wood. Don’t worry you will know if it’s adhering, if not you will see bubbles in the vinyl (because it will pop away from the wood). Do this for all the vinyl you are installing and rewarm the vinyl to make it stick if needed.

Once all the vinyl is installed and sticking to the wall, you can add some caulk to the seams. Apply it to any edges, corners, and where the vinyl meets the concrete (this is the important one!). Then let it all sit for about 24 hours (or until the caulk is dry) before letting any water hit the vinyl.

And that’s how easy it was to install the vinyl. We have already seen that this did work in our garage. Do you need this solution in your garage?


