Use this one tool to remove your baseboards and your walls will thank you!
After removing a small section of baseboard for my closet makeover, I was shocked at the pile of broken pieces and damaged walls. I wanted to cry because I had planned on reusing the trim.
I knew there had to be an easier way to remove baseboards without damaging them or the walls. I found out how to do it and now you can too!
Removing baseboards or trim can be a simple task but the trick is to take your time and use the right tools.

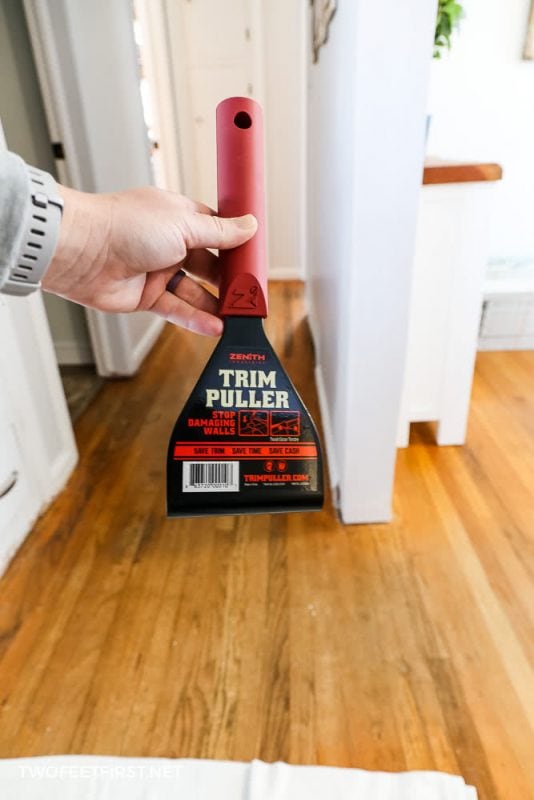
You don’t need special tools to remove baseboards but if you want to make it effortless and limit the damage to your baseboards or walls, you will want a unique tool: a trim puller!
And no, this is not a sponsored post. The tool just works!
Of course, if you don’t want to buy a new tool, you can remove baseboards with a putty knife, pry bar, and hammer (we’ve done that!) but this tool is inexpensive and will save you a lot of frustration.
Why would you need to remove baseboards?
You don’t need to remove baseboards or trim for every project (like painting), but there are two reasons you might need to:
- You don’t like them. This means you probably don’t care how they come off the wall, pieces would probably make you happy! But then, your wall would be a mess, so you still need to be careful.
- You are installing new floors. In this case, you might want to reuse the baseboards to save money. You don’t need to remove the baseboards for all types of flooring but it looks more professional when you do.
Now let’s get started on how to remove your baseboards carefully so you can reuse them.
Disclosure: This post contains some affiliate links or referral links for your convenience. It is a way for this site to earn advertising commissions by advertising or linking to specific products and/or services. Click here to read my full disclosure policy.
How to remove baseboards and trim without damaging them
Tools
- razor blade
- hammer
- trim puller
- safety glasses
- face mask (for dust)
- ear protection
STEP 1: Prepare the trim
Before you can remove your trim or baseboard, find the area where the trim connects with the wall, another board, door jamb, etc. Then, run a razor blade along the joint. By doing this, you will help prevent additional damage to those areas.
Start on one end of the baseboard and continue running the razor blade along the joint.

SIDE NOTE: You might have quarter rounds or shoe molding that need this done too. If you are wondering what a quarter round or shoe mold is Bob Vila has a full article all about them.
If your trim is painted, you most likely have caulk applied in this joint. You need to run the razor blade until it looks like you have broken through the caulk.
SIDE NOTE: If you don’t break through the caulk, it will make removing the trim more difficult because the caulk secures the trim to the wall. You can see what I mean in this tutorial where we apply caulk to a baseboard.
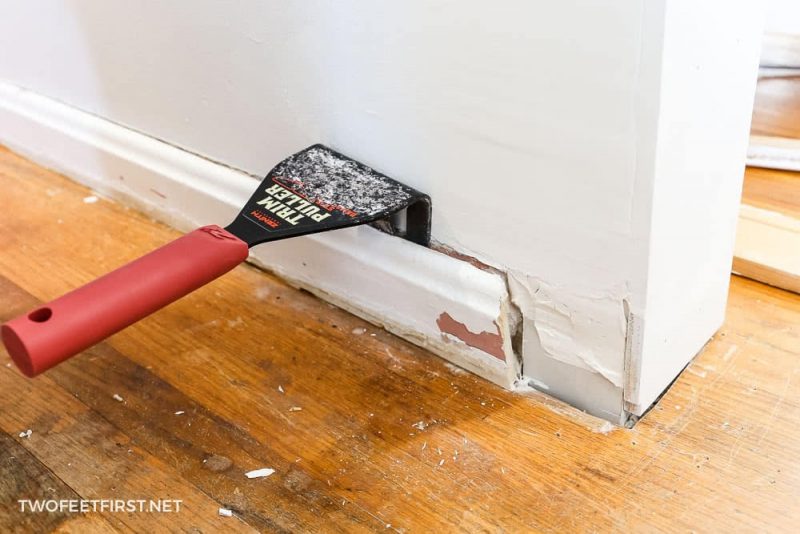
STEP 2: Use the trim puller
Now that the baseboard is finally unglued from the wall, floor or another board, it’s time to use your trim puller. Align the trim puller between the baseboard and drywall (this will be where you just ran your razor blade).
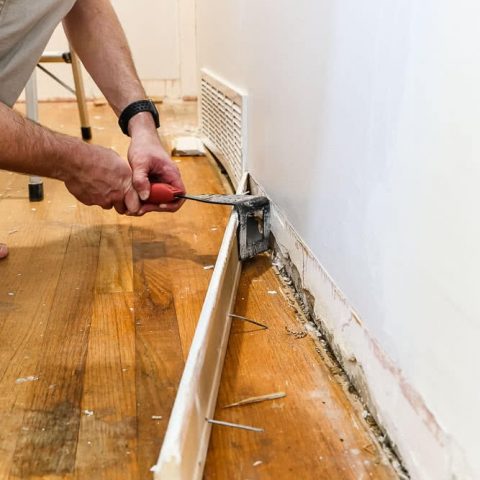
SIDE NOTE: If you are using a putty knife, carefully push the knife into the same area and wiggle it back and forth until the board pulls away from the wall. Then, slide the pry bar into the opening, you may need a hammer to tap the pry bar into place.
Take the hammer and tap the top of the trim puller. This will allow the tool to slide behind the baseboard. Keep tapping until the flat part of the puller is flush with the top of the baseboard.
SIDE NOTE: If you hit a nail or your trim is smaller than the puller, stop hammering and continue to the next part of this step.
Carefully pull the baseboard away from the wall by rotating the tool’s handle to the side.

TIP: The Trim Puller is designed to rotate left or right to remove trim, not up and down, like a pry bar.
Repeat this for the length of the baseboard or trim until the board loosens completely.
Watch for nails protruding from the baseboard. Remove them by hammering them from the back of the board to the front, then pulling the nail out from the front of the board.
Continue the process with the trim puller and hammer until all the baseboards or trim is removed from the area.

Give yourself a pat on the back and prepare for the final step.
STEP 3: Clean up the area
Once you have removed all the baseboards, use the trim puller to check for nails that may still be attached to the wall. If you find a stubborn nail, just hammer it into the wall.
Next, you can either use a putty knife or flat razor blade to slowly scrape the wall where the caulk was previously placed along the trim. This extra step will give you a smooth surface to work with when you’re ready to reinstall the baseboard.
Make sure you remove any residue on the baseboard itself (from the caulk or paint drips).
SIDE NOTE: If you happened to have any damage to your wall, now would be an excellent time to patch it with a drywall compound or spackling paste.
Then sweep the area, and you’re done removing the baseboard.
And that’s how you and your trim puller can remove baseboard without damaging them or the wall!
How to remove baseboards without damaging them or the wall
Are you wondering how to remove baseboards or trim without damaging them or the wall? This one tool will help you achieve that by removing the baseboard or trim without damaing it.
Materials
Tools
- razor blade
- hammer
- trim puller
- safety glasses
- face mask (for dust)
- ear protection
Instructions
- Prepare the trim by running a razor blade along the joint.
- Use the Trim Puller to remove the trim from the wall by rotating the tool to the side.
- After the trim is removed clean the area.


I never heard of a TRIM PULLER. I will buy one and test your system. Final results will be forthcoming.