The full tutorial of how to install window trim to the interior of your home – it’s not as difficult as you would think!
Bright, wooden blinds, freshly-washed window panes, and a lovely outdoor scene to match….but what’s wrong with the picture?
The battered, dingy, interior window trim is ruining the scene and in dire need of replacing!
Follow this guide to install new window trim – you can do it yourself one window at a time.
And you won’t believe how a freshly-renovated window frame changes the view!

If you missed the previous post about installing the window jamb extensions, you probably should check that out first.
Now, let’s start trimming out those windows.
SIDE NOTE: We wanted a simple window trim but you can choose any style that suits you.
How much does it cost to install window trim?
The cost of installing window trim will depend on the size of the window, but for a simple trim, it should be about $3 per foot around the window.
So, for a 36″x 48″ window, the cost would be about $42.
Remember, this cost is if you install the trim yourself and it includes the price of the paint.
Disclosure: This post contains some affiliate links or referral links for your convenience. It is a way for this site to earn advertising commissions by advertising or linking to specific products and/or services. Click here to read my full disclosure policy.
SIMPLE INTERIOR WINDOW TRIM INSTALL
MATERIALS:
- 4″ boards
- 1.75″ nails
- liquid nails (optional)
TOOLS:
- nail gun & air compressor
- miter saw
- tape measure
- level
- safety glasses
- face mask (for dust)
- ear protection
SIDE NOTE: I recommend that you use a 15 or 16 gauge nail gun for installing this trim.
SOME TIPS:
- We purchased 4″ pine boards for all the trim (you can use a different size, but your measurements will be different than the tutorial so keep that in mind).
- You could purchase a pre-primed board too.
- If you would like to save some time down the road, you can paint the boards before installing them.
In this tutorial, I share how to install window trim when the windows do not have any trim installed. If you are updating your window trim (already have trim around the window), be sure to check out my post about removing trim without damaging the walls before starting the steps.
STEP 1: DETERMINE THE AMOUNT OF WOOD NEEDED
To calculate the amount of wood you will need, first measure all four sides of the window opening (top, bottom, & sides).
The top and bottom pieces will need to be wider because this craftsman window trim extends 3.5” (the width of the vertical pieces) and has an extra overhang of 1”.
Thus, you will need to add 4.5” to each side of the width of the top & bottom of the window opening.
So, in total, you would be adding 9″ to the measurement of the top and bottom window openings.
For example: let’s say the window bottom measured 21″ but we need to add 4.5″ to both sides (9″), our piece would then = 30″.
By now, you should know the number of boards needed for each window and what length to cut them.
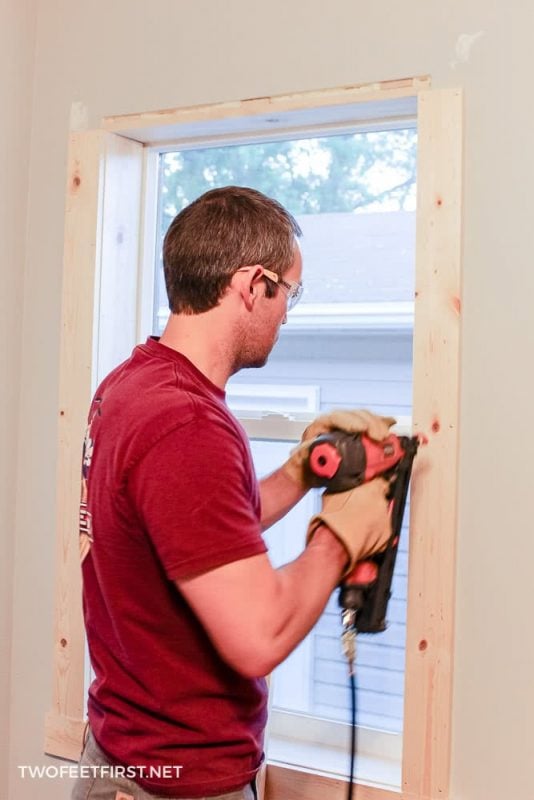
STEP 2: INSTALL THE WINDOW TRIM
The first step to installing the window trim is placing the bottom trim piece.
Take the measurement of the bottom trim piece and cut the board at that length (remember to add the extra inches stated above).
Next, apply Liquid Nails to the wood in a zig-zag fashion, like the picture below: (this picture was from adding the window jambs because I forgot to take a picture when adding the trim). This step can be skipped – the reason why we used Liquid Nails is that our walls are brick with plaster over the brick, so we needed more than just nails to hold the boards into place.

After, place the Liquid Nails side of the board against the wall, 1/8″ down from the window opening (jamb).
Center the board and make sure it is level; then, nail the board into place with 1-3/4″ nails.

TIP: We marked the board 4-1/2″ in from both sides before adding the liquid nails. This step will make it easier to center the board against the window opening.
Now it is time for the side trim.
To get the most accurate measurement, measure from the bottom trim piece to 1/8″ past the top window opening (add 1/4″ to the previous measurement). Make sure you measure for both the right & left sides of the window because it could be different.
Then, cut the side pieces and top piece (remember to add the extra inches from Step 1).

After cutting the side pieces & top piece, apply the Liquid Nails to one of the sideboards and place it 1/8″ away from the side opening. Make sure the bottom of the side trim is flush with the bottom trim; level, then nail the board into place.

Install the other side’s trim piece the same way.
Now that both side pieces are installed, add the top trim piece, again placing Liquid Nails on top of the side pieces. Make sure the board is centered and level.
Finally, nail the last trim piece into place with 1-3/4″ nails.
Enjoy your new window trim – your view is now complete!
And as a note, some of our trim and jambs have some gaps, but this can be filled in with a sealant before painting the trim. If you want to see how to finish painting the window trim, be sure to check out this tutorial on that.
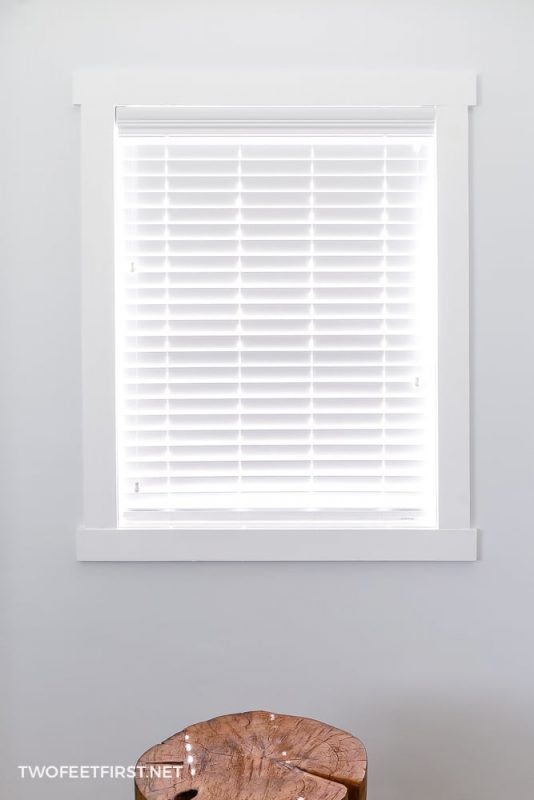
I hope this tutorial will help you add interior window trim to your windows. Plus this craftsman style window trim is not difficult to install. Update the look of your windows by installing window trim.

How to install window trim
Update your windows by installing interior window trim, see how to install window trim yourself.
Materials
- 4" boards
- 1.75" nails
- liquid nails (optional)
Tools
- nail gun & air compressor
- miter saw
- tape measure
- level
Instructions
- Measure the opening of the window to determine the amount of wood needed. Add an additional amount to the top and bottom trim to give an overhang.

- Install the window trim to the window opening using a nail gun. Start with the bottom then sides and finish with the top trim piece.

- Finish the trim with paint or stain. Enjoy!


We JUST decided to do this to our master. Glad to see a tutorial…thanks! Found you at SITS!
I hope the tutorial helps! Good luck and I would love to see your finished windows…
They look amazing. well done. Pinned!
Thanks Patti!!
It looks great! Thanks so much for linking up to my trim tutorial. I also love that first, more complicated design. My parents are building a lake cottage this year and they’re going to do something very similar to that one – gorgeous!
Thanks Christina! Thank you for the great tutorial in the first place…