This is the last step of our whole HVAC project, we replaced the whole thing! Before we talked about if you need to replace the HVAC in your home and installing a new trunk line. Now we are sharing the process we used to install an air duct to a room. If you just want to add an additional air duct to a room, this will help you see the process!
THINGS TO NOTE: We are showing the process for our house, your house could be different. We are running our vents through the floor (ceiling could be different) in our basement. Plus we will be cutting through subfloor, hardwood, and carpet to install the new vent.

INSTALL AN AIR DUCT TO A ROOM
Disclosure: This post contains some affiliate links for your convenience, click here to read my full disclosure policy.
SUPPLIES:
- vent takeoff
- vent pipe
- vent boot
- duct sealant
- 1/2″ metal screws (attach pipe together)
- 3/4″ self-piercing lath screws (attach boot to subfloor – metal to wood)
- wood for bracing pipe
- scrap board (for a template of the vent boot)
- floor vent cover
- 2 – 1/4″x4″ bolts
- 4 – 1.25″ screws
TOOLS:
- drill
- tin snips
- crimper tool (optional)
- Jig saw
- razor (to cut carpet)
- right angle drill attachment
- shop-vac
- Kreg Jig
Find the list of tools we use.
WHY WE ARE INSTALLING NEW VENTS
I explained our reasoning for installing new vents in a previous post about knowing if you need to replace your HVAC system. But I wanted to give you a refresher of why.
The placement of our old vents was not in the right spot. Making it hard to heat or cool our home. The vents were on the inside wall of the house, instead of the outside wall.
And because of this reason we have today’s post!
THE PIPE
Before I explain the install process I wanted to share some more info on the supplies:
PIPE SIZE: This will depend on how much air you want coming into the space. The standard size is 6″ or 7″. But another factor to think about is what you AC can handle.
VENT TAKE-OFF: This is where the duct will start. It is where it is taken off from the trunk line. Not sure what a trunk line is, see this post. Plus I have a video explaining the process of installing a take-off.
VENT BOOT: There are three main styles of a vent boots: 90 degree, straight, or end. So make sure you get the right style and size.
INSTALL AN AIR DUCT
The first thing you need to do is decide where the air duct will be placed. Then install the vent take-off off the main trunk line in that location. See the details of installing a vent take-off.
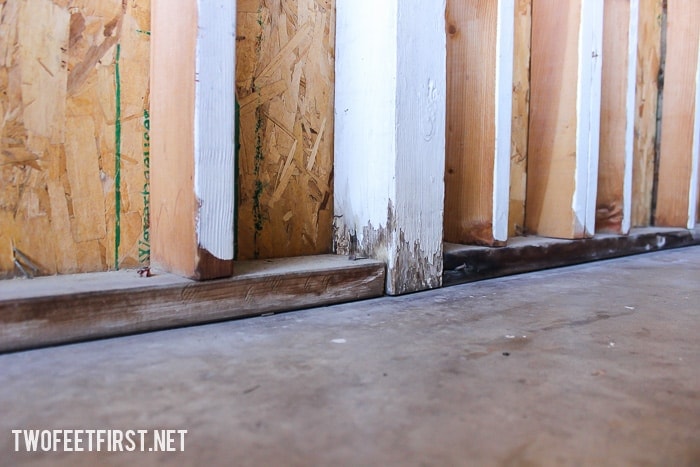
Next, is putting the hole for the vent boot (where the vent will sit). Because we are working around floor joists and cutting a hole through wood, we decided to create a template. The template is the exact size of the boot opening (4″x12″ is an example). Then I drilled two 1/4″ holes somewhere in the middle (for placing the template to trace). And I also drilled four 1/8″ holes in each corner (to secure the template to the subfloor).
Place the template on the subfloor making sure it’s level on all sides (with the exterior wall mainly) and in the right location. Then attach the 1.25″ screws into the four corner holes of the template.

After the template is attached, check to make sure its level again. Then drill a 1/4″ hole into the 1/4″ drill holes of the template. (You will be drilling all the way through the floor).
TIP: We found it easiest to pull the carpet and pad away from the floor first.
Now remove the template and take it to the room you will be adding the duct to. Using the two 4″ bolts, place the template into place and use the 1/4″ holes for the bolts.

We always checked to make sure the template looked level with the wall. But every time we adjusted the template we had issues installing the vent boot. So I would suggest leaving it unless it is really off.
Next trace the outline of the template on the floor with a sharpie marker. Don’t worry you will be cutting on this mark! Remove the template after.
Take the drill bit and drill a hole in a corner of the tracing (inside the rectangle). This hole is for your saw blade. Then using the Jig saw cut out the traced rectangle.
TIP: Have someone running the Shop-Vac while your cutting to collect as much saw dust as possible.

Once the hole is cut, it’s time to test the fit of the vent boot in the hole. Adjust anything if it is needed, we had to widen the hole just slightly some times.
Now let’s install the vent boot into place. Starting at the vent take-off, add enough pipe for the distance to the boot. We liked to install one 5′ piece onto the vent boot first.
SIDE NOTE: The pipe will snap together to form a circle.
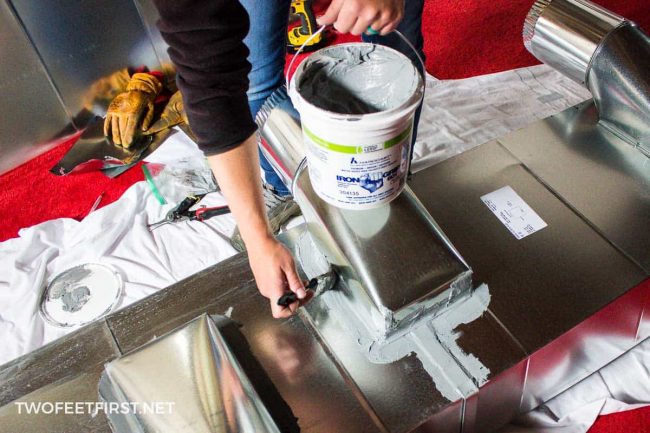
This is done by pushing the pipe and boot pieces together. Then added two or three 1/2″ metal screws where they come together, this will hold them in place. Then add duct sealant to all the seams (I didn’t want air escaping!).
TIP: Pre-drill 1/8″ holes on the vent boot to attach it to the subfloor (makes it easier later). The vent boot will be level with the subfloor once it’s attached. We placed two holes on the longer sides (12″) and one for the shorter sides (4″).
TIP 2: We added duct sealant to the pipe seam after it was snapped together. Also, let the sealant dry before touching or it could get everywhere.
OK back to adding the pipe from the takeoff to the boot. You will probably need to cut a piece of pipe to fit. Do this BEFORE the pipe is attached together (it is easier to cut). Cut it by using tin snips and if needed use the crimper tool (this gives the pipe bumps to be able to fit into the other pipe).
Once you have all the pipe you need, start attaching them together by just pushing (NO screws, yet) starting at the takeoff. Insert the vent boot into the hole once everything is in place. Then attach the boot to the subfloor using the pre-drilled holes. REMEMBER the subfloor and boot will be level! Use the 3/4″ lath screws to attach them together.
TIP: This is when the right angle drill attachment will come in handy.
SIDE NOTE: There is a cool product called Speedi-Boot that makes the install of the boot even easier!

After attaching all the other pipe together using two or three 1/2″ screws then add duct sealant to those seams.
In our house, we used wood to brace the pipe but also support the floor joists, we used the Kreg Jig and drill to install these. Please make sure to add something to secure the pipe in place.

Now you can reinstall the carpet then cut a hole where the air duct is in the floor using a razor blade. And then your vent can be added to the room because your air duct is done!

You maybe wondering if this whole project was worth us doing it ourselves. Yes, there are things that a Pro should help you with. But from the bids we received, we saved over $6,000 doing this ourselves. Would that be worth it for you?


I guess it is all about where you live. I would never dream of working in my attic in Texas. Way too hot all year round. Plus most attics do not have enough crawl space for me to go up there. HVAC needs many permits and city inspectors need to approve.
I applaud your effort. and love reading about your projects.