A simple tutorial to walk you through the steps to make a freezer paper stencil.
There’s a constant battle between the Cricut and the Silhouette to be the most affordable, dependable and versatile cutting machines you’ll ever use.
And, of course, they’re fantastic for cutting a wide variety of materials with detailed stencils in just a few minutes.
But you know what beats all of these fancy, expensive machines?
Your basic crafting tools and an iron!
Today, I will show you how you can use a common paper found in your kitchen – freezer paper – to create a gorgeous paper stencil for your next project!

Disclosure: This post contains some affiliate links or referral links for your convenience. It is a way for this site to earn advertising commissions by advertising or linking to specific products and/or services. Click here to read my full disclosure policy.
WHAT IS FREEZER PAPER?
Freezer paper is generally used to wrap and protect food that will be frozen. It has a waxy finish on one side and a matte finish on the other side.
With this unique combination, people can easily draw patterns or stencils on the matte side, cut out the paper, and then lightly iron the waxy side onto fabric. The paper is then removed without damaging the fabric.
You can find freezer paper in the paper goods section of any grocery store, next to the foil, plastic wrap, and wax paper.
HOW DO YOU USE FREEZER PAPER?
If you place the waxy side of the paper down and heat it with an iron (no steam), it will stick to the surface you placed it on.
Be careful not to iron with the waxy side up, or it will stick to your iron, causing a mess.
After you have used it as a stencil or pattern, all you do is peel it off – it won’t leave any residue on the fabric.
SIDE NOTE: The freezer paper can be used with a Cricut or Silhouette machine. I do not have one of these machines, so see how to use freezer paper with a Cricut from Polkadot Chair tutorial. Or this tutorial using a Silhouette to create a freezer paper stencil by Silhouette School.
Now that you know the benefits of using freezer paper on your project, let’s talk about the supplies and step-by-step instructions.
Create a freezer paper stencil
MATERIALS:
- freezer paper
- outdoor paint (waterproof)
- foam paintbrush
TOOLS:
- printer
- X-acto knife
- iron with ironing board
- cutting mat with ruler
- rotary cutter
Are you looking for a video on how to create a freezer paper stencil? I have one for you!

STEP 1: CREATE YOUR DESIGN ON THE FREEZER PAPER
You can either freehand the design directly onto the paper or use a printer. I personally like to use a pencil to create the design; this way, I can easily erase if needed. Then, I go over the design with a pen to make it easier to see when cutting out the design.
If you want to use the freezer paper with a printer (this is my favorite way to create a stencil), trim it to the size of regular printer paper first.
To do this,use a cutting mat, ruler, and rotary cutter to cut the freezer paper down to 8.5″ x 11″. Cut as many papers as you need to print your design. For example, if your design will be larger than this size, you can attach several pieces of freezer paper to make a larger template.
Also, cut an extra piece to cover the area of your design. This paper will be placed under the fabric so that the paint does not seep through onto other fabric.
Now, insert the paper into your printer so that it will print on the matte side, not the waxy side. Print the design onto the paper(s).
If your design used multiple papers, secure those papers together at the edges using the iron. The papers will easily stick together!
Your printer most likely leaves a margin around your design – do not trim these edges.

And remember, make sure the waxy side of the paper is always facing down so the iron does not touch it.
STEP 2: CUT OUT THE STENCIL
Now that you have your design on the freezer paper, it’s time to make the stencil.
SIDE NOTE: If you want to create this “Let it Snow” design, you can find the Free printable on my tutorial on how to make a Let It Snow throw pillow cover.
Using the x-acto knife, cut out the printed part of the design on a cutting mat.

TIP: This knife is sharp so you will need very little pressure.
Mark the stencil pieces so you know where to place certain pieces, like the floating, inside pieces of letters.
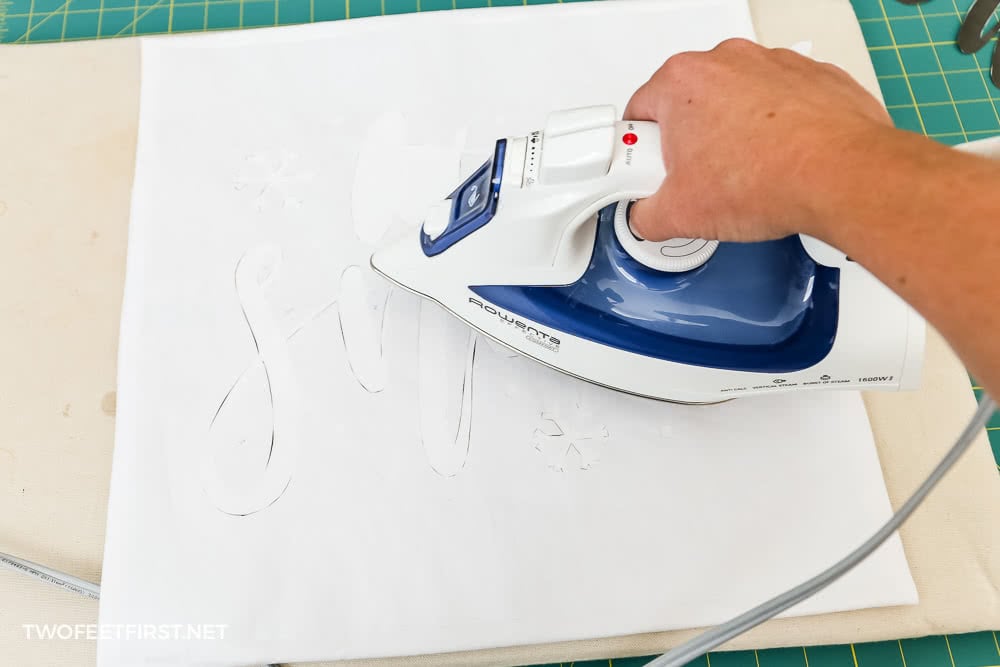
STEP 3: IRON THE STENCIL ONTO THE FABRIC
Before painting a stencil onto fabric, prewash the fabric to make sure it will not shrink if you rewash it.
Place the extra piece of freezer paper (size of design) under the fabric you will be painting the stencil onto. The waxy side of the paper will be faced down.
SIDE NOTE: You can use cardstock instead of another piece of freezer paper to prevent the paint from seeping.
Again, this is to prevent the paint from seeping to another fabric.
Using the iron (no steam), press the stencil onto the fabric. Remember to place all the pieces that may have been cut out and labeled.
It doesn’t take much to iron the stencil in place, but make sure all edges are secured to the fabric.
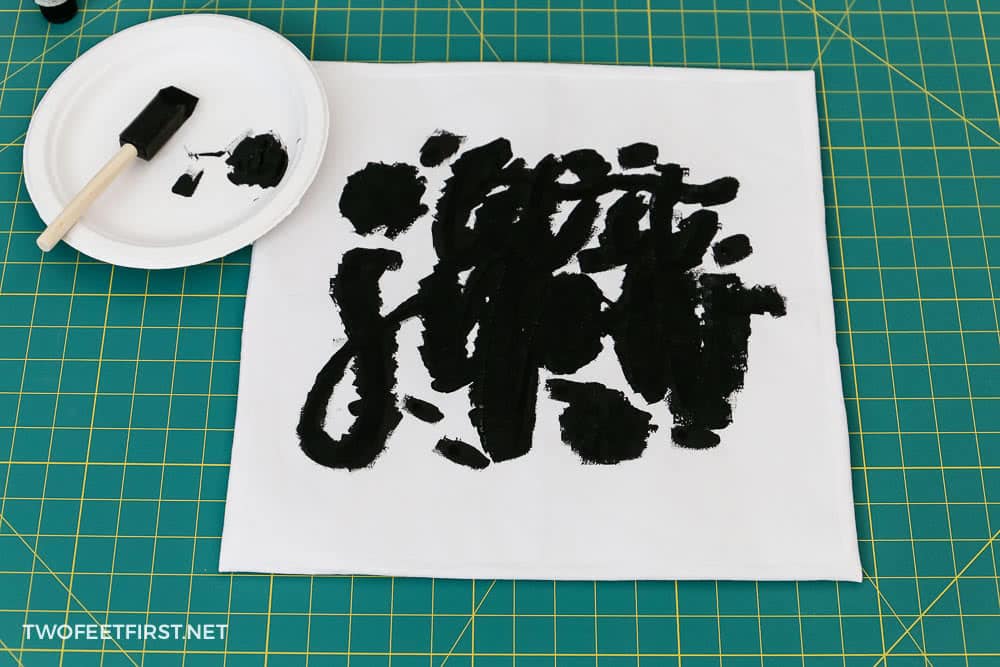
STEP 4: PAINT YOUR STENCIL
Now you’re ready to paint your stencil onto the fabric.
Take your waterproof paint and dab the paint onto the fabric.
You can use multiple colors on a stencil, like I did with my welcome pineapple doormat or when making decorative pillow covers for less than $20.
Then, let the paint dry according to the instructions.
Once the paint has dried, check the coverage of the color. Does it need a second coat? If so, dab paint onto the stencil again.
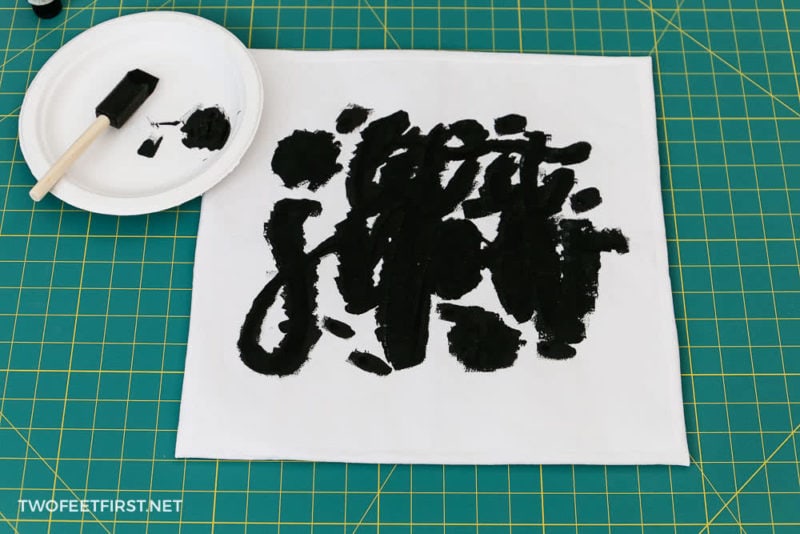
When you have the coverage you want, remove the stencil from the fabric.
Don’t worry, it’s easy to do. Just start at one corner and pull up gently.
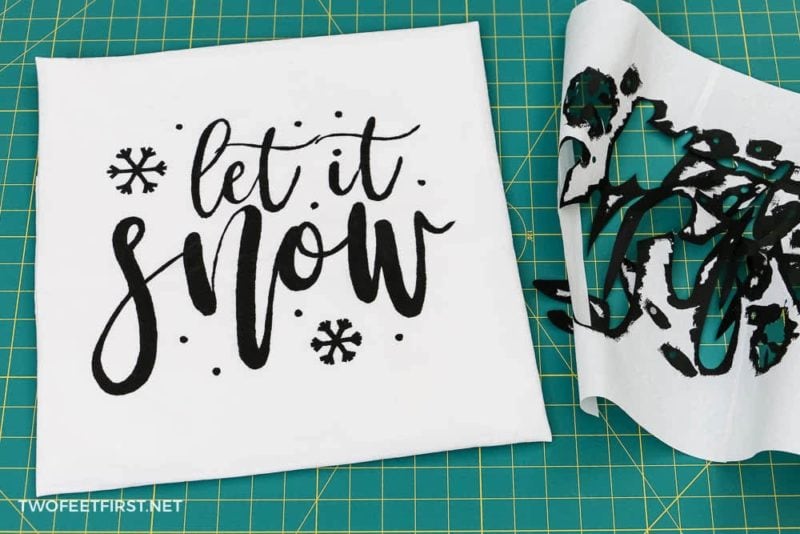
The design should be crisp and clean, like the photo above. You can discard the freezer paper stencil now – your project is complete!
And that’s how you can make your stencil using freezer paper. Now, go and make those stencil you have always wanted.

DIY Freezer Paper Stencil
Learn how to make your own stencil without a fancy machine and using a basic kitchen item, freezer paper. Here's a DIY tutorial on how to make a freezer paper stencil.
Materials
- freezer paper
- waterproof paint
- foam paintbrush
Tools
- printer
- x-acto knife
- iron with ironing board
- cutting mat with ruler
- rotary cutter
Instructions
- Create your design onto the freezer paper by either freehanding it or printing it onto the freezer paper.
- Cut out the stencil using the x-acto knife.

- Iron the stencil onto the fabric, waxy side down!
- Dab paint onto the stencil and allow the paint time to dry.
- Remove the stencil and enjoy your design.