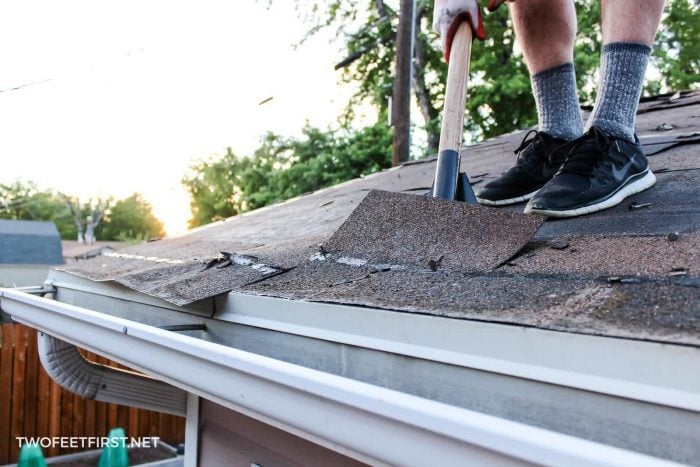
I don’t think I’ll ever forget the two whole days I spent on top of my roof digging out three layers of old shingles.
But once they were gone and we set up the plywood and underlayments, we were really excited about the next part!
Welcome to Part 2 of re-shingling our house. In this tutorial, I am sharing how to add shingles and vents to a roof.
There are a lot of tips and tricks I shared in Part 1 about removing the old shingles and building a chimney cricket. Be sure to check out that tutorial first, you can find it here.
Re-shingling Roof – PART 1
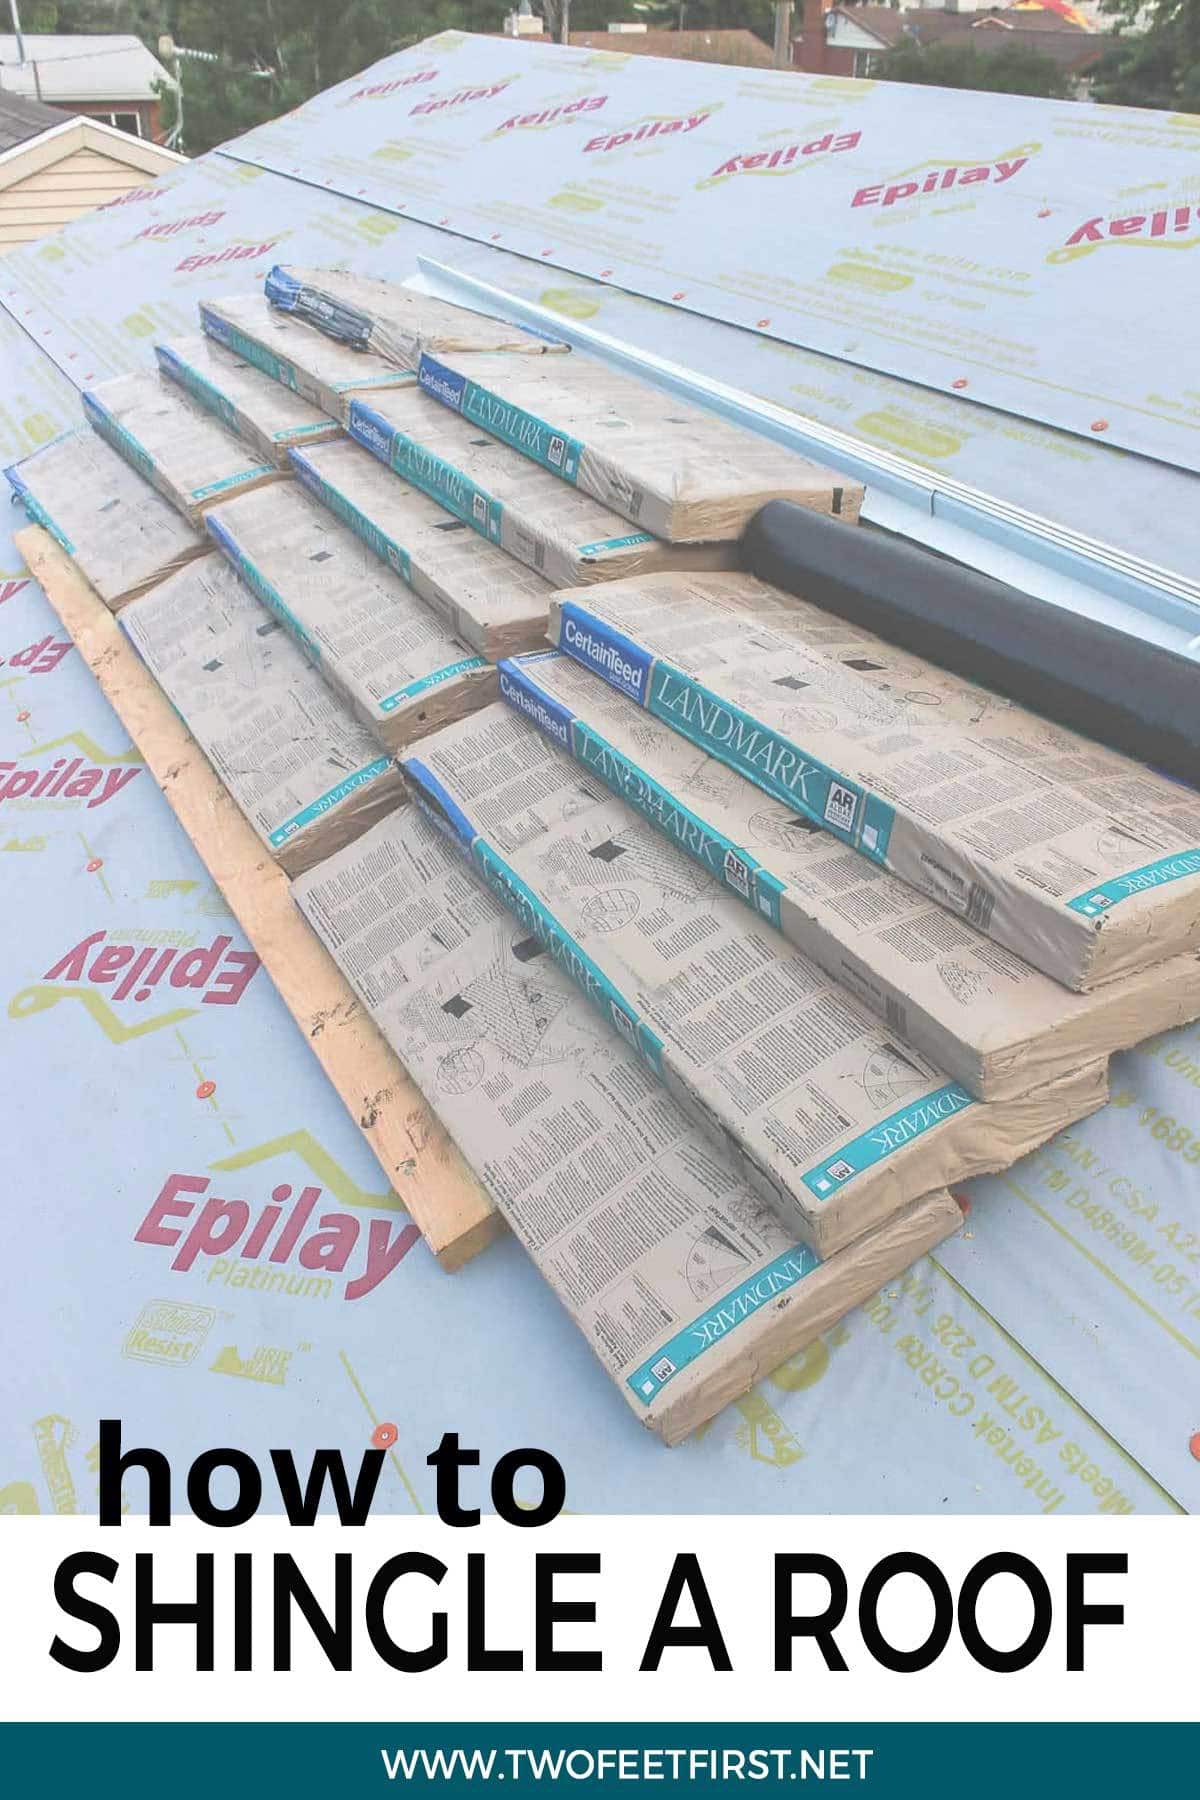
In Part 1, I shared the supplies I used but I want to make things easy so here is that list one more time:
Disclosure: This post contains some affiliate links or referral links for your convenience. It is a way for this site to earn advertising commissions by advertising or linking to specific products and/or services. Click here to read my full disclosure policy.
MATERIALS:
- dumpster (for the shingles)
- shingles (you want close to 10% extra just in case)
- shingle ridge
- starter shingle (sometimes your shingle can be this)
- ice and water shield
- roofing underlayment
- chimney flashing
- drip edge
- vents (air and pipe)
- 1-1/4″ nail coils
- pipe flashing
- plastic nails
TOOLS:
- roofing gun
- shingle shovel
- air compressor
- hammer
- square
- razor knife
- tin snips
- safety glasses
- face mask (for dust)
- ear protection
Find the list of tools we use.
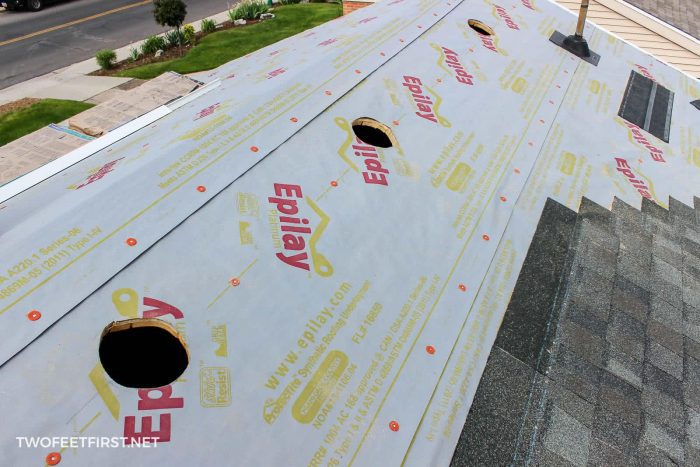
This part of the tutorial continues after adding the waterproofing underlayment, so let’s begin!
ADDING SHINGLES AND VENTS TO THE ROOF

Shingles and vents are added at the same time.
We’re going to start at the end of the roof where the ice and water shield is.
The Starter Shingle
To add the first row of shingles, you need a starter shingle. This is where the tar on the backside of the shingle is at the edge.
SIDE NOTE: The type of shingles we used had a double tar strip so we could use a regular shingle instead. We did this by rotating the shingles so it was upside down (tar strip is still against the roof) and nailing it into place.
Nail this shingle into place using the 1-1/4″ coil nail. You will want nails close to the edge to prevent the shingle from flapping up.
Place the next shingle right next to the previous one and nail into place. Continue this process until you are ready for the end piece.
The Shingle at the Edge
To cut an end piece, place the shingle so it hangs over the edge of the roof line. Use a razor to cut two small slats in the top and bottom of the shingle where it is at the edge of the roofline (where the drip edge ends).

Next, take the square and cut a line on the back of the shingle (easier to cut on the back of the shingle) from one slat to the other.
TIP: Use a piece of wood or a scrap piece of shingle to cut the shingle. You do not want to cut directly on the shingles you have already installed or the waterproofing underlayment because you will cut a hole.
Take the cut piece and check your fit, adjusting if needed and then, nail into place.
HOW TO INSTALL SHINGLES
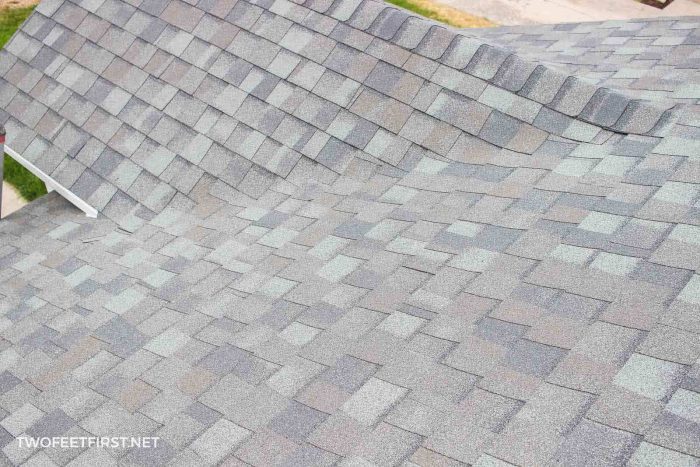
The most important thing you need to understand is the layout of the shingles. You want shingles to be staggered so NO seams will be at the same place.
Have you ever noticed this look when a roof is being shingled?

To achieve this, you need to have a starter bundle of shingles (do not confuse this with the starter shingle); this is made from a group of regular shingles.
The Starter Bundle
You will be cutting shingles to give you this bundle. Each bundle has 6 different shingle sizes:
- regular size
- 5/6 of the regular size
- 2/3 of regular size
- 1/2 of regular size
- 1/3 of regular size
- 1/6 of regular size
But here’s the cool thing: you only need to cut 5 shingles to make 2 bundles (or 3 to make one but you will have 1/2 of a shingle extra).
Cut the starter bundle by making these cuts:
- 1/6 of regular size (also gives you 5/6)
- 2/3 of regular size (gives you 1/3)
- 1/2 of regular size (gives you an extra 1/2 for the next bundle)
Let me share what our cuts look like. Our full shingle is 39″, so the cuts would be 6.5″, 13″, and 19.5″. Use a square to make each cut.
Here’s the bundle all ready, minus the full shingle (sizes 32.5″, 26″, 19.5″, 13″, 6.5″):
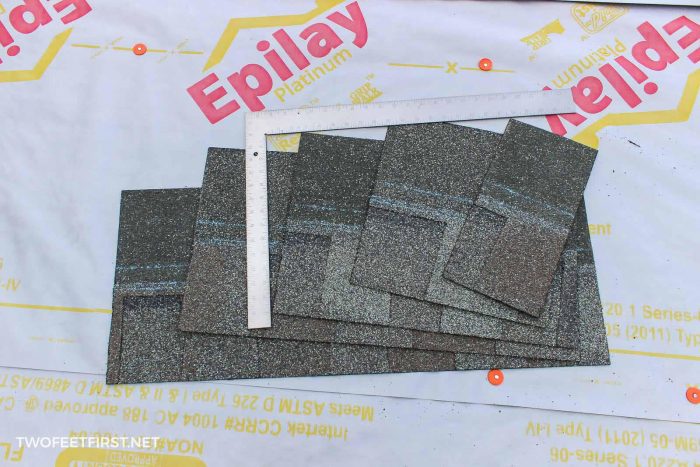
This bundle will be used every time you start a new shingle row and you always start with the full shingle first.
How to Arrange the Shingles
So let’s start installing the shingles.
Your first row of regular shingles will be over the starter shingles (the shingles you already installed). You do this to cover the nails you placed at the edge. You can start this row with a full shingle or the 5/6 cut (32.5″) from the starter bundle.
TIP: The shingles you are using have instructions on the package. Read these to see the best way to install the shingles. It will also tell you the amount of nails to use.
The shingles we used had a double blue line. The roofing nail was to be placed between these two lines. We placed about 5 nails per full shingle (wind is a factor on the amount of nails used) and we had a nail at each end of a shingle, about 1/2-3/4″ from the edge.
After installing the first shingle of the starter bundler, go ahead and install the 2nd and continue until the whole bundle is installed.
Looks something like this:

TIP: Make sure the edge of the shingle is at the edge of the roofline!
Now, go back to the first shingle of the starter bundle and finish that row with shingles and complete all the other rows. Or work on each row by placing a full shingle on the bottom row and working up then over until all rows are finished.
SIDE NOTE: When you get to the end of the roof, cut the shingles just like I explained before.
Then, install another starter bundle, finish those rows and repeat until the roof is complete.
If you have any valleys in your roof, work the rows of the shingles together.
Now, let’s talk about two more things: the vents and chimney flashing.
HOW TO INSTALL ROOF VENTS
Roof vents are essential – they extend the life of your roof, reduce energy cost, and reduce indoor temperatures. They allow proper air flow which reduces moisture that can build up inside your attic. Without roof vents, moisture can damage your roof and allow mold to grow.
There are a couple of different types of roof exhaust vents: static roof vents (like the ones we used) or ridge vent.
A ridge vent is located at the very top of the roof at the peak of the sloped roof but this type of vent can only be used if the roof has intake vents along the soffits. If you want more information on ridge vent, Lowes has a great article on what it is and how to install one.
We installed the static roof vents because the soffits of our home do not have vents.
You can easily see that layering the shingles over the top of the bottom shingle is KEY to having water run off the roof.
It’s the same with roof vents. These vents could be either pipe vents (placed over the vent of the drain pipe) or air vents.
Let’s talk about how they are installed.
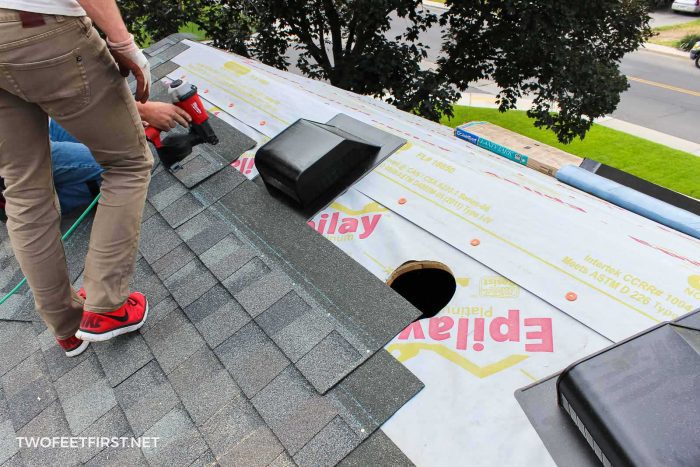
TIP: If you are using plastic vents, use a hammer to nail them into place because the roofing gun can crack the plastic
On our roof, we had no air vents so we had to cut holes in the roof.
First, we traced a circle the size of the vent; then, we used a Sawzall to cut the hole. This is what we were left with:
After, install your shingle rows until the actual exposed part of the shingle (below the nail line) is overlapping where the vent will sit.
Here is an example of adding another row because the row will not overlap:
And here is the same vent installed with the overlap I am talking about:

Once you have the overlap, cut the shingles that are covering the hole in the roof. Then, install the vent.
SIDE NOTE: If you are installing a pipe vent, you will have to cut the shingle before placing because it’s a smaller hole.
Wrap the next row of shingles around the vent; they will also need to be cut.
Here is an example of an air vent

And here is a pipe vent – see how this is cut to fit around the vent:

TIP: I would recommend applying clear caulk around the pipe vent right where the pipe comes out of the vent.
Now that the vents are installed, we’re ready for the chimney flashing.
INSTALLING CHIMNEY FLASHING
First, install a row of shingles until it overlaps the chimney, just like the vents. Then, install the front of the chimney flashing (down the slope; remember to start at the bottom), again overlapping.
Make sure you hammer the nails into the chimney (installed in the grout line); don’t use a nail gun as this could crack the grout.
.

As you move up the chimney, the flashing will overlap the shingle.

Also notice how the first flashing up the slope wraps around the chimney front. So, in other words, the flashing is added with each new row of shingles around a chimney.
Continue the process until the chimney is all covered with flashing.
You can also take an extra precaution by adding tar around the flashing. My husband got a little too excited with the tar around our chimney but now we will not have to worry about water coming in so I don’t mind that at all!
Also, here is an example of shingling over a small chimney cricket (remember, you want one of these!).

INSTALLING THE SHINGLE RIDGE
Now the only thing left to install is the roof ridge.
To begin, the row of shingles needs to overlap at the ridge. The easiest way to do this is to take one side of the roof and take the row until it overlaps onto the other side. You also want that row to only show the exposed part of the shingle once the ridge shingle is in place.
See how the top row is hanging over the other side of the roof in this image:
TIP: You will want to nail the overlap to the other side of the roof; you only need a couple of nails to hold it in place.
Then, finish the shingles on the other side of the roof but when you get to the last row overlap these singles onto the other side of the roof. You want to make sure that once the ridge shingle (the shingle place at the peak of the roof) is installed, you only see the exposed part of the shingles.
For example in the image above, you want the part below the blue line to only be exposed.
TIP: Use a shingle ridge piece to check this.
If you are lucky, you will not have to cut the overlap. Then, nail those shingles into place the same way as before.
Now, to install the ridge shingle, you need to consider where the most wind blows from. If you know what side that is, start on that side of the ridge first.

TIP: Again, read the instructions on your shingle package to make sure you install the ridge correctly for your shingle.
Install the first ridge shingle just like the starter shingle, nailing all sides of the shingle. Then, place another shingle over the first one and only nail as indicated from your shingle instructions.
Now, move to the next ridge shingle, nail into place and continue down the ridge.
There are different ways to finish the ridge but we chose to use nails and cover those with tar. So decide on the best option for your home.

And that was the final step – now you have a completely re-shingled roof!
COST & TIME INVOLVED IN RE-SHINGLING A ROOF
Overall, the whole project cost about $3,000. Our home is about 800 square feet so it’s about $3.75 per square foot. That price covers the shingles, nails, vents, water barriers and the dumpster rental.
For the size of our house, it took four full days to remove three layers of shingles and install the new shingles. It could take more time or less depending on the size of the roof, angles (peaks), and how many layers of shingles you need to remove.
The most time-consuming part was removing the shingles because the bottom layer did not come off in nice sheets. I recommend always removing the shingles because of town building codes and it makes it so much easier to replace the next time.
Just so you know, we decided to build a new porch gable so that is why our house looks so different. You can find that tutorial here.

I hope this tutorial helps you understand how to re-shingle a roof and gives you ideas on how to make it easier! But before you begin any project like this, please remember to do your research and think about safety!
SIDE NOTE: Speaking of safety, we did use a couple of scaffolding to roof our house. One was one that goes between ladders and another was a roof bracket
*Please note: we are not experts, just homeowners learning about remodeling and sharing our projects with you. The projects, suggestions, and tutorials on TwoFeetFirst are not error proof, they are simply what worked for us or did not work. Additional research and precautions are always recommended and TwoFeetFirst cannot be held responsible for your personal safety or the outcome of your project.*