An elegant, spacious front porch is like a luxurious scarf – it’s an accessory that is not only functional but elevates your style too.
In our case, our porch was more like a sad basket of leftover, unmatched socks.
The roof did not cover the whole concrete area below, possibly only 2 feet of it, and it was very unattractive. I certainly wouldn’t consider it a front porch and it bothered me for a long time.
Finally, when we decided to replace our entire roof, we also gave the front porch a makeover by adding a roof gable.
And here’s how we did it!

Please be aware that the first part of this makeover will require hiring a professional.
Here are the materials we used for this project:
Disclosure: This post contains some affiliate links or referral links for your convenience. It is a way for this site to earn advertising commissions by advertising or linking to specific products and/or services. Click here to read my full disclosure policy.
ADDING A FRONT PORCH TO AN EXISTING HOUSE
MATERIALS:
- 4″x4″ post
- 2″x6″ boards
- 2″x4″ boards
- 7/16″ OBS sheet
- 3-1/4″ framing nails
- redhead bolts
- 4″x4″ post base
- 4x post cap
- hurricane tie
TOOLS:
- framing nail gun
- rotary hammer drill
- hammer
- air compressor (depending on nail gun)
- level
- square
- ladder
- Sawzall
- circular saw
- safety glasses
- face mask (for dust)
- ear protection
SIDE NOTE: Make sure to check your local building codes before starting this project!
FRAMING THE PORCH: BUILDING A GABLE ON A FRONT PORCH
For this part of the project, I suggest you use a professional because it will affect everything if not done correctly. The new porch needs to be attached to the existing home and the weight of the new porch has to be braced correctly.
We had a professional contractor helping us. He built the whole porch but we were right there, helping and learning. This is why I can explain some of the processes but please remember, your house will be slightly different.
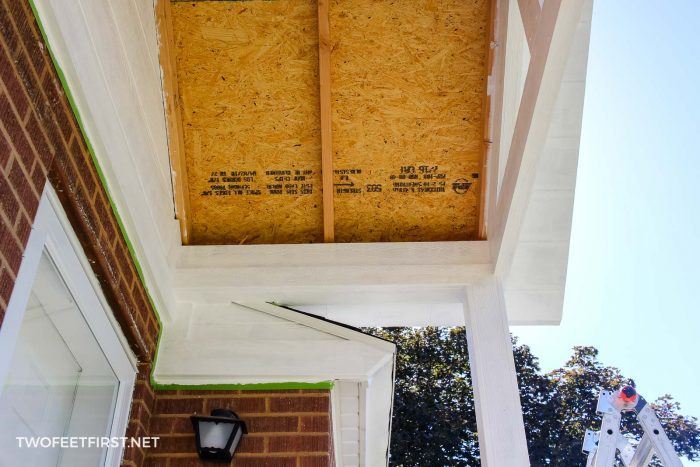
First, we had to find out where we could attach the new porch to the house. Since our home is made of brick, the place where we would tie into would be above the brick wall. But we also needed to work with the house’s trusses.
The easiest way to see what we were working with was opening up the roof (see an image before for example).
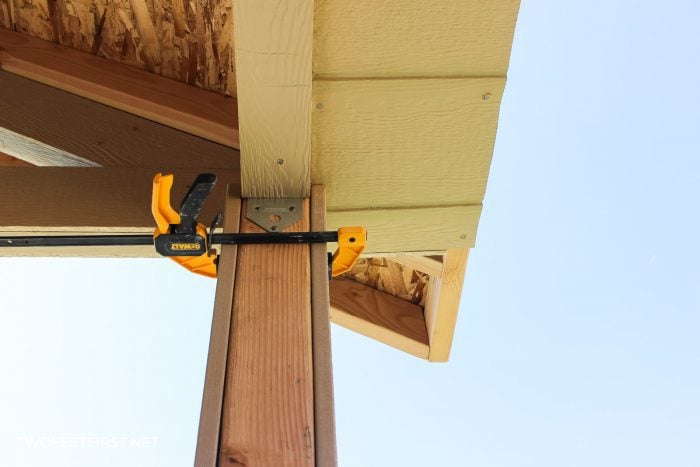
Once the roof was open, we knew where everything could be placed. So we installed the 4″x4″ post base (attaches the post to concrete) using our rotary hammer drill and the red-head bolts

Next was attaching the 4″x4″ post base to the 4×4 post plus the 4×4 post cap to the other end (these hold the 2″x6″ that connect to the house).
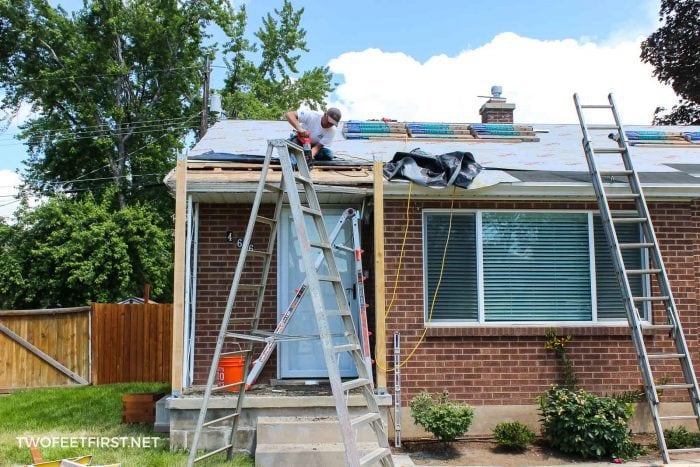
It was at this point that a Sawzall was used to cut the old porch away from the house.

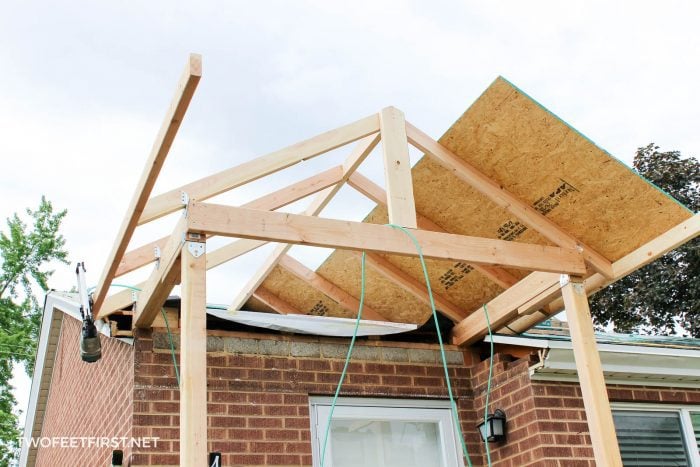
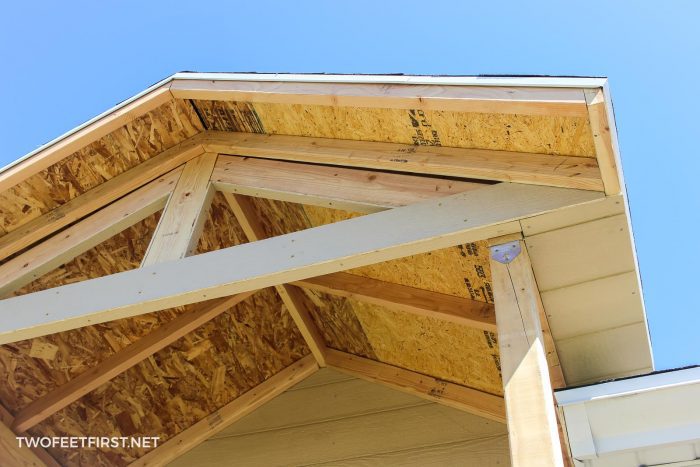
To decide on the slope of this new gable, we considered the same slope as our roof (this is standard). But it was not the look that I wanted because I wanted to add some decorative trim to our new porch roof.
To give us an idea of different slopes, we held two 2×4’s boards at a triangle, which helped us decide on the perfect angle of the slope. We decided on an 8/12 slope for this roof with our main roof being a 6/12.
At this point, I stepped away to go finish installing some more shingles but here is what the frame of the porch looked like at the point of framing the gable:
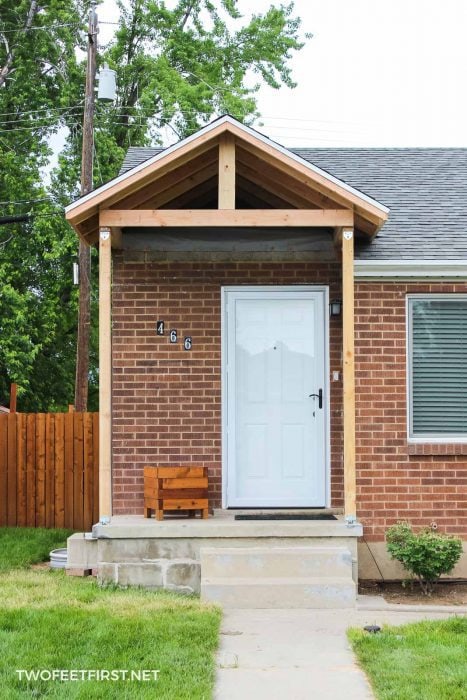
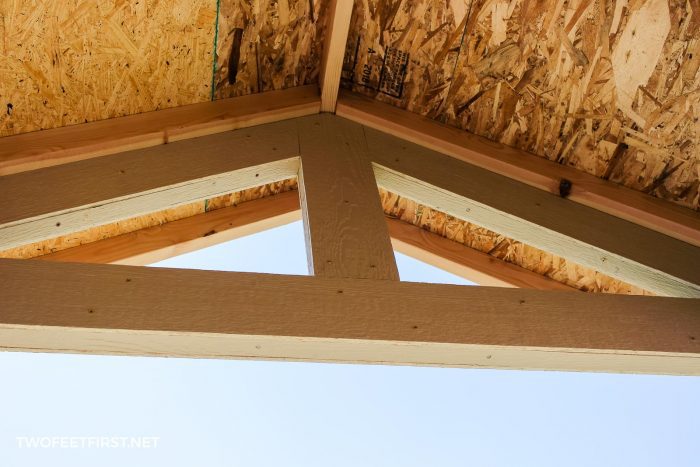
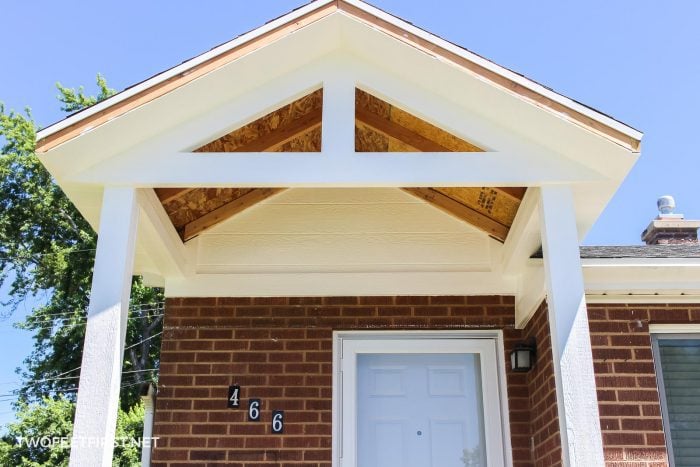
And here is what the porch framing looked like completed:
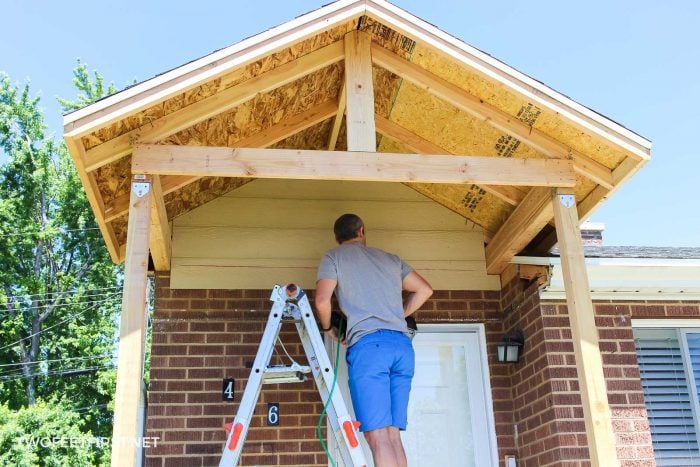
Since we relied on a professional for this part, my tips above are just a summary.
Now, here are the details on how I finished the porch by wrapping the columns and everything else.
FINISHING THE PORCH BY ADDING TRIM
I first want to show you the finished porch so you have an idea of what I will be talking about.

One thing I regret not doing was adding a dangling light but that would have taken a while so I decided not to do it. Plus, birds were already trying to create a nest in all the openings!
Here are the supplies I used for this part of the project:
MATERIALS:
- 1″x4″ exterior trim
- 1″x6″ exterior trim
- LP Smartside strand panel siding (comes in 48″x96″)
- LP Smartside strand soffit panel (comes in 48″x96″)
- 2-3/8″ exterior galvanized ring shank nail
- 1-1/4″ exterior screws (if you do not double the 2″x6″ board in the front)
- 1/4″ cedar planks
- 1-1/4″ finishing nails (18-gauge)
- 2-1/2″ exterior screws
- white and clear caulk
- exterior paint
- tung oil
TOOLS:
- framing nail gun
- air compressor (depending on nail guns)
- level
- square
- clamps
- ladder
- Kreg Jig K5
- Sawzall
- circular saw
- jigsaw
- miter saw
- Kreg rip-cut
- finishing nail gun (18-gauge)
- hammer
- safety glasses
- face mask (for dust)
- ear protection

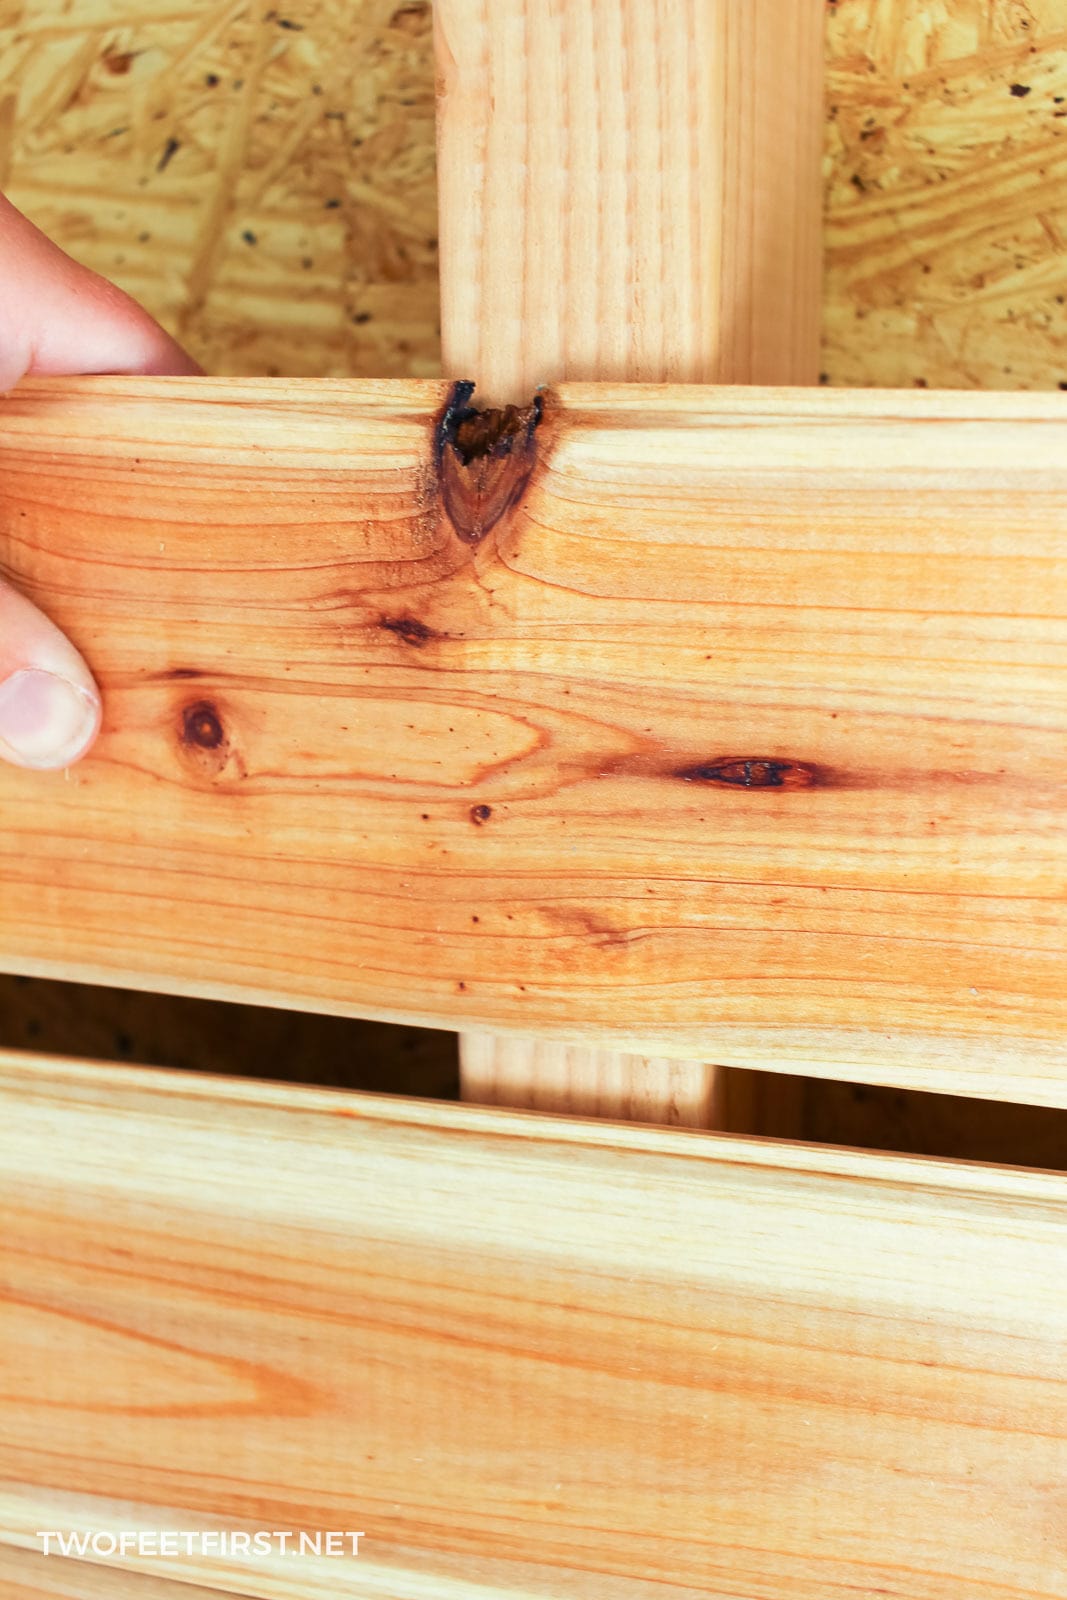
First thing I had to do was add some bracing – this way I had a place to nail into. To do this, I used 2×4’s cut to the size I needed. Then, I used the Kreg Jig K5 to create pockets to secure the boards to the porch with a 2-1/2″ exterior screw. Here’s an example.

Next was cutting the 3/8″ LP Smartside Siding panel to fit the space. I decided on this panel because we wanted the look of shiplap. I used a jigsaw to cut the piece to fit and we used a chalk line so we would know where the 2×4 boards were to nail into.
After the pieces fit correctly, we nailed into place using the 2-3/8″ ring shank nails (these are for exterior use).

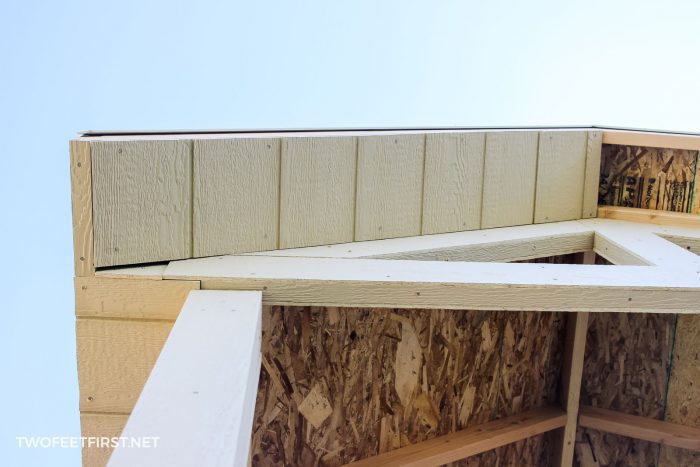
We also cut a piece to cover the other opening. Here are both of those pieces into place:

Next was adding the soffit to the roof overhang, just the sides. Rather than buying the actual soffit, I cut strips of the LP Smartside soffit panel using a circular saw attached to the Kreg Rip-Cut (if you’re not sure what that is, see this post on how to use a Kreg Rip-Cut).

Then, I cut it to the size I needed. I took the soffit to where it would be in line with the 2×6 that braced the front of the gable. Check the fit and nail into place. See more images below for more examples.
Next was adding trim to the 2×6’s (the design in the front). I did this again by using the circular saw attached to the Kreg Rip-Cut to cut the 3/8″ soffit panel into strips.
The first strips I cut were for the inside of the design and all along the bottom of the 2″x6″ board. These strips were 1-1/2″ long.
SIDE NOTE: I wish I would have doubled up the 2×6’s design by adding more 2×6’s right against the ones already installed. If I would have done this, the strip would have been 3″.
After, I cut the strips to the length I needed and installed using the 2-3/8″ nails.
TIP: Use a clamp to help you hold them in place.
After those were installed, I added the trim to the front and back of the 2×6’s. I again used the circular saw with the Kreg Rip-Cut and cut the strips to the size I needed. To get the size, measure the distance (it will be close to 6-1/4″ and 5-7/8″; there will be two different sizes).
The first strip to add is the bottom one, the longest 2″x6″ board. On our porch, the 8ft panel was slightly small so I needed two strips. I cut the piece to fit the space. Then, I used clamps to hold them in place.

TIP: The strips will be flush with the smaller strips already installed.
Now, before using nails to secure the trim into place, think about the width of the boards. If you did not double the 2″x6″s, your width will be about 2″ once all strips are installed.
And the nails are 2-3/8″ so you will NOT want to use them. Use the 1-1/4″ exterior screws instead.
TIP: If you are not sure what angle the trim pieces should be cut at, use a scrap board to test or purchase a T-bevel to give you the correct angle.
I also added trim (strips of 3/8″ soffit panel) to the other 2×6’s and 2×4’s framing around the porch. I installed the same way but used 2-3/8″ nails.
Now it’s time to wrap the porch columns.
WRAP THE PORCH POST WITH TRIM
To give you more in depth instructions, I created a different tutorial for how to wrap porch columns. So, jump over to that tutorial to learn how to wrap the post and then come back when you’re done.

FINISHING THE TRIM
At this point, I finished installing the rest of the soffit.

I also added trim boards to the inside, 6″ for the bottom and 4″ everywhere else, like this:


SIDE NOTE: Some of the 6″ trim was where the brick was so I could not nail into place in some areas. Instead, I created pockets (using my Kreg Jig K5) to attach the 6″ board to the 4″ side trim then, applied liquid nails to the 6″ board and nailed the 4″ trim into place.
At this point, almost all the trim was added (only the ceiling trim was missing but that had to wait until after the cedar boards were installed). Now, it was time to prep for paint. In other words, caulk was applied to all seams and nail holes.
Also, I taped off against the brick and concrete to protect it from getting painted or caulk all over it.


Next was painting all the trim white. You will want to use an exterior paint that has paint and primer in one. Here’s after one coat of paint:
Because I was painting the trim a bright white, it took 3 coats to get the coverage I wanted.
ADDING CEDAR PLANKING TO PORCH
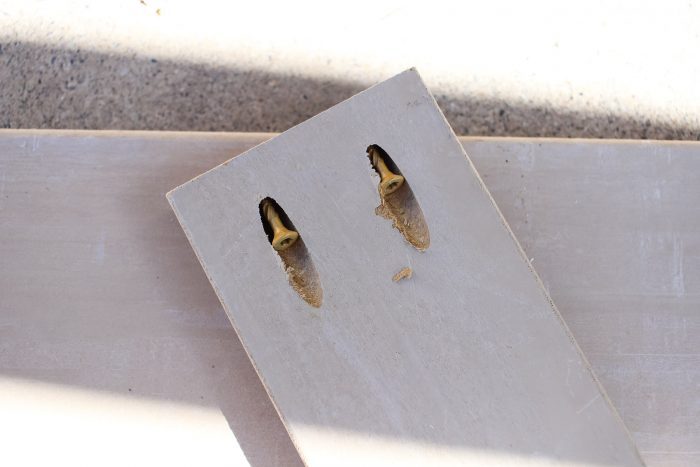
First, you will want the planking to sit out in the open for 48 hours to adjust to your climate. Here’s the cedar planking I used:

Next, I put a waterproofing finish on the cedar using my favorite wood finish Tung Oil. I always like to apply at least two coats.

Once the boards dried, I measured the ceiling of the porch. You do not want the boards to be completely flush (give them a 1/8″ gap on each side), so subtract 1/4″ from the measurement.

TIP: Do not cut all the boards at once; work in sections (about 4 boards installed). Then, measure again because it could change at different points.
Starting at the bottom of the ceiling, place the first board. You will want the groove side of the panel down. Nail into place using the 1-1/4″ finishing nails.
TIP: You will want the first board straight – measure from the top of the ceiling down to give you the straight line.
Install the next cedar panel by inserting the grooves together.
And again, nail into place. Continue installing the panels on that one side until the last piece. If needed, cut the final piece to fit into the space (I used a jigsaw to do this).
Then, complete the same process on the other side but do not add the last piece.
The last piece will need to be cut at an angle to fit flush against the other side. So, measure the distance and cut at a 30-degree angle depending on your roof pitch. Then, install the same way.
Now, it’s time to install the last trim pieces. I decided I wanted less trim showing so I used 2″ trim (I cut the 3″ piece in half). I cut the pieces to fit before painting them.
After they dried, I installed them using the 2-3/8″ nails.

Next was caulking the seams and filling in the nail holes. I used white caulk wherever there was paint on paint. But if it was paint against cedar or cedar against cedar, I used clear caulk. I also filled in any holes the cedar had (knot holes) using the clear caulk.
SIDE NOTE: Clear caulk goes on white but it dries clear, so don’t be alarmed.
Once the caulk dried, I touched up the nail holes and white caulk with white paint.

And that is how I updated our front porch by adding a porch to an existing house and wrapping the posts with trim. I hope this project gives you some ideas to update your front porch.
I love the style we chose – it gives us plenty of curb appeal and now I won’t get soaked in the rain!

PS. The cost for all materials for this project was less than $700.


Love the porch, but why didn’t you paint the cinder blocks? (the base of porch)
Thanks, Mattie! The reason why I did not paint the porch cinder blocks is that I need to patch the seams first (it’s called parget) then I would paint that. I plan on completing this project this year!!