You know those times you start a project and then you add another project to it? This happens to us often and it happened with our closet makeover. See the light in our closet (plus the other closets in our house) is on the wall, not the ceiling. So the light would shine only 2 feet across the wall, making it a dark closet. Long story short, we decided (Eric wanted) the light moved to the ceiling. To be honest, he was right about it! Here was our light before.


There will be some supplies you will need to move a light so let me list them.
Disclosure: This post contains some affiliate links for your convenience, click here to read my full disclosure policy.
SUPPLIES:
- Wire (I used extra I had on hand, 12-2)
- Wire caps
- Wire staples
- Light socket box (this one if placed by a stud or this one for between studs)
ADDITION:
- New flush LED light
- Light socket cap (to cover old wires)
TOOLS:
- Hammer or drill
- Wire stripper
- Stud finder
- Flashlight
- Drywall saw
- Tape measure
- Pencil
- Wire tester
- Razor knife
NOTE ABOUT ELECTRICAL- we are not electricians and you should be aware that there are dangers in doing this project yourself. Please be careful and do your research so you do not get electrocuted or burn down your house!*
HOW TO MOVE A LIGHT
FIRST, TURN OFF THE POWER TO THE LIGHT!!
Once the power is turned off to the light (you can use a wire tester to check the wire), remove the light. Note the wires that are wiring the light currently. If you’re lucky they will be the only ones but if not don’t worry you can still move the light!
We were not the lucky ones and had multiple wires in the box. If you have this also you can do two things.
- Rewire all the wires to the new box or
- Add a wire to the old box that connects to the new box.
Can you guess what we decided? Number 2 because it would be the easiest. But before adding the wires we needed to place the new light box.
PLACE THE BOX –
You should have a good idea of where you would like your new light box but you need to check if anything is in the way. This is where you will need a stud finder.

SIDE NOTE: I used my sisters this time because it has an electrical finder with it (power will need to be on to work!). This one was a lot better than mine.
Mark the places where there are studs (wood) or electrical. It just so happened that there was wood running right where I wanted my light. So our light was not centered… But we could use the light box next to the wood.
Next take the new light box and trace the shape onto the ceiling where you want it. Take a razor knife and score along the shape you just traced.
Then take the drywall saw and cut out the shape of the box. (SIDE NOTE: if you are moving the old box completely you can use this drywall shape to patch that hole). Test the new light box to make sure it will fit.
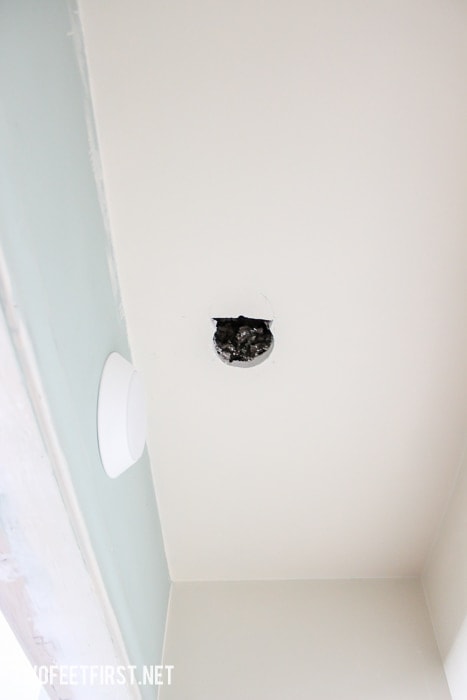
Once the hole is cut you can install the new box. Sorry, no pictures because Eric was in the attic with a hammer.
WIRE THE NEW BOX –
After the new box was installed, we wired a new wire into our old box to the new box. Then I removed the jacket from the wire (yellow) inside the box and stripped an inch off the insulation of the wire. I then wired the old box the same way as before but this time connect the new wire, not the light fixture.
I then moved the new box and wired the light to the wires. Before I completely installed the light (tightened it completely), I test the wires by turning on the power.
Once I finished and the light worked, I added the blank light cover to the olds box and finished installing the new light.

And that’s how we moved the light in our closet to the ceiling. We need to redo the placements of more lights in our home (kitchen)… Does anyone else need to do this?


