A step-by-step tutorial on how to build a barn door with glass window; this DIY barn door tutorial has a video and plans to go with it.
Your basement can be a basic space where you store extra items and run downstairs to do your laundry a few times a week.
Or, it could be valuable square footage where you organize your life’s belongings in a clutter-free zone, take care of paperwork in a quiet retreat and still keep an eye out for missing socks from the dryer.
So why not decorate it like the gorgeous bonus space that it is?
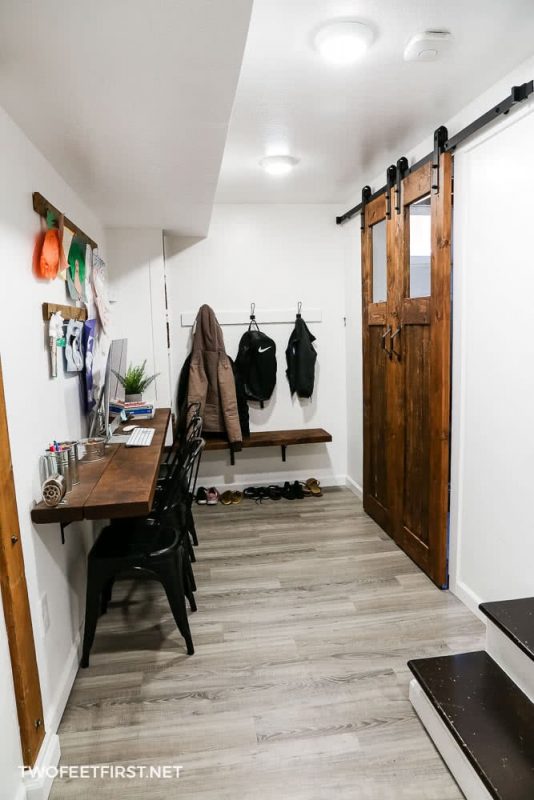
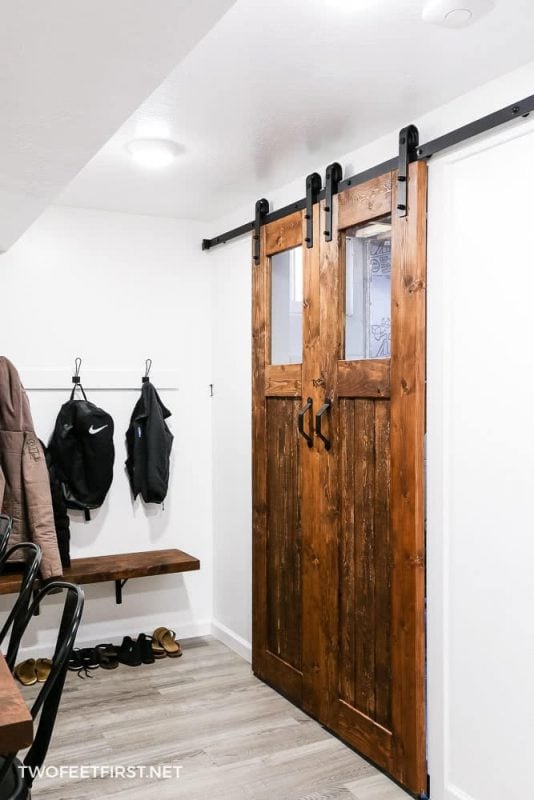
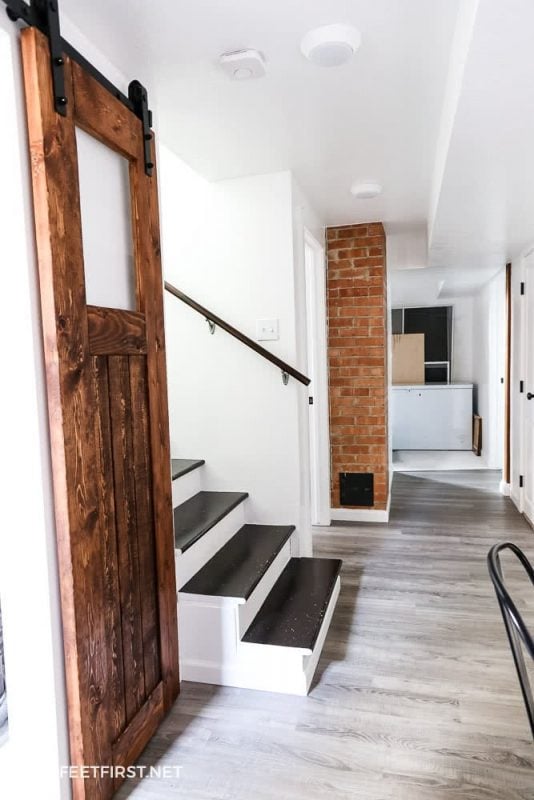
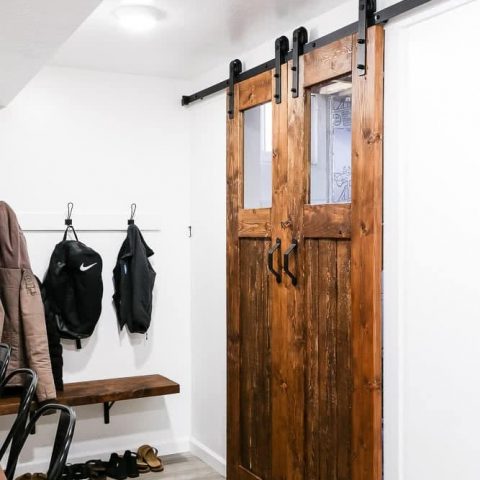
After finishing our basement, we decided that we wanted to separate the laundry room from the mudroom in a stylish way, with sliding barn doors.
But we didn’t want the mudroom to be dark if the doors were closed – there are no windows in that space. So we decided to add glass panes in the doors.
This is my DIY tutorial on how to build a barn door with glass inserts.

HOW MUCH DOES IT COST TO BUILD A BARN DOOR?
The cost will depend on the size of your door or doors.
I built two doors that are each 24″ wide by 80″ tall, which meant that I also needed hardware for two doors.
The cost of the wood and glass was about $65 for both 24″ doors. The hardware cost about $110 (this includes the track and handles).
The total cost of building these two DIY sliding barn doors would be about $175.
Now let’s discuss which supplies and tools you will need to build these double barn doors.

Disclosure: This post contains some affiliate links or referral links for your convenience. It is a way for this site to earn advertising commissions by advertising or linking to specific products and/or services. Click here to read my full disclosure policy.
DIY barn door
MATERIALS:
- 2″ x 6″ wood board
- 1″ x 6″ shiplap boards
- 15″ x 20″ glass (cut to 15″)
- 2.5″ wood screws
- stain (optional)
- 100% Tung oil (protective finish)
- #220 grit sandpaper
- wood glue
- clear caulk or silicone
- wood plugs
- sliding door hardware
- door handles
- latch (optional)
- painters tape and paper (optional)
TOOLS:
- miter saw
- drill
- sawhorses (optional)
- Tape measure
- router
- clamps
- Kreg K5 pocket hole system
- square
- level
- safety glasses
- face mask (for dust)
- ear protection
HOW TO MEASURE FOR A SLIDING BARN DOOR
The first step is determining the size of your barn door. You need to decide if you want a single barn door or a double. This tutorial is about building a double barn door, but the concept is the same.
Measure the size of the opening. Mine was 47.5″ wide.
TIP: Measure the top, middle, and bottom because they could be different. Then, use the smallest measurement.
Next, add 2″ to the width measurement of your opening.
This step is something I wish I would have done. It will give your door an overhang, and believe me, you will need it because a sliding door is different from a regular door. You don’t want it to fit inside the opening; you want it to overlap the opening.
To determine the height of the door, you first need to purchase the sliding door hardware. Then, check the measuring instructions from the manufacturer to calculate the height of your door.
SIDE NOTE: I didn’t do this, and my door is shorter then I would have liked, so please check your hardware instructions.
CREATE THE BARN DOOR PLANS
Before you build your sliding doors, you need to create your plan.
I’ve created detailed plans and here is the link to purchase them.

If you want a different size of door or doors, you can adjust the size of the plans according to your measurements from before.
BUILD YOUR SLIDING DOORS
To help you see the steps of building these barn doors, I have created a video of the whole process.

And here is the breakdown of how to build these doors.
STEP 1: CREATE THE SIDES
Take four 2″ x 6″ boards and cut them to the length of your door.

Next, mark the side of each board for where the dados will be placed to insert the glass and shiplap. Remember, this tutorial is for two doors, which means there are four sides between the two.
The start and end of each dado will be where a panel is placed later.
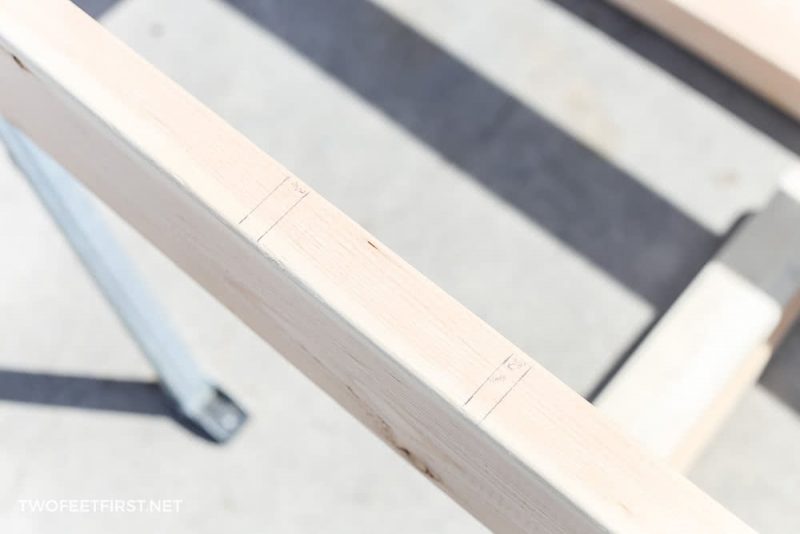
The top and bottom dados will start/end 5″ from the edge and centered on the board. This is 1/2″ less than the actual board size to allow for the dados on the panels. Place a mark on one side of each board 5″ from both ends.
The top dado will be 1/4″ wide and 1/2″ deep by 20″ in length. Place another centered mark 25″ from the end of the board. Then, write 1/4″ somewhere in this section to remember the size.
After this mark, there will be a space of 4-1/2″ before the start of the bottom dado. Place a mark 4-1/2″ from the last mark that is centered on the board to give you your starting mark for your bottom dado.
The bottom dado will be 1/2″ wide and 1/2″ deep, and the length will be between the two previous measurements.
Make sure you mark each board.
TIP: Place the board next to each other and mark them all at the same time using a square.
Now, you will cut out the dados.
Take your drill with a 1/4″ bit (have a 1/2″ on hand) and drill a 1/2″ deep hole onto the top mark at each board. This is where your 1/4″ dado will be.
Then, take a 1/2″ bit and drill a 1/2″ hole at the top mark for where the 1/2″ dado will be on each board.
These holes will allow you to insert the router bit into the wood to start your dado.

Use your router with an edge guard attached to create your 1/4″ dados and 1/2″ dados within your marks on each board. Make sure that the edge guard is positioned so that the dado will be in the middle of the board.

TIP: Cut all of the same size dados first before cutting the others.
STEP 2: CREATE THE PANELS
Now it’s time to create the panels that make up the middle of the doors.
These panels will also need dados, so let’s mark the boards for these. Since I am using a hand router to create my dados, I will not be cutting the boards yet because it’s difficult to start a straight dado at an edge. I have found that I need about two inches in from an edge to get a straight groove.
This tutorial will also follow this method, but if you have a table saw or router table to create your dados, you can cut your pieces first.
Start by creating your marks on the side of a 2″ x6″ board for each panel. Measure from one edge place a mark at each of these measurements: 2″, 16″, 17″, 31″, 32″, 46″, 47″, 61″, 62″, 76″, 77″, 91″.
These measurements will be where a panel will start and end, so it will be your cut line later.
Now, label each section, the first two sections (edge to 31″) label “middle panel”, the next two (32″ to 61″) label “top panel”, the last two (62″ to 91″) label “bottom panel”.
Take your drill with a 1/2″ bit and drill a hole at the 62″ mark 1/2″ deep. Make sure this mark is centered on the board before drilling.
Use your router with an edge guard attached, create your 1/4″ dados from the edge of the board to where the last top panels ends (61″). Remember, the dados need to be in the middle of the board!
TIP #1: Use the dados from the side pieces as your guide.
TIP #2: Go past the mark about a 1/2″ to make sure you have no rounded edges once the board is cut to size.
Then, create the 1/2″ dados in the bottom panels.
After, flip the board over to the other side and create a 1/2″ dado in the middle panels (edge to 31″). The middle panels hold both the glass and shiplap insets, so they need both 1/4″ and 1/2″ dados.
TIP: I would recommend completing step 1 and step 2 at the same time so you do not have to reset your router more than needed.
Now that all the dados are created, cut the board at the marked lines. Make sure you are cutting on the right side of the line to allow each board to be exact 14″; a saw blade removes 1/8″ with each cut.
STEP 3: CREATE POCKETS IN THE PANELS
Next, take each panel (top, middle, and bottom) and add pocket holes to the 6″ side of the board on the ends.
There will be four per panel, so a total of 24 pockets because you have six panels total (three per door).
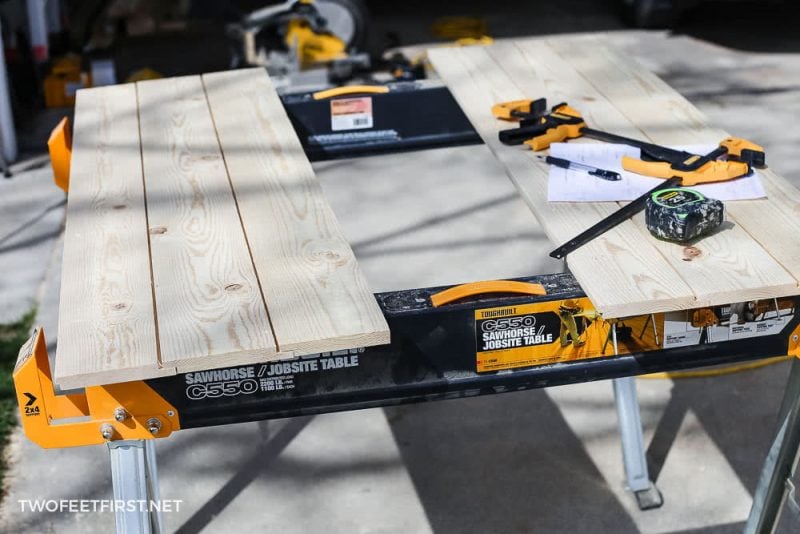
STEP 4: CUT THE SHIPLAP AND GLASS
Have the glass cut to size at your local hardware store or glass store. The glass should be cut to 15″ x 20″.
Unlike the glass, you will need to cut the shiplap yourself. The length and the width will both need to be cut to fit inside the dados.
To determine the length for the shiplap boards, take the height of the door and subtract 34.5″ (panels and glass with the inset). Cut the shiplap to this measurement six times so that you will have three per door.
Now, take three boards and place them together; you may need to flip a board to have the correct grooves together.
Then, measure the width of the three boards together – it will be probably 16.5″. These boards need to be 15″ together, so you will need to cut the two side pieces to make it this measurement.
If the boards are 16.5″, you would subtract 15″, giving you 1.5″. This then needs to be divided into two for each end, 3/4″. You would then remove 3/4″ from one side of the end shiplap pieces.
TIP: I recommend cutting an extra 1/8″ from only one board, 7/8″, to allow the boards to fit inside the dados without issue.
Use a table saw or jigsaw with a guild to cut the sides of four shiplap pieces.
STEP 5: SAND THE PIECES
Now that you have everything cut, use an orbital sander to make the wood smooth.
I like to use #220 grit sandpaper and I decided to only lightly sand the shiplap because I liked the rough look.
Once every board is sanded, wipe off any dust by using a cloth.
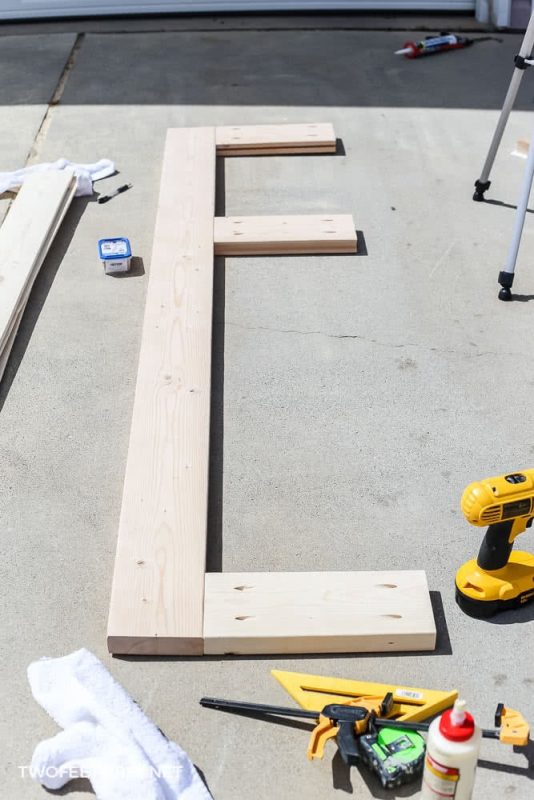
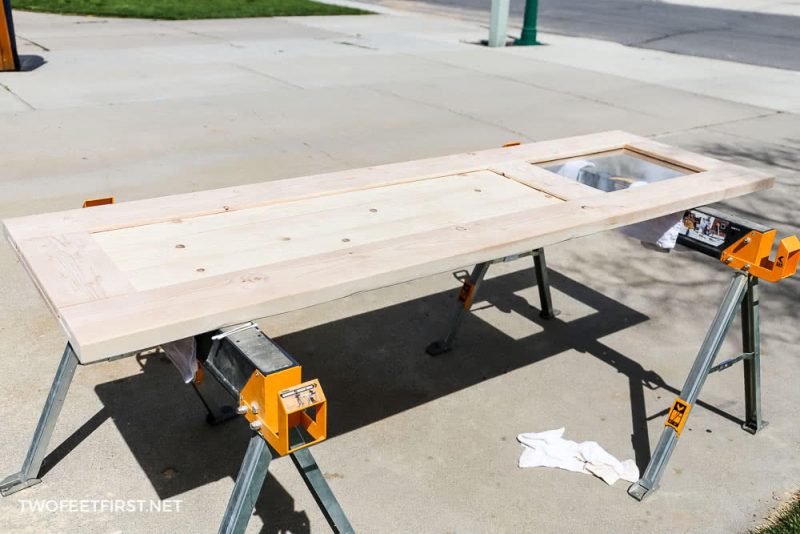
STEP 6: ASSEMBLE THE DOORS
To assemble the doors, you will start with one side piece, then work your way over to the other side piece.

Place one side board on a flat surface, with the backside facing up.
Position one of the top panels at the top of the side piece, making sure the pocket holes are facing up, and that the dado is facing the other 1/4″ dado.
Glue the side of the top panel, making it flush and square to the side board; then, clamp the two together. Now, use the 2-1/2″ screws to attach the pieces.
Measure 24.5″ from the edge of the side board and make a mark close to the side where the middle panel will be placed. This mark will be where the top of the middle panel will be placed.

Now, position one of the middle panels at this mark. Remember, the top of the panel will be at this mark, plus the 1/4″ dado facing the other 1/4″ dado. Also, make sure the pocket holes will be facing up.
Glue the side of the middle panel, make it flush and square to the side board then clamp them together. Now, use the 2-1/2″ screws to attach the pieces.
Next, position one of the bottom panels at the bottom of the side board. Make sure the pocket holes are facing up and that the dado is facing the other 1/2″ dado.
Glue the side of the bottom panel; make it flush and square to the side board; then, clamp them together. Now, use the 2-1/2″ screws to attach the pieces.
Now, place glue inside the 1/2″ dados (middle panel, side board, and bottom panel).
Insert the one cut end of the shiplap into the grooves; then, insert the uncut one and finish by adding the last piece with the cut side face out.
Next, place clear caulk or silicone inside the 1/4″ dados (top panel, side board, and middle panel).
Insert the glass carefully into the grooves (it’s a good idea to wear gloves for this).
SIDE NOTE: Please be careful with the glass, or it will break. I had one break on me because the wind blew my door over while I was inserting it.
Now, position the other side board along with the door. Make sure the dados are facing the right way.
Glue the side of the top, middle, and bottom panel plus inside the 1/2″ dado on the side board. Also, place the clear adhesive (caulk or silicone) inside the 1/4″ dado.
Then, make the side board flush and insert the glass and shiplap into the groves. Make sure everything is still flush and square before clamping the pieces together (at the top, middle, and bottom panels. Then, use the 2-1/2″ screws to attach the pieces together.
Next, glue the pocket plugs into place, wherever a pocket hole is.
Complete this process to assemble the other door the same way. Then, allow the doors to sit for 24 hours (allow the glue time to cure fully).
SIDE NOTE: You will want to re-sand the areas where the glue is added (after the glue dries) to remove any residue, or your finish may not look as smooth as you want.
STEP 7: CREATE A TRACK GROOVE
After the doors have dried, you need to cut a groove in the bottom of each door to allow the door to slide along a track (also known as a guide). This will help the door from swinging out at the bottom when being moved.
This track piece should be in your sliding door hardware, but if you’re like me and don’t want to drill a hole in your floor, you can purchase a sliding door guide that is placed on the wall/baseboard.

Create the groove by using a router with a bit large enough for your track. I used 1/4″. Use the edge guide attached to the router to center the groove in the middle of the door.

Then, cut a groove at the depth you need for your track across the whole bottom of the door (mine was 1/2” but yours could be different).
STEP 8: APPLY A FINISH
Now that your doors are fully assembled, it’s time to apply a finish.
You could use a stain with a protective coat, just the protective varnish, or paint.
I decided to stain our doors with Minwax Provincial and applied tung oil as our protective coat.

STEP 9: INSTALL THE DOORS
Use your sliding door hardware instructions to install your doors into the space but you will probably need to add additional trim at the top of the opening for the hardware to attach too.

I hope this tutorial will help you create your own double sliding doors that have a glass insert. Remember to take your time and be safe.
DIY Barn Door
Building a barn door can add privacy and style to any room of the house. Learn how to make a DIY barn door that has a glass window at an affordable price.
Materials
- (5) 2" x 6" wood board
- (3) 1" x 6" shiplap boards
- (2) 15" x 20" glass (cut to 15")
- 2.5" wood screws
- stain (optional)
- 100% Tung oil (protective finish)
- #220 grit sandpaper
- wood glue
- clear caulk or silicone
- wood plugs
- sliding door hardware
- door handles
- latch (optional)
- painters tape and paper (optional)
Tools
- miter saw
- drill
- sawhorses (optional)
- Tape measure
- router
- clamps
- Kreg K5 pocket hole system
- square
- level
- safety glasses
- face mask (for dust)
- ear protection
Instructions
- Cut four 2"x6" boards to the size of the door.
- Cut a 1/4" dado and 1/2" dado into each 2" side of the boards to allow for the shiplap and glass to be inserted.
- Create more dados in the last 2"x6" board for the door panels.
- Cut the panels to 14" (six total) and add pocket holes to each.
- Cut the shiplap to length and cut sides so that the pieces are 15" when placed together.
- Sand all the wood pieces.
- Assemble the door by placing one side board then attaching the panel pieces to that board. Then insert the shiplap and glass into the grooves. After attach the other side board to finish the door.
- Create a groove at the bottom of the door to allow the door guide to slide along the door.
- Apply a finish onto the wood.
- Install the doors according to the instructions in your sliding door hardware.


Wow! These are amazing barn doors!
The barn door turned out awesome!! Such a great idea to make it with a window. I really love it.