Installing an over-the-range microwave is a must if you want more space in your kitchen. Find out how we did it ourselves and transformed our whole kitchen in the process!
Once you’ve equipped your kitchen with every appliance and gadget you could possibly want, you look around and realize something.
There’s no space to do any actual cooking!
That was our problem. Everything on the countertop was essential but we were running out of room to prep for daily meals.
So we decided to find a permanent solution by installing an over-the-range microwave.
This would clear off the countertop without taking up precious space elsewhere and it was something we could do ourselves.

BUT we had a huge challenge to overcome first!
Keep in mind that an over-the-range microwave requires cabinets or at least an upper cabinet (for support reasons) to install. The top of the microwave attaches to the upper cabinet and it has a metal bracket that secures the bottom of the microwave to the wall.
Take a look at our space before – see our lonely stove in the corner?

That’s right, no cabinets. So, before we could even move the microwave, I had to build cabinets to accommodate it.
This post will give you an overview of how to build those necessary cabinets but if you already have cabinets, you can skip ahead to the installation at the end.
Please note that you will need to buy an over-the-range microwave – you won’t be able to attach your old countertop microwave. Once you find the right microwave for you, read the installation instructions before you start so you have a good idea of what space is needed. Normal microwaves need a 30″ opening but check your space as well!
BUILDING THE CABINETS
We decided to add four additional cabinets to this space: one next to the stove and three above. This is the process I used to create the frame of the cabinets.
SIDE NOTE: I was trying to match the frame build to my other cabinets (original to the home)
Disclosure: This post contains some affiliate links or referral links for your convenience. It is a way for this site to earn advertising commissions by advertising or linking to specific products and/or services. Click here to read my full disclosure policy.
MATERIALS:
- 3/4″ plywood
- 1″x2″ trim
- 1-1/4″ screws (I used the Kreg kind)
- 1-1/4″ finishing nails
- microwave
TOOLS:
- Kreg Jig K5 (or another style)
- circular saw w/rip-cut (because I don’t have a table saw)
- drill
- jigsaw
- clamps
- nail gun (18-gauge)
- safety glasses
- face mask (for dust)
- ear protection
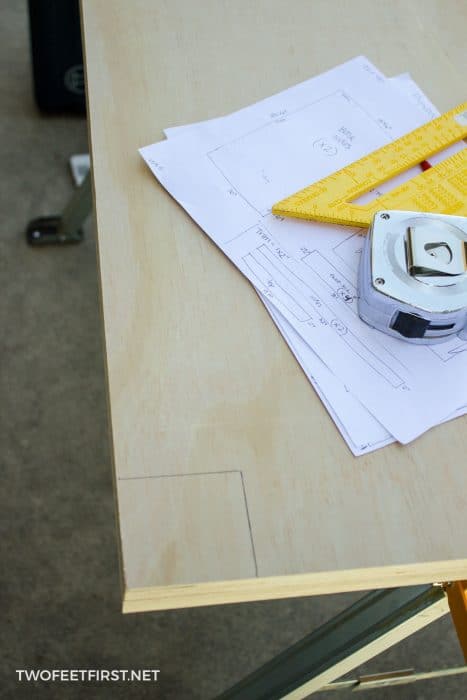
I will not be sharing the measurements of this build because the cabinets are small and they are made to match my other cabinets. But all the side cabinets are 9-1/2″ wide and I wanted to share the process I used because it worked so well!
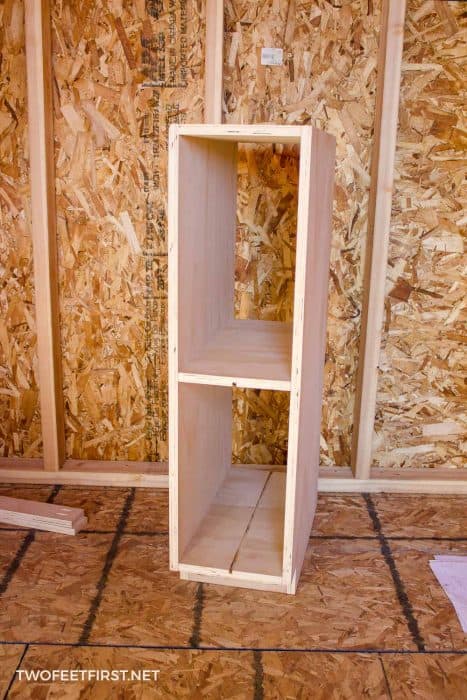
I first cut all the plywood I needed to build the frame – this included the sides, bottom shelf and additional shelves, bracing for the bottom, and bracing for top & back. See images below of the finished cabinet for examples or head over to Ann White’s tutorial of building kitchen cabinets.
After, I used the Jigsaw to cut a square from the side pieces. I decided to cut a 2-3/4″ x 2-3/4″ piece.
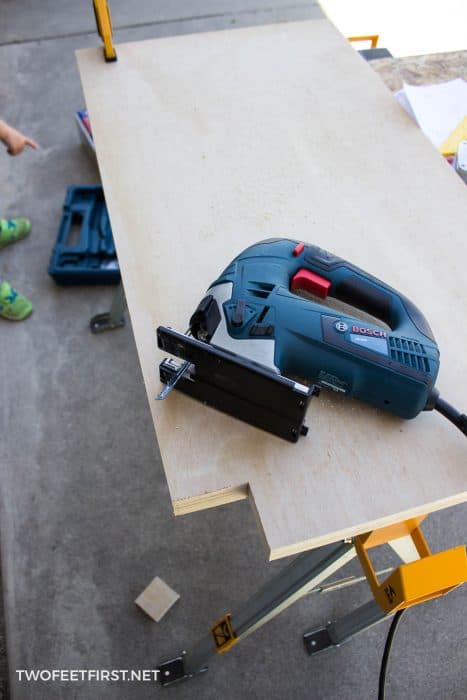
TIP: Cut one side, then clamp the other side piece to the cut side, using this as your guide. Or cut both at the same time! This will make the cut exactly the same on both boards.
Next, I used my Kreg Jig to create pockets to attach the boards together later.

SIDE NOTE: There is a great cabinet making tutorial is found on Houseful of Handmade website!
Finally, I sanded all the boards and started putting the pieces together.

TIP: A great tool to help get into hard-to-drill places is a 90-degree adapter.
And those are the steps I used to assemble the cabinet frames.
SIDE NOTE: When my old cabinets were built, they made the frame, attached it to the wall, then added the trim to all the frames. Most cabinets now have the trim added before installation.
Because I am matching these to my existing cabinets, the trim will be added after installing the cabinets.
After all the cabinets are assembled, I caulked all the inside seams and primed/painted the inside of the cabinet white plus added polycrylic (a clear finish). You can also leave the wood natural if you would like.
TIP: Using a paint sprayer will save you time!
SIDE NOTE: I painted the trim boards at the same time to speed up the process.
Once the cabinet frames were dry, I mounted them to the wall.

Then, I installed the trim. I used the same method as when I built my master closet system. After, there were a few finishing touches: filling in holes, caulking, priming just those areas and painting those areas as well (plus adding Polycrylic).

When everything had dried, I was ready to install the microwave.
Remember to read the instructions that come with your microwave. Sorry but I have no pictures of the process because this was a two-person job.
But let me explain the process:
INSTALLING AN OVER-THE-RANGE MICROWAVE
The microwave we installed had a metal plate for the bottom of the microwave. It attaches to the wall and has lips that the microwave sits on.
SIDE NOTE: The microwave we have is the Whirlpool 1.7 cu. ft. in Stainless Steel.
You will need to drill holes in the cabinet above the microwave spot. One is for the outlet cord and there are two smaller ones to attach the microwave to the cabinet. Your instructions should tell you where each hole needs to be placed.
SIDE NOTE: Ours came with a template to make it easier!
After the holes are drilled and the metal plate is attached to the wall, you can install the microwave into the space.
Once it’s sitting on the metal plate, run the cord through the pre-drilled hole before putting it into place. Then, attach the microwave to the top cabinet with the screws.
Plug in the cord and your microwave should be in business (make sure to remove all plastic wrapping inside before testing).

IMPORTANT UPDATE: Before we built the cabinets, the recommended distance from the stove to the microwave bottom seemed too small to me so we decided to have ours higher (22-1/2″). But now, I would have to say the better height would be around 20″; ours is a little high for me to reach and I am 5’4″.
Well, I hope this post will inspire you to finally move that microwave off the countertop because I am loving the extra space!