Adding An Electrical Breaker
This post may contain affiliate links. Please read our disclosure policy.
Something that we have managed to get away without for years was a freezer, we have been using my parents but that’s an hour away. And if you did not know you can save money if you buy things in bulk and when they are on sale. For example, we buy our chicken by the case (that’s 40 lbs) then I put it into freezer bags and freeze them. Or another thing my family does is getting a whole beef cut the way they want (this saves money and you get better beef). But for both of these, you need a freezer…
Disclosure: This post contains some affiliate links for your convenience, click here to read my full disclosure policy.
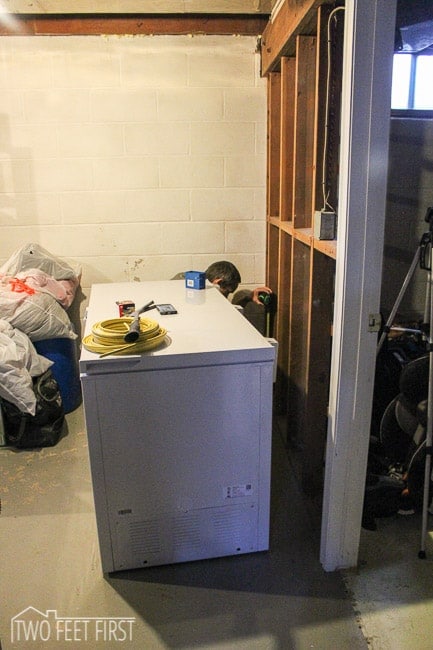
Anyways we decided it was time to buy a freezer. After looking at our choices we decided on the GE Chest freezer, here (they also have a smaller one that we were debating on but decided on the bigger one, smaller one is here).
But here was our problem we wanted to have the freezer in our storage room in the basement and there was NO outlets in this room, meaning we could not plug the freezer in. So we needed to add an outlet. Now remember our basement electrical has problems (OK our house does…), everything in the basement is on one breaker. We can not run the dryer and space heater at the same time. Because of this problem we needed to install a new breaker. This way we are not tripping the breaker every time I do the wash, it would give me a reason not to do it through…
**Please note that we are not electricians and you should beware that there is danger in doing this project. Make sure you follow all the code in your area. **
Supplies Needed:
– wire (we used 12-2, here)
– breaker (make sure you get the right type for your breaker box)
– clamp connector (your breaker box could be different)
– staples
– outlet
– outlet box
– outlet cover
Tools:
– wire stripper
– voltage tester (loved this one!!)
– flat head screwdriver
– philips screwdriver
– hammer
– flashlight
This is NOT a tutorial on how to install a breaker, I will just be sharing the process on how we did it and the questions we ran into that got answered during the process.
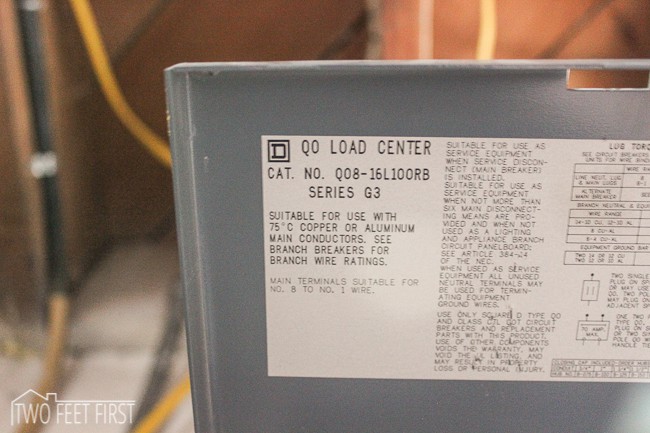
One questions that we had was, what wire do we use??? We found that there are 2 types of wires that are commonly used to wire a house. A 12-2 wire and a 14-2 wire, the difference is that the 12-2 uses a 20 amp breaker (can have more watts) and 14-2 uses a 15 amp breaker, see more here. So decide on what amps you need, we decided to use the 12-2 wire (yellow wire), because we were installing a freezer and wanted a 20 amp breaker. And because we are talking about breakers, how do you know what kind to buy??? What there is more than just 15 & 20 amps? Yes and we found this out after we were trying to install the breaker because it would not fit in our breaker box. So before you go to the store check your breaker box and see what type it is. It will say the type on the inside of your breaker box, see ours is the QO type.
Another thing that depends on your amps is your outlet, so make sure you buy the right one. After we purchased our supplies, we were ready to get started. FIRST THING FIRST, turn OFF the power to the breaker box!!! We have three breaker boxes, so our main power coming into the house is in a different breaker box. Meaning NO wires in our box had any power on. But your breaker box could be different, use the voltage tester tool to check yours, the nice thing about this tool is that you can touch the black wire anywhere, not where it is connecting to the box. After this project, I really like the idea of having your main power shut off in its own breaker box. Now back to the install process.
First we added our outlet box in the location we wanted using a hammer (see video below). Then we decided to pull the wire from the outlet box to the breaker box. We also decided to run the wire by the old wires to make the install easier. We made sure to leave extra wire at both ends and used staples to hold the wire in place.
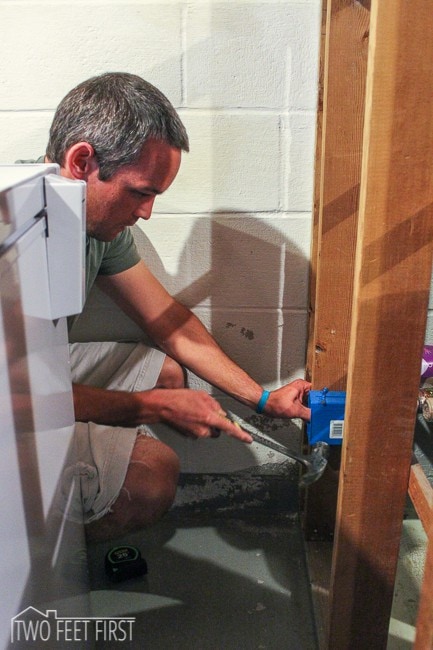
After the wire was ran, we added the outlet to the outlet box. When doing this make sure that the loop in the wire is going the same direction as the screw tightens, a wire stripper makes this process easier. And the black wire goes to the brass screw, white wire goes to the silver screw, and the copper (ground) wire goes to the green screw. Next we placed the outlet into the box and installed the cover. Here is the video we used for this step was found here.
At the breaker box, we removed the metal tabs from the cover (for the new breaker) and at the bottom of the breaker (for the new wire to come in). To do this, we used a flat head screwdriver and lightly hammered at the dents. After the tabs were removed, we took the clamp and installed it to the bottom of the breaker box (it screws on like a bolt with a nut). Then we ran the wire through the clamp (giving enough wire to attach to the breaker) and clamped the wire into position.

Next we installed the wires, (remember we are not electricians), to do this we prepped the wire the same way we did for the outlet. Here is the video we used to install the wires to the breaker box, found here.
Here is also another video about install a breaker box, here.
After installing the new breaker and wires, we turned power back on, making sure we were looking away from the box and standing as far as possible (and you should be wearing shoes and probably some gloves, to make sure you do not get electrocuted). Then we tested our connection of the new wire with the voltage tester tool, please be careful doing this!!! Our connection was good, so we carefully put the cover back onto the breaker.

That was the process we used to install a new breaker to the breaker box. And now we have this lovely freezer that I am working on filling up… Anyone else need a freezer? Or need to add a breaker to a breaker box?