Are you embarrassed by how outdated your front porch looks? You don’t have to settle for a worn-out welcome everytime you come home.
It’s time to remove the frustration and give your porch a modern makeover!
With the right materials and techniques, you can add an elegant and refined architectural design to your front porch, like a lofty roof and stately porch columns.
In this post, we’ll update your home’s curb appeal by learning how to wrap porch columns.

Disclosure: This post contains some affiliate links or referral links for your convenience. It is a way for this site to earn advertising commissions by advertising or linking to specific products and/or services. Click here to read my full disclosure policy.
HOW TO WRAP PORCH COLUMNS
Materials
- 1″x4″ exterior trim
- 1″x6″ exterior trim
- 3/8”x3-1/8″x5″ spacers
- 2-3/8″ exterior galvanized ring shank nail
- white caulk
- exterior paint
Tools
- framing nail gun
- air compressor
- level
- clamps
- ladder
- miter saw
- Pencil
- safety glasses
- face mask (for dust)
- ear protection
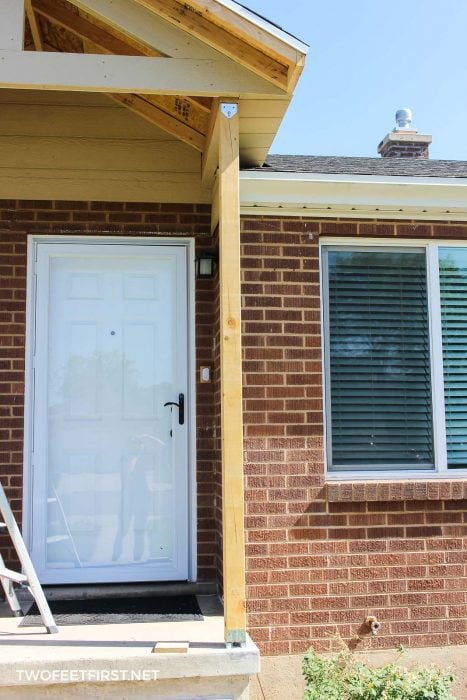
Believe it or not, this porch was not there originally. That’s right – we added a brand-new front porch to an existing house. And if you are wondering about the process, visit the article about how we added a front porch.
Here’s what our home looked like before.

Before we begin, pay attention to how close to the concrete your trim should be. If you wanted to, you could take the trim all the way to the concrete. But then, if water happened to get under the trim, it would sit directly on the trim, and that could ruin it over time.
What I suggest is leaving a gap of about 1/2″-1″ from the end of the trim that wraps around the post to the concrete.
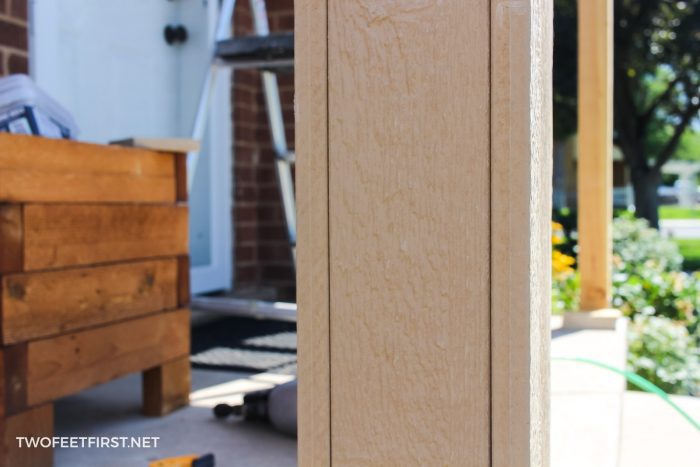
Also note that I am wrapping 4×4 wooden posts.
The sides to wrap first are the left and right sides of the post when you are facing the porch. These sides will have the 4″ trim boards; the front and back will have the 6″ boards. Measure the post (from concrete to top of post) and subtract 1/2″-1″ for a gap.
TIP: You will want to measure each side of the post because the measurements could be different.
Then, cut the 4″ boards and 6″ boards to these measurements. If you need to, use a jigsaw to cut notches.
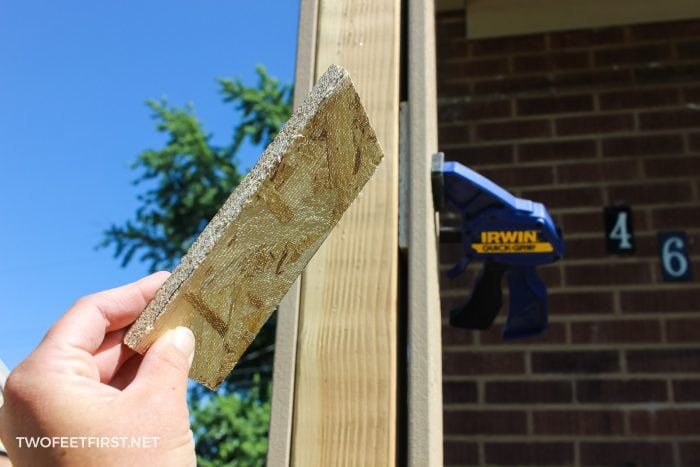
Next, clamp the 4″ boards into place on one post. Check the fit of the 6″ board on the open side. Your 6″ board will most likely be too big for the post. So measure the overhang, mine was 3/8″ which is the same size as the panel I used on the other parts of the porch.
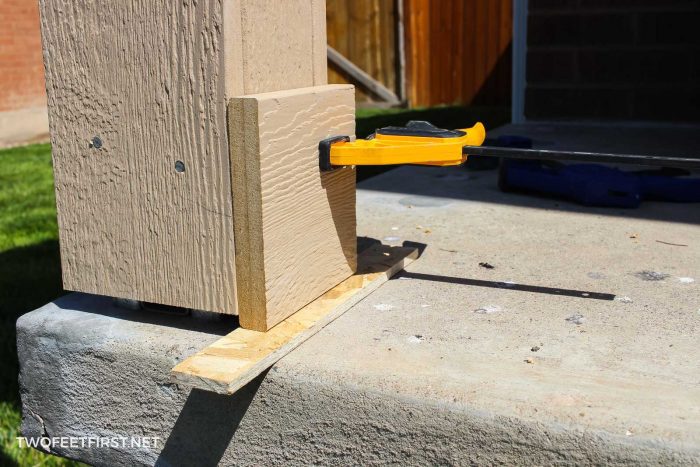
Cut 5 spacer pieces at about 3-1/8″x5″ for one post. I needed 10 spacers for my porch.
Place these spacer pieces against one side of the post – remember the 4″ boards are already clamped into place. Unclamp the top clamp and insert one piece; then, reclamp. Unclamp the bottom and place the other 4 pieces.
TIP: Locate the center of the board before you start so you can make sure a piece is placed there.
SIDE NOTE: I placed my spacer pieces toward the inside of the porch so that I would not throw off the spacing of the post to the edge of the concrete.
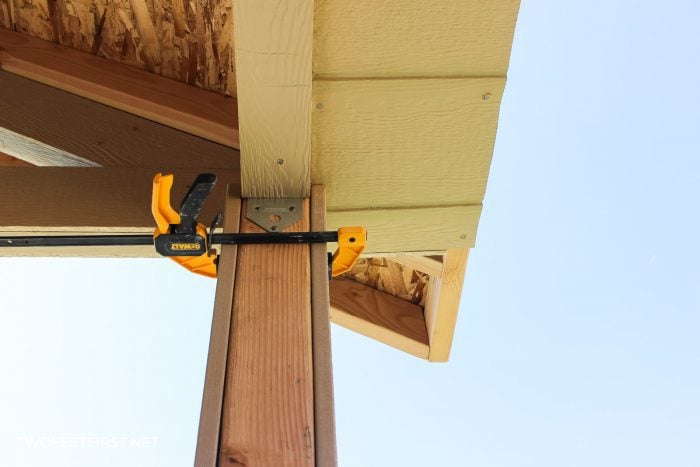
Make sure the 4″ boards are flush at the top of the post before nailing into place with the 2-3/8″ nails. Also, check that the nails are placed wherever a 3/8″ spacer piece is placed.

After, clamp the 6″ boards, making sure they are flush at the top; then, nail them into place. Do this for all posts.
TIP: Remember to avoid nailing into the metal base that is holding the post into place. It’s a good idea to make sure where it is!
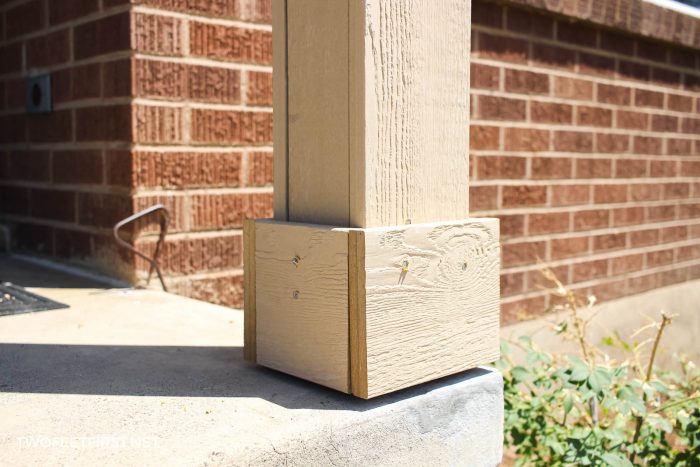
Now it’s time to add a trim piece to the bottom of the wrapped post – let’s call this the baseboard. The baseboard will be cut from the 6″ trim board. For one post, cut a piece for the left and right of the post (it will be about 5″).
Before placing these pieces, grab a 1/4″ or 3/8″ piece of scrap board. This scrap board will be used to prevent the baseboard from sitting directly on the concrete. I decided to use 3/8″ because it’s what I had on hand.
Place the 3/8″ (or 1/4″) board on the concrete; then, clamp the baseboard into place. Remember the edges will be flush.
Nail the baseboard into place; then, move to the other side and install the other baseboard the same way. Also, measure for the front and back baseboard.
Install these the same way as the sides. Add the baseboards to any other posts the same way.
And now the porch columns are completely wrapped in trim! Next, is painting the trim to protect it from the elements. I share that whole process in my article about adding the front porch to my house.
To help you see the process of wrapping the porch columns, I also made a video of me installing the trim to the post.

I hope this tutorial will help you finally update your outdated porch into something you can truly LOVE by wrapping the porch columns. No more being embarrassed!