A step-by-step tutorial on how to build simple pull out shelves for kitchen cabinets.
The moment you’ve dreaded is finally here. It’s time to prepare dinner for the family.
But why is it such a frustrating time in the day? Surely, mopping up spilled orange juice and scrubbing your toddler’s handprints from the walls earlier topped your list of stressful moments…
No, it’s definitely making dinner.
And if we think about why, picture all the steps you make around your kitchen. Half of them are totally unnecessary.
You spend many wasted minutes looking for 5 different items that you stored away but can’t find now that you need them.
Sound familiar?
What if you took some time to organize them all in one area? And are you tired of trying to reach that item from the back of your kitchen cabinet?
I am going to share with you how to convert kitchen cabinets to drawers by building pull out shelves.

Disclosure: This post contains some affiliate links or referral links for your convenience. It is a way for this site to earn advertising commissions by advertising or linking to specific products and/or services. Click here to read my full disclosure policy.
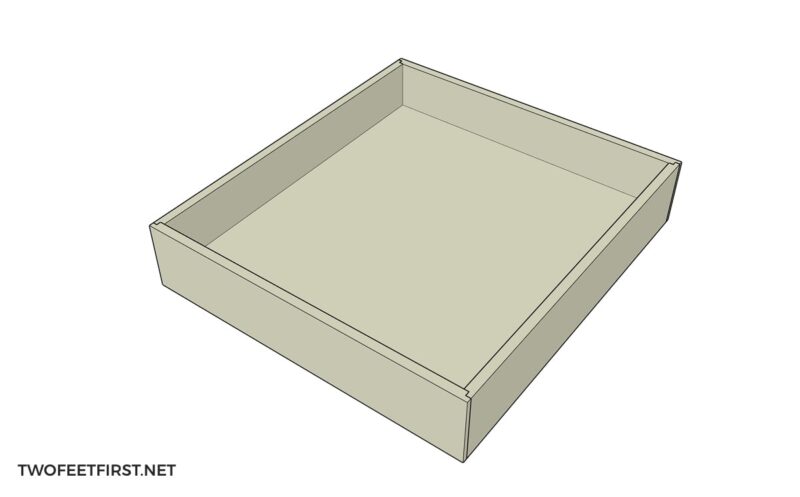
Pull Out Shelves for Kitchen Cabinets
MATERIALS:
- ½” cabinet grade plywood
- 1-¼” brad nails
- Wood glue
- Drawer sliders (I like to use Blum)
- #220 grit sandpaper
- Wood file
TOOLS:
- Table saw
- Nail gun w/air compressor, if needed
- Orbital sander
- Clamps
- Jig saw (depends on your drawer slides)
- safety glasses
- face mask (for dust)
- ear protection
SIDE NOTE: There are many ways to build pull out shelves. I have a few other articles about building drawers if you are looking for something different:
Step 1: Determine the size of the pull out shelf
Cabinets have standard sizes but to make sure the pull out shelf fits into your kitchen cabinet, you need to measure the size of the cabinet.
Using your tape measure and a piece of paper, note how wide, deep and tall the cabinet is inside.
SIDE NOTE: To determine the width of the drawer, measure the actual opening of the cabinet box since most cabinets are indented on the inside from the trim that sits on the box frame, Because of this indent, you will need to leave room on the sides of the cabinet box to allow the drawer to slide out of the cabinet without hitting the trim or door of the cabinet. I would recommend leaving ¼” on each side of the cabinet opening.
Step 2: Create your plan
Now that you have your dimensions of the cabinet, you can create your plan of the pull out shelf.
Here is a sketch of the pull out shelf so you can see the parts:
Length of the Shelf:
The length of the shelf will depend on how deep your cabinet is because it determines the size of your drawer slide. If your cabinet is between:
- 16-½”-18”, you will use a 15” Drawer slide.
- 19-½”-21”, you will use a 18” Drawer slide.
- 22-½”-24”, you will use a 21” Drawer slide.
Because this tutorial is using the Blum motion slides, the length of the shelf will be the length of the slide.
Width of the Shelf:
For the width of the shelf, you will take the width of the cabinet and subtract 1”. This is to allow the spacing needed for the slide. If you are using a different slide other than the Blum motion, determine the width of the slides you are using, take the width of the cabinet, add ½”, then subtract the width of the slides.
Height of the Shelf:
At this point, you will have the width and length of your shelf. Now you need to determine how tall you would like your shelf. The shelves in this tutorial are 4” tall.
Determine the size of the shelf bottom:
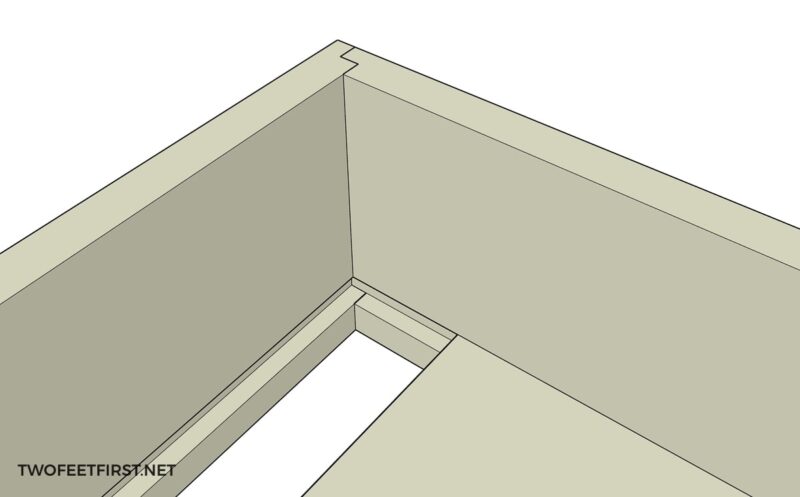
For these shelves, we are using ½” plywood so we will adjust some dimensions to have the base of the shelf sit inside the sides of the drawer.
We will be using a dado (groove on the inside of the sides) that is ¼” deep by ½” wide (to fit the ½” plywood) to hold the bottom of the shelf into place.
Therefore, the bottom of the shelf needs to be ½” smaller for the width and length than the dimensions of the shelf.
SIDE NOTE: If you do not want to use a dado to secure the bottom of the shelf to the sides, you can use pocket holes instead but you will need to make the width and length 1” smaller.
Use double rabbet joint to assemble the shelf:
You will notice in the sketch above that the pieces have grooves on the sides of the shelf to attach the pieces together. Here is how you can account for each of these with your measurements:
- For the width: subtract nothing from the width of the shelf.
- For the length: subtract 1/2” from the drawer length.
Use Pocket Holes instead of double rabbet joint:
In this tutorial, we are using a double rabbet joint to create our shelves but you can use pocket holes (Kreg Jig) to create your shelf instead.
When using pocket holes, you will need to adjust the length of the shelf by 1”. Thus, you will subtract 1” from the drawer length.
Create a cutting diagram:
At this point you will know what sizes of the plywood you will need for the shelf. I always recommend creating a cutting diagram to show you where to cut the wood.
SIDE NOTE: This will also tell you the amount of wood you need for the project.
Take the time now to create a layout of how to cut the ½” plywood with the least amount of waste.
TIP: I start by placing the largest piece (bottom of shelf) on the diagram, then work around that piece, until all the pieces fit in the diagram.
If you are looking for more assistance creating a cutting diagram or starting a project, you will want to look at my “Start a Project” Workbook”. This workbook breaks down the process I use every time I start a new project and how I create my cutting diagrams.
Step 3: Cut the wood
Now that you figured out how to cut the wood based on your diagram, it’s time to cut the plywood.
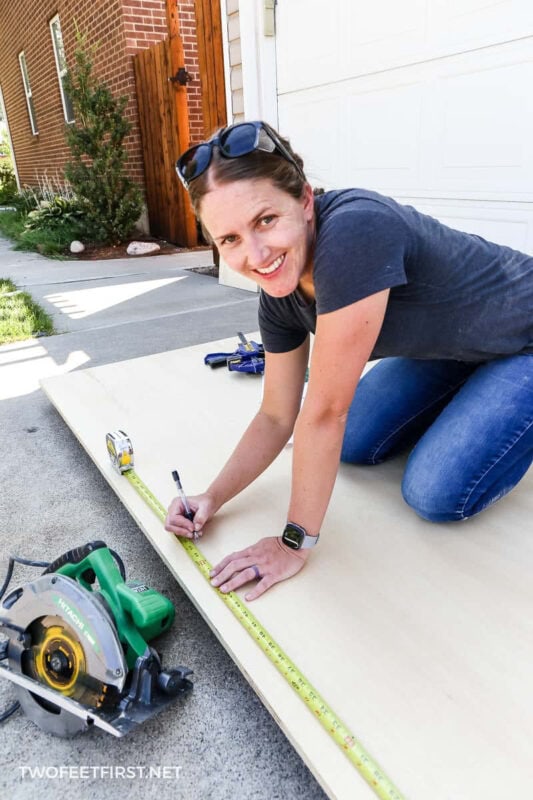
Use the cutting diagram to cut the plywood with a table saw or circular saw (using a rip-cut or something similar to give you straight cuts).
Step 4: Add the dado and double rabbet joint
After all the pieces are cut from the plywood, it’s time to add the dado and the double rabbet joint.
To create the dado, you can use a router or table saw (which I used).
SIDE NOTE: If you don’t want to use the dado or double rabbet joint, you will now add the pocket holes to the pieces.
You will need a ½” dado on each side piece of the shelf ½” from the bottom of the side pieces.
After the dados are added to the side pieces, add the double rabbet joint to the ends of each side piece. This joint will be ¼” in from the edge and ¼” in depth.

SIDE NOTE: If you are using a table saw to create this, make sure you leave a ⅛” of wood next to the fence. This is for your safety and to prevent any damage to your saw. You will use a chisel to remove this strip of wood after.
Step 5: Sand the wood
Now that all the wood is cut, pockets are added, and grooves are created, you are ready to sand all the wood.
Use #220 grit sandpaper with an orbital sander to sand the plywood smooth and remove any chance of future splinters.

To sand the grooves, use a #220 grit sheet of sandpaper and a scrap ½” plywood piece. Wrap the sheet of sandpaper around the plywood, then sand the grooves by moving the plywood wrapped in sandpaper back and forth along the groove.
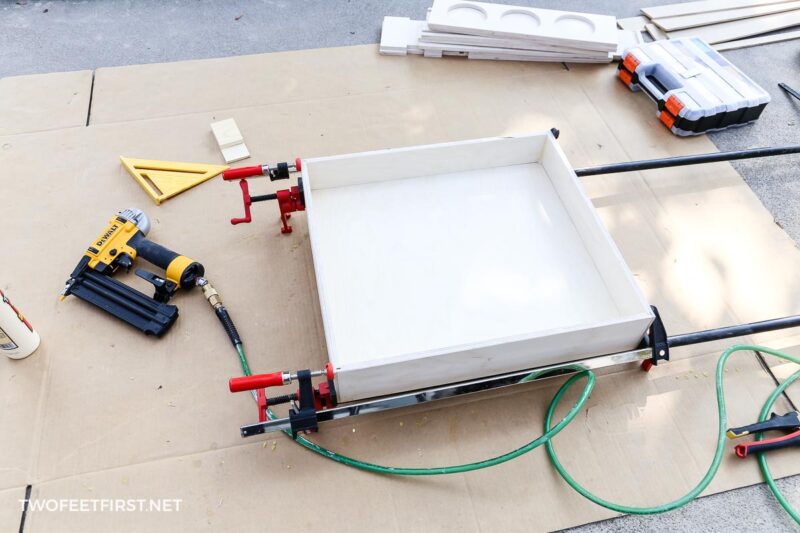
Step 6: Assemble the drawer
To assemble the drawer, place the front side piece on a flat surface.
Place the bottom piece of the drawer inside the dado of the side piece, making sure you have the correct sides aligned (front of the drawer).

Next, place one side piece of the drawer into place, followed by the other side piece.
Finally, place the back side piece into place. Make sure everything is aligned properly. If not, make any adjustments necessary to give you a proper fit of all pieces.
Now that you know everything fits together, you can secure the pieces with wood glue and nails.
Starting with the back side piece, lift the piece from the drawer bottom and apply wood glue onto the joint.
DO NOT add wood glue to the dado groove to any of the pieces. This is to allow the bottom piece to sit into place.
After the glue is added, place the piece back onto the bottom piece. Using 1-¼” nails, place two nails along the side pieces to secure the back piece to the side pieces.
SIDE NOTE: There will be two nails on each side of the back piece.
TIP: Make sure the nails are going in straight so they don’t poke through the plywood.
After, use a clamp to hold the pieces together until the wood glue dries.
SIDE NOTE: Use a cloth to wipe up any excess glue that might seep from the joints.
Now, rotate the box to place the top of the box facing up and repeat the same process.
Allow the drawer to sit for about 24 hours to allow the glue to fully cure.
Step 7: Cut back of drawer for drawer slide (this step is only for the Blum motion slider)
If you are using the Blum motion sliders, you will need to cut a notch from the back of the drawer box and drill a hole.
Follow the instructions from the manufacturer to create the correct notch and drill hole. You can also purchase a jig that makes it easy to cut these out.
But if you want, you can create your own jig to match the requirements. I got this idea from Shaun Boyd’s YouTube channel where he explains how to install the Blum drawer slides.
Step 8: Fill nail holes
After the box is assembled, fill in the nail holes with a wood filler.
Allow the filler to dry, then lightly sand the area with #220 grit sandpaper.
SIDE NOTE: You can also sand any excess glue, if needed.
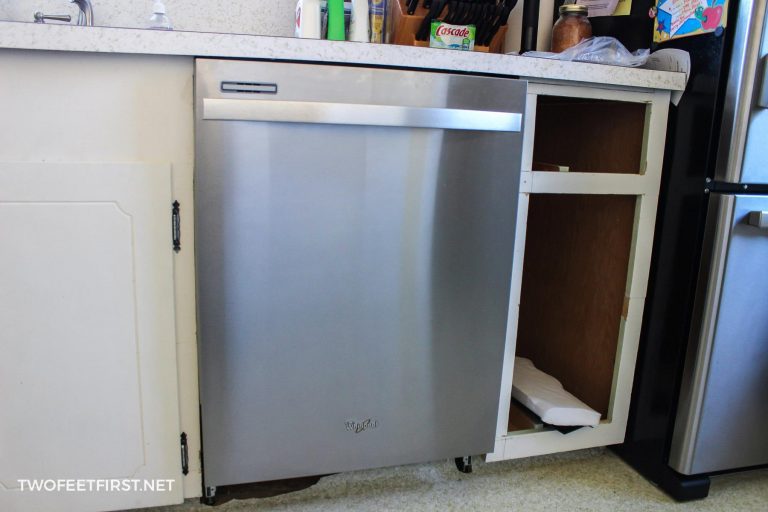
Step 9: Install the drawer into the kitchen cabinet
At this point, the drawer is completely built! Now, you are ready to install it into your kitchen cabinet.
Be sure to secure any wood pieces needed to remove the indent of the cabinet and allow the drawer to slide out from the cabinet smoothly.
After those are secured, install the drawer slides according to the manufacturer instructions. Then, attach the pull out shelf onto the slide.
Test to make sure the drawer works correctly.
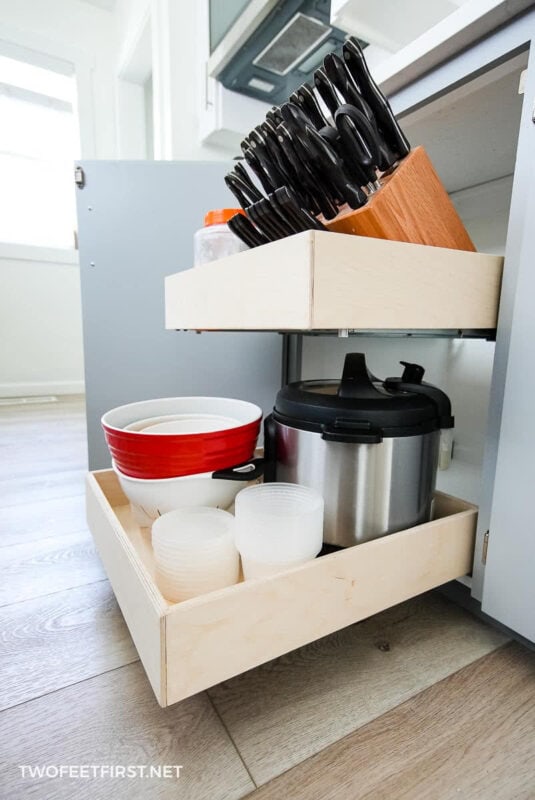
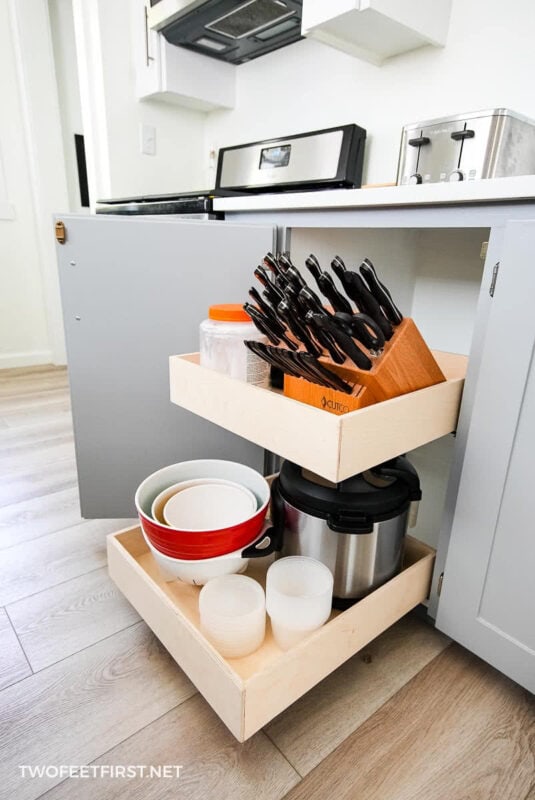
And now for the best part! Start placing your kitchen supplies onto the shelf.
I would suggest grouping similar items together, such as knives and other dinner prep tools. Now, when you are getting ready to cook, everything is just a few drawer pulls away!
FULL PROJECT VIDEO:
Are you someone that does better with visuals? Check out the full project video below and don’t forget to subscribe on YouTube so you don’t miss out on future projects!

I hope this tutorial will help you organize your kitchen cabinets and allow you to finally reach every part of the cabinet.