Follow these step-by-step instructions to build your own DIY pendant light. With only a few supplies, homeowners can make an affordable, unique pendant light that adds style and personality to any space.
Ready to elevate your home’s style with a touch of creativity? In this tutorial, we’ll walk you through the process of crafting your very own DIY pendant light. With our step-by-step instructions, you’ll be able to build a stylish and personalized light fixture for your kitchen. Let’s dive in and start assembling your unique pendant light!
Disclosure: This post contains some affiliate links or referral links for your convenience. It is a way for this site to earn advertising commissions by advertising or linking to specific products and/or services. Click here to read my full disclosure policy.
DIY Pendant Light
MATERIALS:
- Uno Threaded Keyless Lamp Socket:
- 3-1/4″ Shade Holder
- 12” Cone Shade w/3-1/4″ Neck
- 18” x 1/8ips Threaded Pipe
- Wire
- Straight Cylinder Threaded Coupling
- 1” Hollow Nipple
- Canopy
- 1” Steel Washer
- Slip Star Lock Washer
- Hex Head Nut
- Canopy Crossbar Kit (comes with crossbar, studs, and acorns nuts)
- Light bulb
TOOLS:
- Screwdriver
- Utility Knife
- Pliers
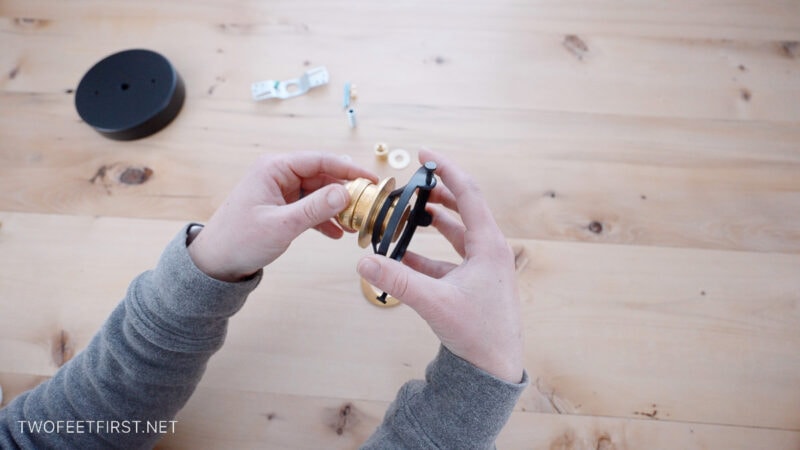
STEP 1: Begin the Assembly
First things first, start by threading the keyless lamp socket onto the shade holder.
Step 2: Attaching the Threaded Pipe
Let’s break down the socket a bit more.
Remove the top piece of the lamp socket.

Untighten the screw on the top part. This will allow you to attach the threaded pipe, which is 18 inches long.

Make sure to tighten the screw after attaching the pipe to secure it in place.

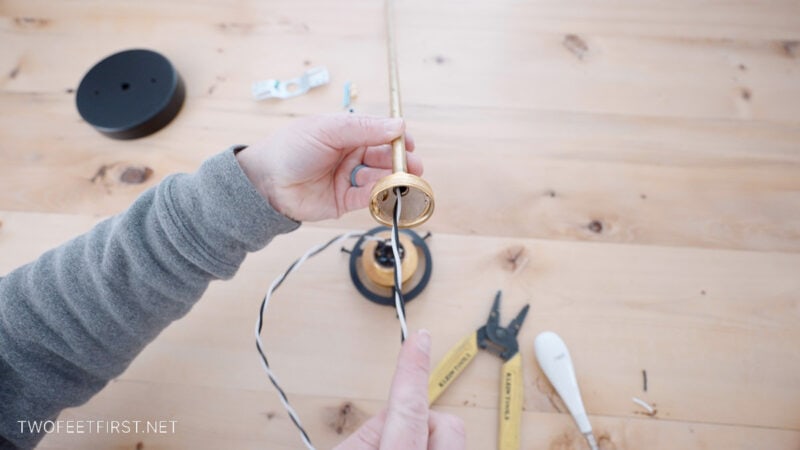
Step 3: Wiring the Socket
Remove the middle piece of the light socket – this is where you will attach the wires.
Using wire strippers, remove about three quarters to an inch of insulation from the wire ends.
This will expose the wires.
Twist the wires gently to prevent them from fraying.

Unscrew the screws on the socket.
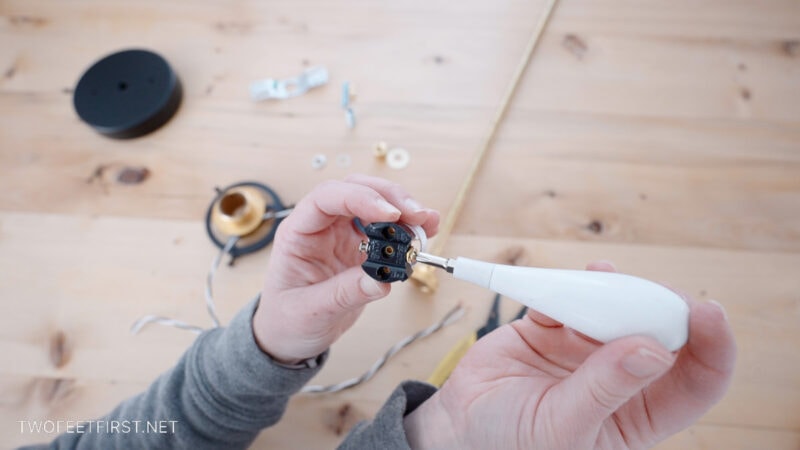
Hook the wires around the screws making sure the wires are hooking in the direction you will be turning the screws to tighten the wires to the socket.
Then tighten the screws.
SIDE NOTE: The specific wire placement does not matter for this type of light wiring.
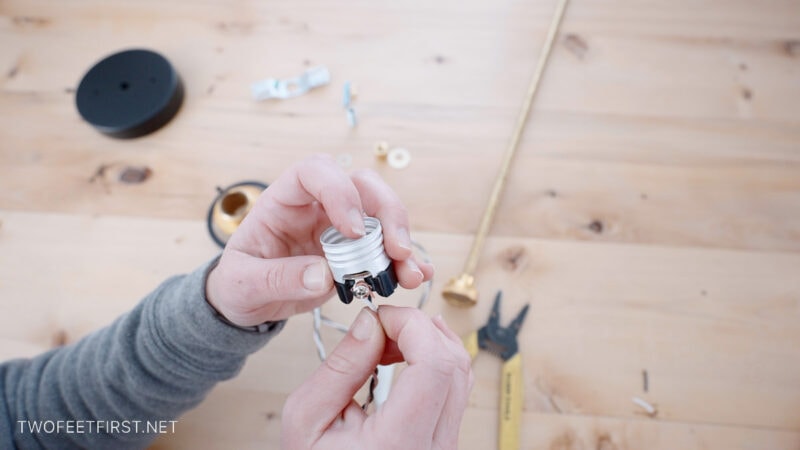
Step 4: Reassembling the Socket
After the wires are securely fastened, place the socket back into the main socket area.

Thread the wire through the top of the socket and the pipe.
Reattach the cap over the socket and tighten them together.

Step 5: Assembling the Light Components
Thread the wire through the straight cylinder coupling and tighten the coupling to the pipe.
Then, pass the wire through the hollow nipple and secure the nipple to the cylinder.
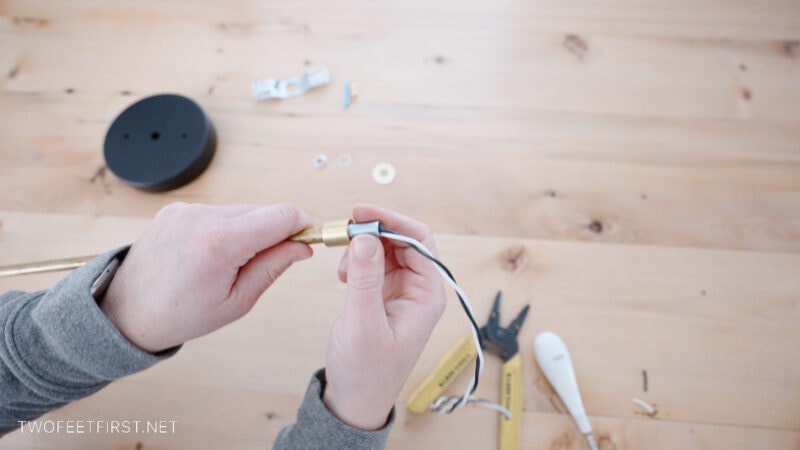
Thread the wire through the canopy and tighten the canopy into place using the washer, slip star lock, and hex nut.


Step 6: Mounting the Light
Using a crossbar kit, attach the light fixture to the ceiling.
Insert the still studs through the crossbar and canopy.
Fasten them in place using acorn nuts.
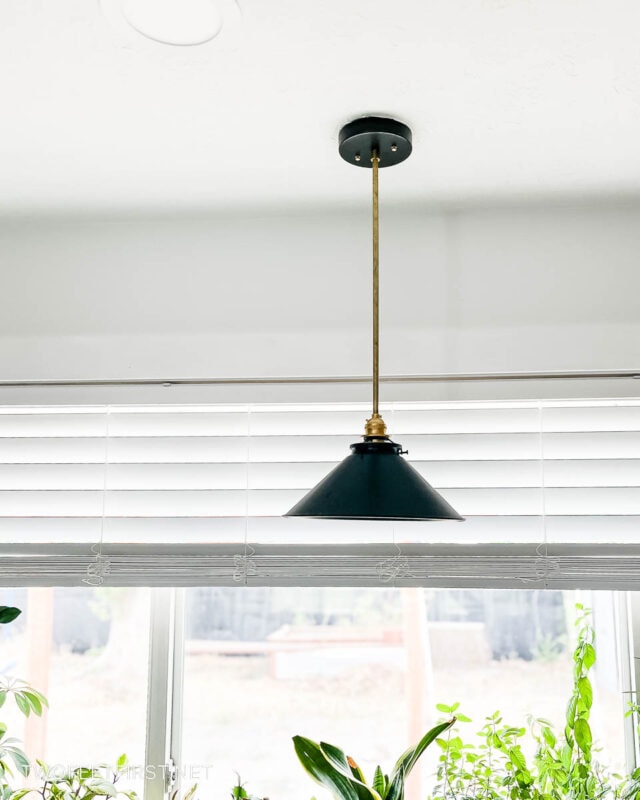
Step 7: Adding the Finishing Touches
Once the light fixture is securely installed, it’s time to add the cone shade.
Simply attach it to the light, step back, and admire your handiwork!

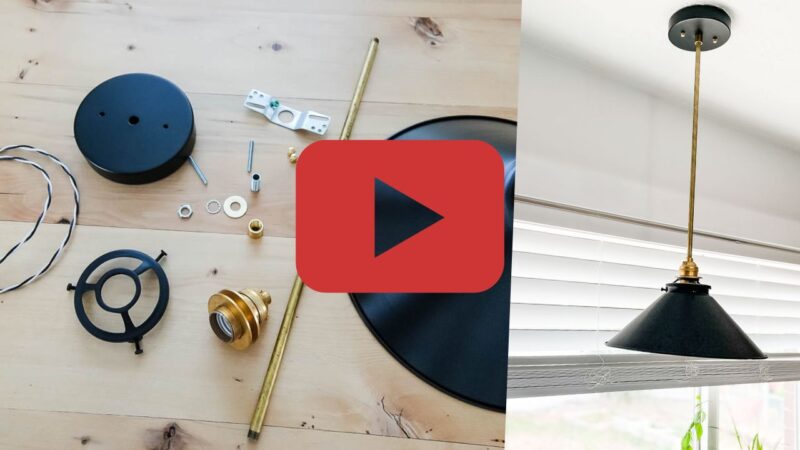
FULL PROJECT VIDEO:
Are you someone that does better with visuals? Check out the How to make a DIY pendant light full project video below and don’t forget to subscribe on YouTube so you don’t miss out on future projects!
You’ve created a special lighting fixture for your kitchen by following these simple steps. If you enjoyed this project and want to explore more lighting ideas, be sure to check out our other light making tutorials.


Genius idea. Looks amazing.
Thanks, Stacey!