Learn how to prep a shower for tile with a Schluter Kerdi waterproofing system.
If you’re renovating your bathroom, adding new tilework is a beautiful and worthwhile enhancement.
But if you don’t take the steps to waterproof it, you could ruin your new bathroom with leaks and water damage.
Prepping a shower for tile is a very important step in having a waterproof shower.
Disclosure: This post contains some affiliate links or referral links for your convenience. It is a way for this site to earn advertising commissions by advertising or linking to specific products and/or services. Click here to read my full disclosure policy.
There are many different ways to prep a shower:
- First, there is the backing, which is either cement board, Dunshield, or another material.
- Then, you have the shower pan which can be a premade one, cement one, or just a tray that has the slope.
- Next is the waterproofing layer, such as Red Gard and other types of membrane.
One of the most reliable ways to waterproof a shower is with the Schluter Kerdi shower system.
In this post, I will share how I prepped our shower for tile using this system.
WHY I CHOSE SCHLUTER KERDI
I first heard about Schluter Kerdi from a plumber who highly recommended using this system.
After researching for myself, I quickly realized three things:
- The system is completely waterproof (even the floor drain).
- The shower pan (tray) already has the slope built in.
- It’s designed for the average DIYer to install.
Bear in mind, this is not the cheapest option but it’s very effective. It’s about $500 for the whole system. And my total cost was slightly more because of my half wall and the niche.
But let’s move to the process of installing the Schluter Kerdi shower system.
PREP A SHOWER FOR TILE WITH SCHLUTER KERDI SHOWER SYSTEM
MATERIALS:
OR buy everything individually
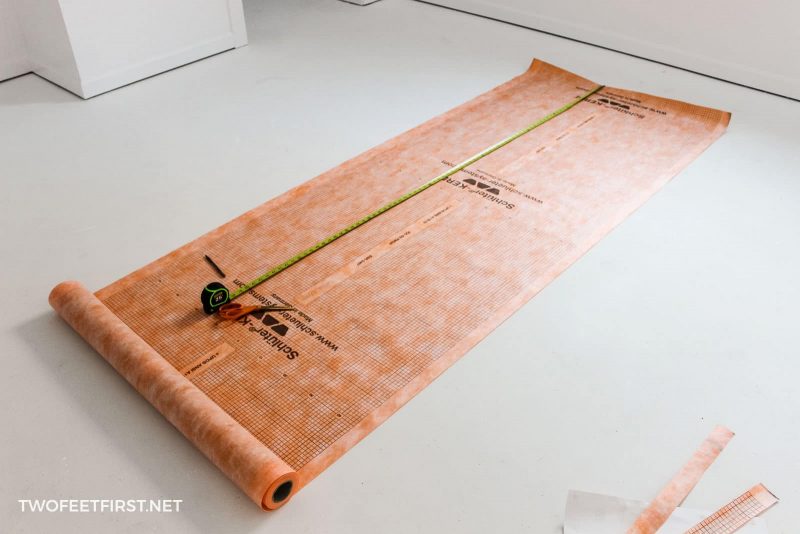
- Schluter Kerdi membrane (this was enough for a 36″x5′ shower)
- Schluter Kerdi shower tray
- Kerdi Drain
- Schluter Kerdi band
- curb (or use 2×4’s wrapped with your backer board choice)
PLUS you will need these items for either option
- mortar (the ANSI A118.1 kind)
- 2″ test plug
- Schluter Kerdi niche (optional)
TOOLS:
SIDE NOTE: I did not purchase the kit because I needed the adaptor drain and I was building the half wall so I did not need the whole curb. (And if you are wondering what the curb is, it is the lip/border between the bathroom floor and shower that helps to keep the water in the shower.)
TIP: Make sure to have all the plumbing ready before starting this process (have the shower faucet valve installed and maybe your drain).
INSTALL THE BACKER BOARD
The first step to waterproofing a shower (after framing and installing the plumbing) is installing the backboard. We decided to use Denshield because it is easier to use and has a moisture barrier (mold-resistant).
SIDE NOTE: We used two 2×4’s for our shower curb (bottom was pressure treated and top a regular 2×4); then, wrapped the boards with Denshield.
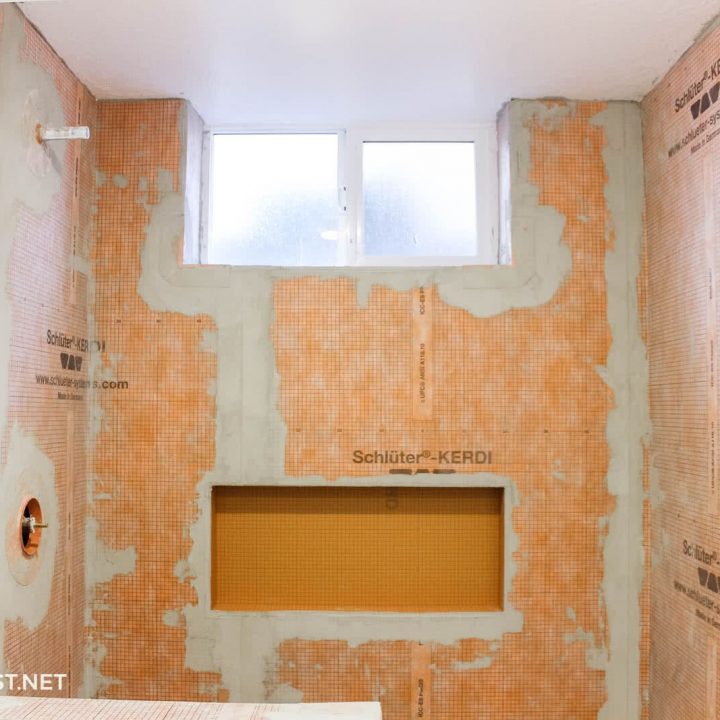
Also, if you are using a niche, avoid covering that area in backer board and install the niche after!

LEVELING THE FLOOR
The floor of our shower was not level because we replaced all of our drain lines. So, before installing anything, the floor had to be leveled. This was not as difficult as I thought it would be. See my post on how to level a floor to see the full process.

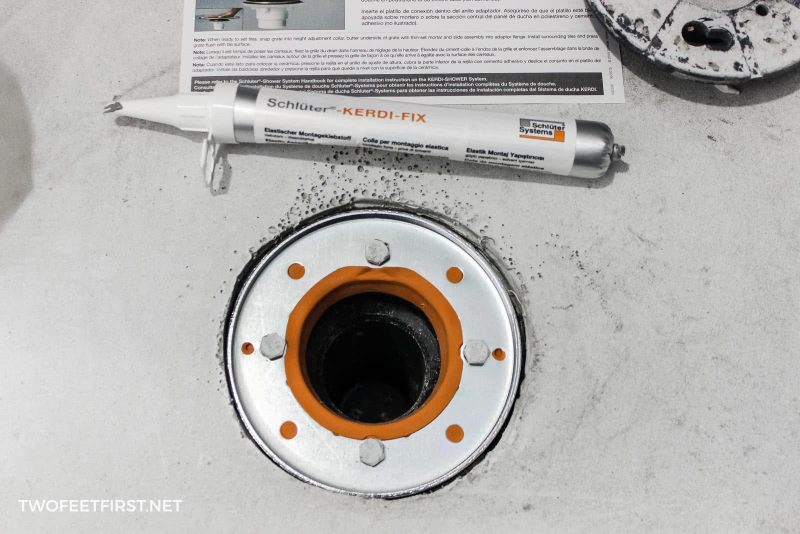
INSTALLING THE SCHLUTER KERDI DRAIN ADAPTER
For this shower, we used the Schluter Kerdi drain adaptor because we already had a drain cemented into the floor.
But before I actually installed the new drain, I cut the shower tray to the size I needed (our size was about 54″ and the tray was 60″). To cut the tray, I used a razor blade and square. Then, I tested the fit and adjusted if needed.
Now, back to adding the drain.


The drain kit comes with instructions but I personally love videos so here is the Schluter’s instruction video on installing the drain adapter.


But, just so you know, it was as easy as they made it look and I only installed the adapter ring at this time.
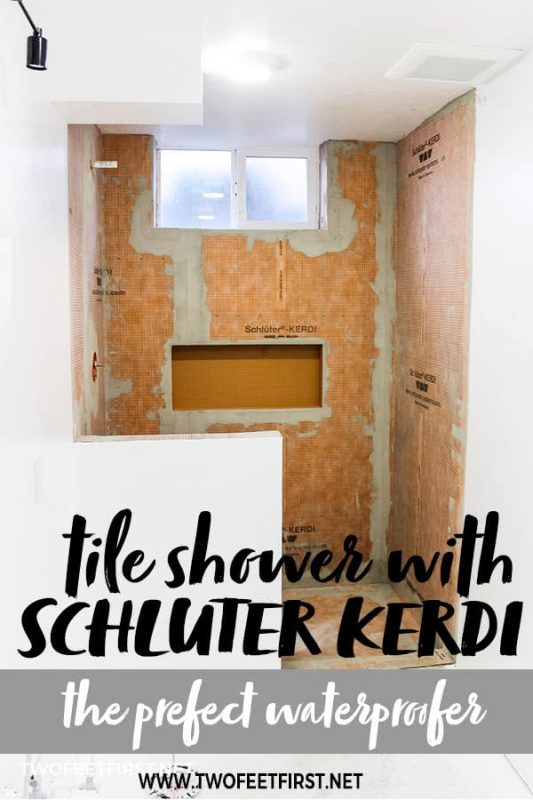
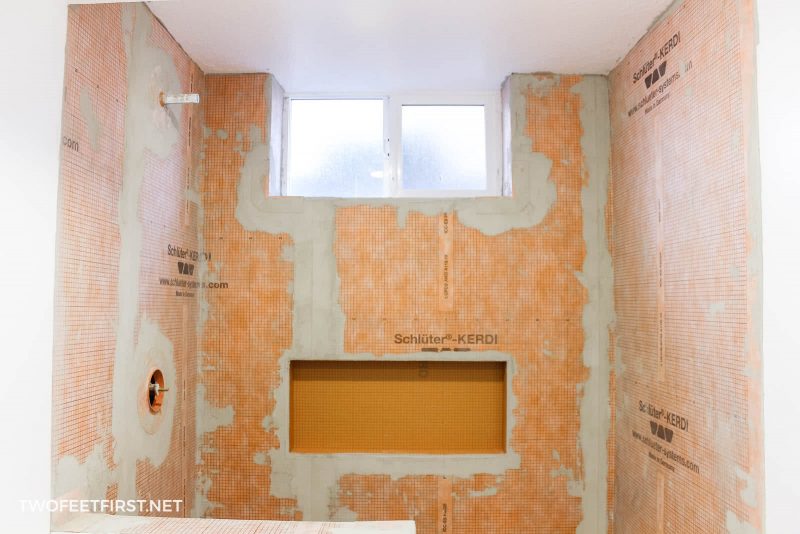
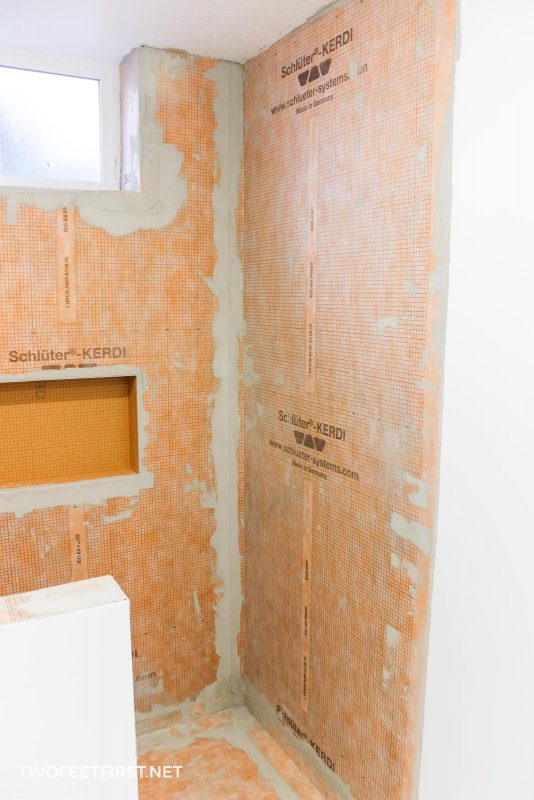
INSTALLING THE SCHLUTER KERDI MEMBRANE
Because this is my first time EVER tiling a shower, I am going to recommend you watch Schluter’s instruction video on installing the Schluter Kerdi shower system. This will explain the whole install process.
Also, it took me 6 hours to install the system.
I decided to cut out my pieces first and this was easily done using a tape measure and scissors.
Next, I mixed the mortar.
TIP: Make sure you are using the correct type of mortar: unmodified thin-set mortar ANSI A118.1. The ANSI A118.1 is the most important part and will be written on the bag.

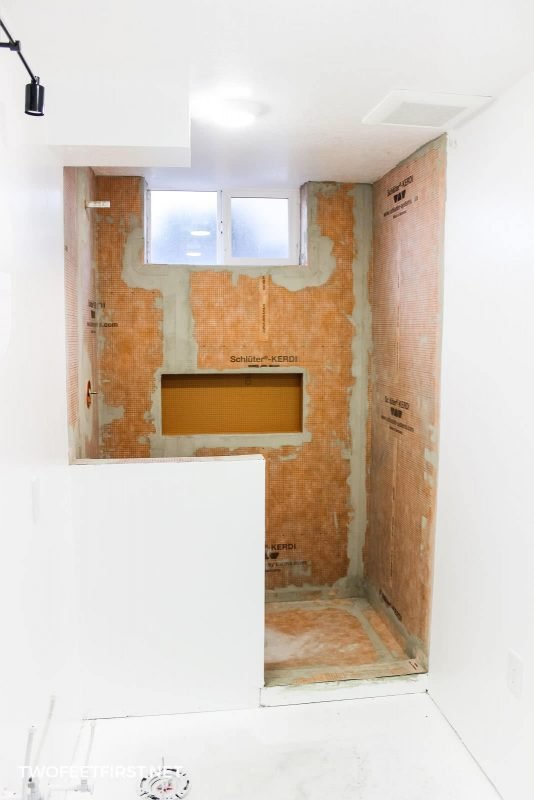
Then, I installed the membrane as the video demonstrated. I started with the walls first, adding the tray, and waterproofing the corners. The most difficult part for me was the corners but after some practice, it became easier.

TIP: Place the 2″ test plug into the drain so nothing falls into the drain.

Here is my shower after 24 hours of dry time:

Next, I tested the shower. To do this, make sure the shower floor is clean and tighten the 2″ test plug into the drain. Then, fill the shower bottom with water (at least an inch deep) and mark the spot. Let that set for 24 hours to make sure everything is waterproof. Here is another Schulter Kerdi video on performing a water test.
SIDE NOTE: This membrane is made so that you could shower with just the membrane (NO tile) and have no water issues.
And that is how someone with NO tiling experience installed the Schluter Kerdi shower system.
Hope this helps you when tiling a shower because prepping the shower the correct way will help the shower to last a very long time.
Also be on the lookout for my experience tiling for the first time!
How to prep a shower for tile with Schluter Kerdi
Are you ready to tackle that shower project? Follow these steps on how to prep a shower for tile with Schluter Kerdi.
Materials
- Schluter Kerdi membrane (this was enough for a 36″x5′ shower)
- Schluter Kerdi shower tray
- Kerdi Drain
- Schluter Kerdi band
- curb (or use 2×4’s wrapped with your backer board choice)
- mortar (the ANSI A118.1 kind)
- 2″ test plug
- Schluter Kerdi niche (optional)
Tools
- bucket
- mixer
- drill
- tape knife
- trowels
- trowels
- razor
Instructions
- Install the backer board onto the walls.
- Make sure the floor is level in the shower.
- Install the drain adapter, if needed.
- Cut the shower tray to size.
- Install the Schluter Kerdi membrane over the backer board using the correct mortar.
- Let the mortar dry for 24 hours then test the shower.
- The shower is ready for tile.