A step-by-step tutorial on how to build a DIY closet organizer.
Do you remember the day you finally bought that dress you have been eyeing, took it out of its delicate packaging and hung it up in your closet as soon as you got home?
No? Is it still sitting in its shopping bag, near the front door?
Or perhaps it has made its way into your abyss of a closet, shoved between your partner’s favorite well-worn shirt and your child’s last year’s piano recital shirt. (Wait, why is that even in your closet?!)
You can’t even see the closet rod anymore because of all the clothes hanging on it. The doors barely close after you kick the shoe boxes further in and you squirm when you see the loose scarf peeking out from the top.
Your closet longs for order and refinement.
How can you achieve this without converting one of your children’s rooms into a walk-in closet?
That is why I recommend building a DIY closet organizer.

The basic closet design (single rod and shelf) is a poor way to organize effectively and wastes space.

Read on to find out how easy it is to build your DIY closet organizer that comfortably holds what you have and grows with your needs.
DIY closet organizer
This is an in-depth tutorial on how to build and assemble your closet. Before you begin, complete two important steps below.
CREATE YOUR PLAN
Any closet space can be masterfully transformed to suit its unique homeowners. I wish I could say that my sketch of my closet will work perfectly for your closet but you might need to create your own design. Don’t worry – I have a detailed tutorial on how to create a DIY closet organizer plan.
Plus, you can use my “Closet Organizer Plan Printable”, you will have to subscribe to my newsletter to receive the FREE PDF, just fill out the form below if you’re interested. Or if you have questions, please visit the Q&A page on free printables/plans.
If you want more detailed instructions or assistance, you can purchase my “Floating Closet Organizer Workbook”. You can create the whole closet system plan by adding the measurements from your closet to my pre-existing plans and cutting diagrams.
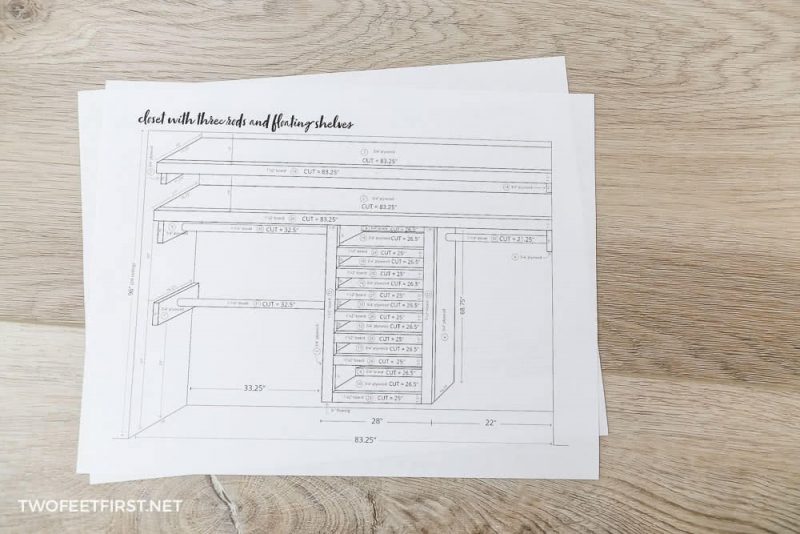
First, determine the design you want. I recommend that you install the organizer somewhere in the middle, just like this closet makeover. Then, set up two hanging rods (for shirts) and one hanging rod (for dresses or hanging pants) on either side of the organizer.
TIP: For a floating organizer project like this one, don’t forget about bracing pieces. You will need these to support the rods and top shelf, and also to brace at the top of the organizer and bottom to secure it to the wall.
The size of the organizer depends on the space available in the closet and the length of the rods you need. Once you decide on these, start creating your plan. Here’s what mine looked like:
CREATE YOUR CUTTING LIST AND DIAGRAM
Now you need to create your cut list and diagram to determine the exact amount of wood needed and where to cut each piece. Here is an example of my cut list and cutting diagram:
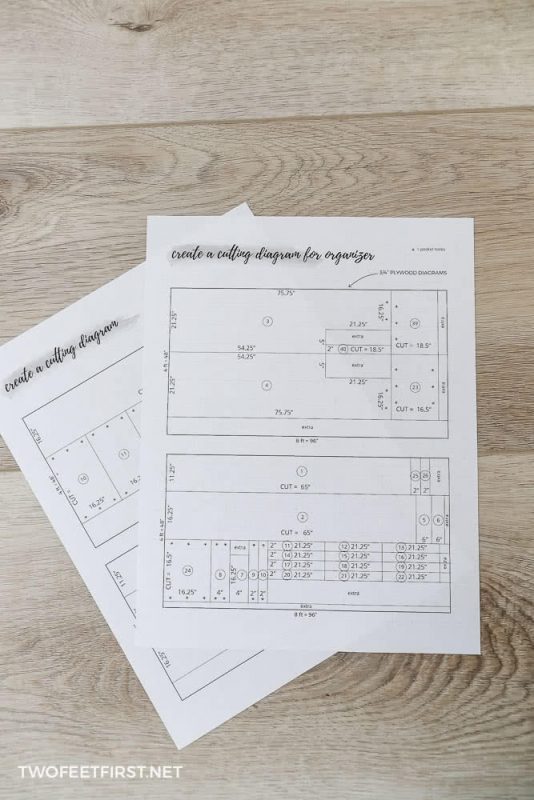
SIDE NOTE: My article about creating a DIY closet organizer plan explains this step but my workbook will be the most helpful.
Now that you have your plan, cut list and diagrams, let’s move on to gathering your supplies.
Disclosure: This post contains some affiliate links or referral links for your convenience. It is a way for this site to earn advertising commissions by advertising or linking to specific products and/or services. Click here to read my full disclosure policy.
HOW TO BUILD A DIY CLOSET ORGANIZER
MATERIALS:
- 3/4″ plywood
- 1″x2″ primed board (trim for around plywood)
- 1-1/4″ screws
- #220 grit sandpaper
- 2″ finishing nails (I recommend 16 gauge)
- 1-1/4″ finishing nails (I recommend 18 gauge)
- paint and primer
- 2″ screws to attach the organizer to the wall
- spackling paste
- 1-1/4″ wooden dowel
- 3 – rod holders
TOOLS:
- table saw or circular saw with Rip-cut
- miter saw
- Kreg Jig K5
- drill
- square
- level
- clamps (the Kreg right angle clamp is a great option)
- orbital sander
- cordless nail gun
- Critter paint sprayer (optional)
- stud finder
- safety glasses
- face mask (for dust)
- ear protection
STEP 1: CUTTING THE WOOD
Because you already have a cutting diagram, this part will be fast! Start by cutting your plywood pieces to the measurements on your diagram. Since I don’t own a table saw, I used a circular saw with the Kreg Rip-cut to cut my sheets of plywood. I explain more about the Kreg Rip-cut in this post, see for yourself on how to use it.
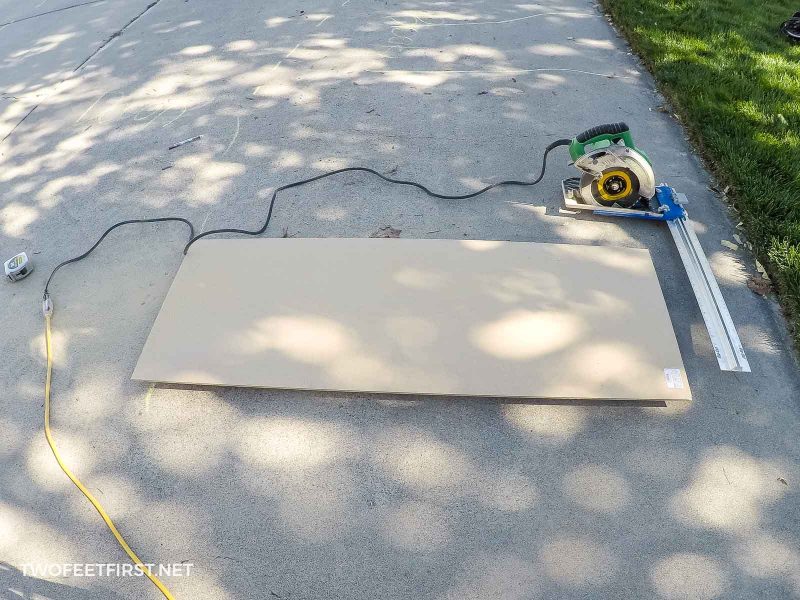
TIP: Hold off on cutting the 1″x2″ trim pieces until the closet organizer is in place. This way, you can measure the exact cuts you will need.
STEP 2: CREATING THE KREG JIG POCKETS
We create pockets to secure the plywood pieces together but only the organizer pieces will have them.
Place pockets on the top of the side pieces that sit against the top shelf (goes across the length of the closet) and on all the shelves inside the organizer.
SIDE NOTE: In the diagram provided in the printable, the “*” is where a pocket hole will be placed.

STEP 3: SANDING THE PLYWOOD
Now it’s time to sand all the plywood pieces. You can use #220 grit sandpaper and an orbital sander to make this process easier!
Once everything is sanded, wipe the wood with a dry cloth to remove the dust.
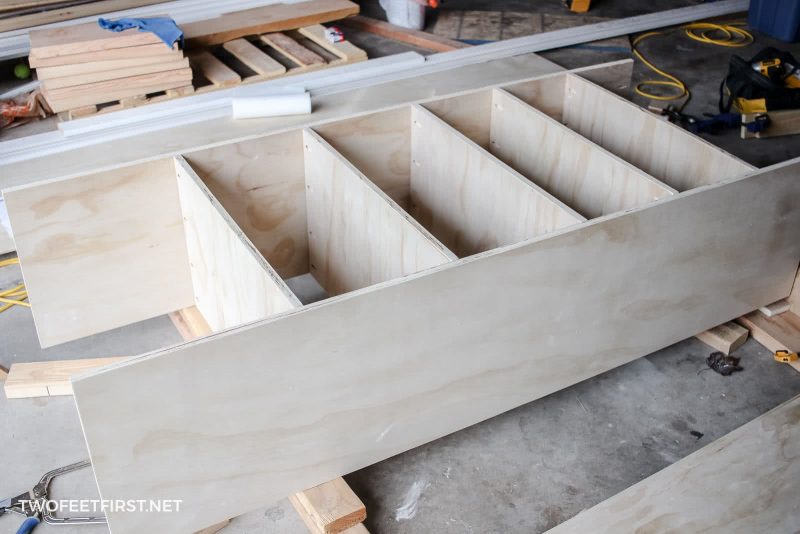
STEP 4: ASSEMBLE THE ORGANIZER
SIDE NOTE: I did not assemble the last two shelves until after painting because it would have been difficult to reach a small space with a paint sprayer.
Have a look at my tutorial video – you’ll see how I attached each shelf to assemble the organizer.

TIPS when attaching shelves:
- Measure one shelf and assemble before measuring for the next.
- Measure front and back on each side piece for each shelf (measuring in four spots).
- Use a square!
- Use a Kreg right angle clamp!
- Take your time to make sure it’s all square.
- When attaching the bottom shelf, remember that you will later be adding trim to the front to give the organizer a finished look. Therefore, place the bottom shelf 1-1/2″ from the edge of the side pieces. There will be a 3/4″ gap once the shelf is added.
To attach a shelf, use the 1-1/4″ screws and adjust the torque on your drill (the numbered dial) to avoid over-drilling.
STEP 5: PAINTING
Before painting, prep the organizer by caulking the seams where each shelf meets the sides. This will give you a clean, finished product. Once the sealant has dried, you are ready to paint.
TIP: Applying caulk will make the organizer look finished and you can see my tips and tricks how to apply caulk in this article.
I applied two coats of primer and two coats of white paint. I used my Critter paint sprayer!
SIDE NOTE: When the paint finished drying, I assembled the last two shelves on my organizer.
STEP 6: INSTALLING THE ORGANIZER INTO THE CLOSET
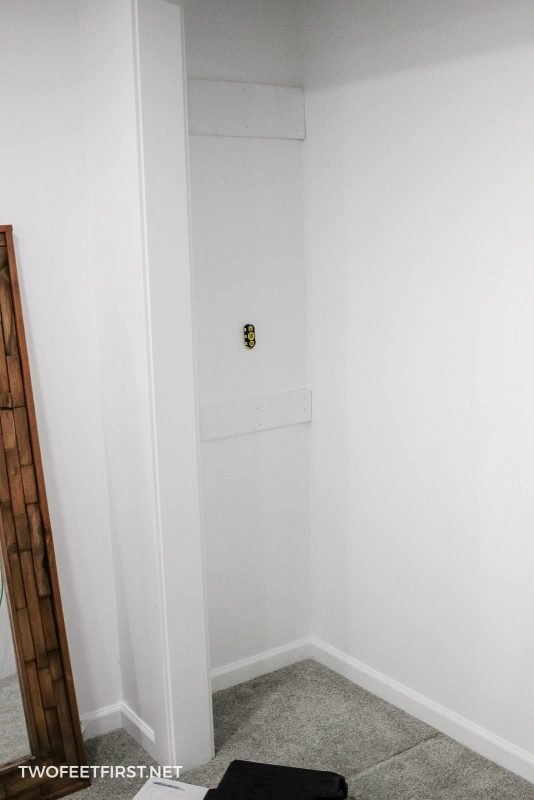
Before the actual organizer can go into the closet, you need to secure the bracing for the long top shelf and the rods.
To do this, measure the wall for placement and identify the location of the wall studs.
SIDE NOTE: It’s impossible to do this task without the magnetic stud finder or a different type of stud finder!
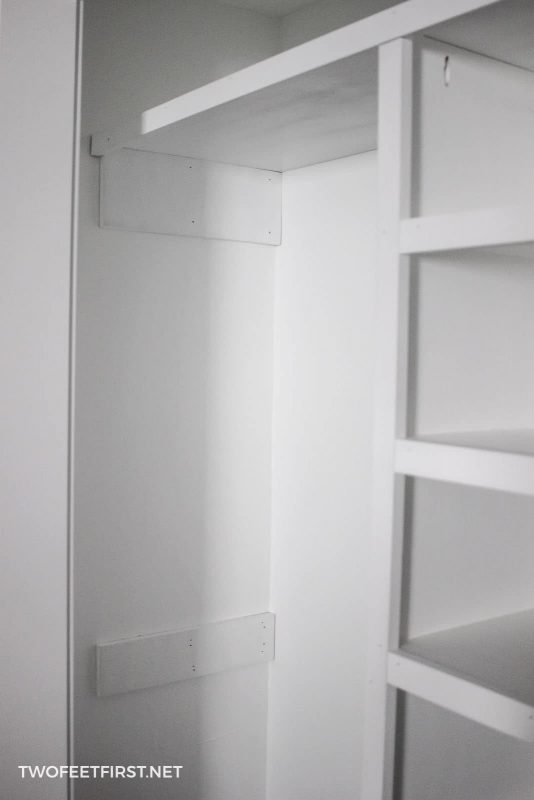
Before attaching a brace to the wall, check that it is level and then nail into place with 2″ nails.
After you install all the bracing, it’s time to set up the top shelf (the one that spans the length of the closet). Then, measure the placement of the middle organizer and find the studs in the wall so it can be secured into place.
SIDE NOTE: I had to shift the organizer a few inches to one side so I could secure it to two studs.
I created this organizer with a floating design so you can store shoes underneath. I placed four sturdy objects under the organizer to give it the support we needed underneath. You can install it without but you will need three people to make that easier.
TIP: This next part is a two-person job!
SIDE NOTE: Sorry, I forgot to video this part.
How to secure the organizer to the wall and add trim:

- Place the organizer in the desired location (where it will be secured to two studs). Next, pre-drill the top bracing with a 1/8″ drill bit where the organizer will be secured to a stud. Finally, take the 2″ screws and secure the top to the wall.
- TIP: Make sure the organizer is level vertically and horizontally and with the top shelf.
- Remove any items that are holding the organizer. Next, secure the bottom brace in the same manner as the top. Then, attach the organizer to the top shelf with the Kreg Jig pockets.
- Now it’s time to add the 1″x2″ trim to the front of the organizer and shelf. Cut one trim piece the length of the top shelf. Place the trim against the shelf, the top will be flush, then starting on one end nail the trim piece into place with 1-1/4″ finishing nails. Move about 8″ and place another nail, adjust the trim piece if needed to make it flush with the shelf. Continue this process for the length of the board.
- Measure the sides of the organizer (each one could be different) and cut the trim at those measurements. Check the fit and adjust if needed. Then, nail the trim into place just like the first trim piece.
- Finally, measure the distance of each shelf (remember, each piece could be different) and cut and install the same way.


STEP 7: FINISHING TOUCHES
Once you’ve installed all the trim, fill in the nail holes with spackling paste and seal all the seams with caulk.
After everything dries, lightly sand the nail hole areas and touch up with paint.
Now it’s time to add the closet rods. Measure the distance from the rod bracing to the organizer (three in total). Then, depending on your rod holders, you will subtract 1/8″-1/4″. Cut each dowel to this measurement. Then, lightly sand the dowel with #220 grit sandpaper and wipe clean with a cloth. You could stain the wood or leave as is.
Another important step is to measure the bracing to attach the rod holders to the wood. This is done by measuring 11″ from the back wall and 1-3/4″ down on the rod bracing (this will put the holder in the middle of the brace). Place a mark at this spot where the top of the rod holder will sit. Place the rod hanger, trace the screw holes, and pre-drill 1/8″ holes. Then, attach the holder using the screws provided.
For the other rod holder, mark the placement, trace the screw holes, and attach just like the last time. Complete this step for all rod holders.
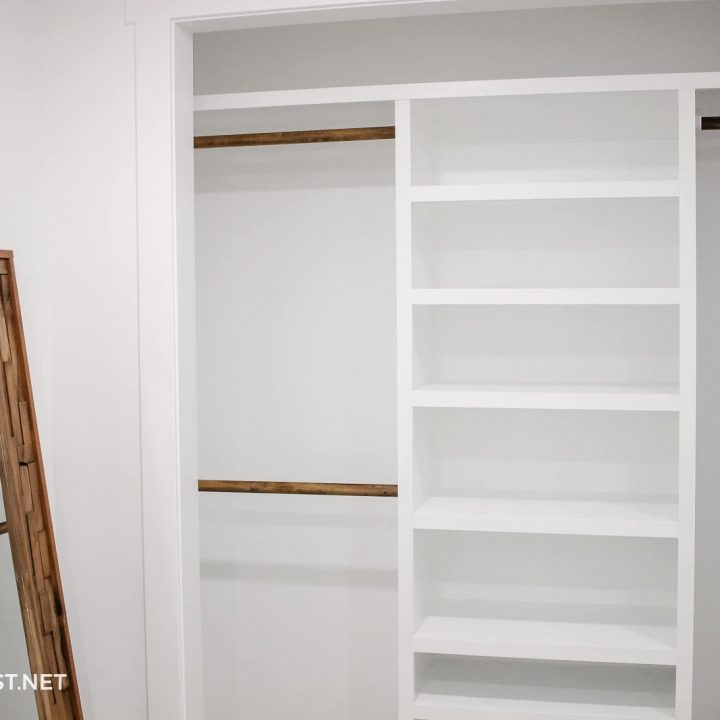
Once all the rod holders are attached, insert the rods carefully. You can adjust the length of the dowel if needed.

And your closet is now completed! It’s amazing how much space we created by redesigning it. Now you have a closet that is structured, versatile and there is space for everything – even that lovely new dress that’s still sitting in its shopping bag!
Here’s my daughter’s closet after adding clothes to our masterpiece:

WHAT DOES IT COST TO BUILD A DIY CLOSET ORGANIZER
Can you believe that the total cost of this closet build was less than $140?! This included all materials, essentially two full sheets of plywood and rod holders.
So, for less than $140, you can build your own closet organizer and finally organize your space exactly the way you want. I hope this helps you!

Build a Floating Closet Organizer
Organizing a closet is easy with a closet organizer. This tutorial will show you how to build a custom DIY closet organizer.
Materials
- 3/4″ plywood
- 1″x2″ primed board (trim for around plywood)
- 1-1/4″ screws
- #220 grit sandpaper
- 2″ finishing nails (I recommend 16 gauge)
- 1-1/4″ finishing nails (I recommend 18 gauge)
- paint and primer
- 2″ screws to attach the organizer to the wall
- spackling paste
- 1-1/4″ wooden dowel
- 3 – rod holders
Tools
- table saw or circular saw with Rip-cut
- miter saw
- Kreg Jig K5
- drill
- square
- level
- clamps (the Kreg right angle clamp is a great option)
- orbital sander
- air compressor with a nail gun
- Critter paint sprayer (optional)
- stud finder
- safety glasses
- face mask (for dust)
- ear protection
Instructions
- Design and create your closet organizer plan.
- Create a cutting diagram for material needed.
- Cut the wood according to the cutting diagram.
- Add pocket holes to some of the plywood pieces.
- Sand the wood with #220 grit sandpaper.
- Assemble the organizer.
- Paint all the wood with primer and paint.
- Install the organizer into the closet.
- Touchup nail holes and seams then repaint.
- Install the rod holders and cut the dowels to length.


I’m about to begin our master bathroom / closet renovation so this is perfect timing! Definitely pinning!
Best of luck with your closet renovation, I know you will love the finished product!
The closet organizer looks AWESOME! Your hard work really paid off. I just love that it’s an open closet.
Thanks, Christine! I know that open closets are not for everyone but we love them at our house, no one is slamming any doors plus the doors are not in the way!
Wonderful work! I LOVE adding closet organizers… we did a few at our old house, but we moved so I need to do more. The wire shelves are driving me nuts!
Thanks, Danielle, wire shelves drive me crazy too!
I love this!
We were talking about doing something similar in my sons room which is on the small side. The shelves would have to be for additional toys for that dude!
The shelves are amazing! My daughter put all her Lego’s on the shelves and she still has empty shelves!
Awesome tutorial! I need to do this in all of our closets – I have too much wasted space right now!
Thanks, Eileen! I know you would love it!!!
Your closet looks amazing now and I know that you are enjoying the organization!
Thanks, Sherry!
Megan, what a great project! It really utilizes every inch of closet space now, and a great tutorial too.
Thank you, Toni!
Just seeing how talented you are, inspires me! I am moving soon and will definitely need some storage like this in our small space. Thank you for the tutorial with all the details needed to make my own.
Thanks for organizing the At Home DIY group.
Happy Weekend.
Thanks, Meegan! Best of luck with the move and I cannot wait to see your upcoming projects!
That turned out beautiful and your diagrams are so organized and well thought out. I need to start doing that with my builds. :)
Thanks, Stephanie! I cannot tell you how much I love having these diagrams, the cutting diagrams are the best!!!
I love this! I hope that we can do something like this in our son’s closet when he gets a little older and we need more storage! great job!
Thanks, Carmen! I still need to create a system in my boy’s closet too but they still do not hang up any clothes so maybe one day!
This is AMAZING. I’d love to do this in my daughter’s closet … so much wasted space!
Thanks, Randi, I think you would love it!!
This looks amazing! We installed a full closet system into our master bedroom walk-in closet a couple of years ago, and we absolutely love it. Bravo to you for building your own! It is definitely WAY cheaper than purchasing one like we did. :)
Thanks, Amy!
Wow! That’s some gorgeous organizing! And now if I could just have you draw up all of my DIY projects heretofore, please and thank you. :)
Lol, thanks, Jamie! I decided I need to try a software program but I don’t want to take the time to figure it out. I would love to help anytime!!
Love the built in’s, such a great use of space. Great use of money too!
Thanks, Jacque! I would agree!
This is such a great tutorial, you laid it out so well! And your closet looks amazing, so much more storage space.
Thank you, Sarah! We are loving this style of closet!
This looks great! I’ve been racking my brain about what to do for our master bedroom and now I think we should just DIY it instead of buying a pre-made closet system that will be so much more expensive!
Thanks, Amy! I would recommend DIYing it because then you get exactly what you want!
Awesome job! We did a closet organizer in my daughter’s nursery before she was born and loved it so much we did one in our closet too. I was super pregnant and lazy though so we went the wire closet maid route lol. I’d love to redo it one day though.
Thanks, Brittany!
I love your projects they are always so detailed and Beautiful!
Thank you, Anam, for the sweet comment!
This looks great! So clean looking and I love that everything is attached to the wall and raised off the floor so you can easily vacuum under the shelves!
Thanks, Christine!
These are gorgeous! That was a lot of hard work but turned out beautifully- so worth it!
Great, detailed tutorial! The end result is amazing, such a great use of the closet space!