A step-by-step tutorial on how to build a gate pergola, the perfect way to updated your curb appeal.
A gate by any other name is still a gate. But a gate with a pergola? That’s a magical portal to a home of adventure and creativity.
At least, that’s what we thought when we decided to build a pergola over the gate in our backyard.
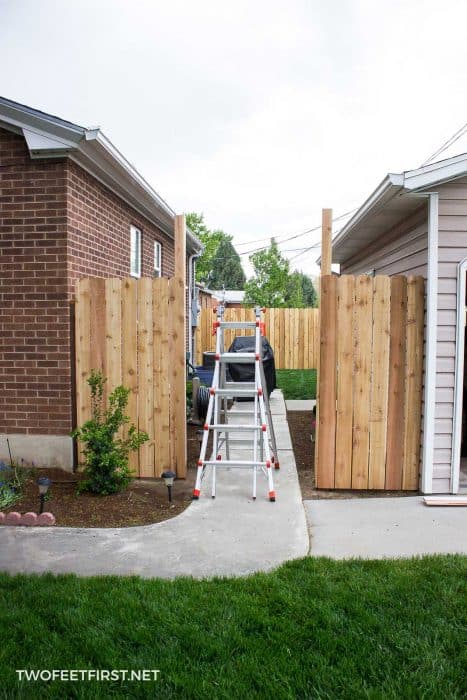
Of course, there was a practical reason too – we had been wanting to replace our old gate because the 4×4 posts that were holding up the gate were not very sturdy. They would move the fence every time you opened or closed the gate.
There was no doubt this whole section would need to be redone, see how we installed a new post.
The process we used to build a fence pergola is very simple and you can do it too.
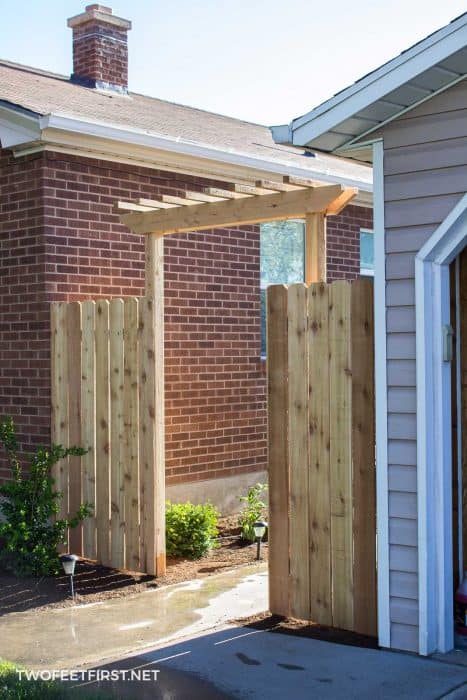
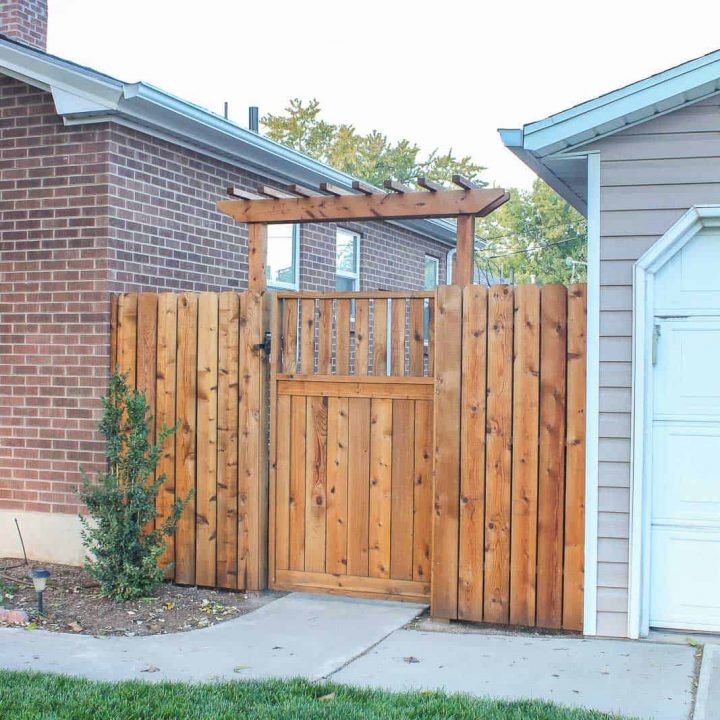
But because I am always excited to show you the finished product, how about an ‘after’ picture? This is after applying the stain:

What do you think? Does it make the gate stand out? What do you like or don’t? I like how simple but elegant the pergola is!
Now, let’s share with you how we built a pergola fence.
Disclosure: This post contains some affiliate links or referral links for your convenience. It is a way for this site to earn advertising commissions by advertising or linking to specific products and/or services. Click here to read my full disclosure policy.
HOW TO BUILD A Gate PERGOLA
MATERIALS:
- 2 – 4″x4″x10ft board
- 2 – 2″x6″x8ft board (depends on your space)
- 1 – 2″x4″x8ft board (we used cedar)
- 28 – 3″ deck screws
- 1 – 10″ concrete tube form
- 3 to 4 – concrete bags (we used about three 60lb bags for 2 posts)
- 60lb – gravel
- water
- scrap boards to brace posts
TOOLS:
- miter saw
- circular saw
- table saw
- drills
- level
- clamps (at least 2)
- shovel
- razor blade knife
- Sawzall (optional)
- ladder
- tub or wheel barrel (to mix concrete)
- speed square
- safety glasses
- face mask (for dust)
- ear protection
In an earlier step, we installed some new posts for the pergola, and here is what our fence looked like after:
MEASURE AND CUT THE WOOD PIECES
To begin, we took our tape measure and noted the distance between the two posts (measure the top – ours was 48.25 inches).
TIP: If the posts are not the same height or taller than you want, they can be adjusted (we had to do this).
After finding the distance, we added the measurement of the post (3.5 inches) and an 8″ overhang for both sides (it would be 23 inches extra; ours was 71.25 inches). This is the measurement you will use to cut the 2×6 board; you need to cut two of them.
Once the 2×6 board was cut, we marked an end of the board to give us the design we wanted. We marked 1.5 inches from the top edge and 6 inches in from the bottom edge of the board.
Then, we took a ruler (scrap board) and connected the two marks; this gave us a diagonal cut line. We used our circular saw to cut along the line.
TIP ON CUTTING: Place some 2×4 pieces under the board (longer side up) – sometimes it helps to have someone hold the other end of the board while cutting.
Now, with the piece that we just cut from the 2×6 board (it’s a triangle), we used this as our template to mark the other 3 edges. We made sure to place it at the right edge and cut along the line toward the 2×6 main board. It should look like this when done:

After cutting, we could now install the 2×6 boards to the posts. Please note this is a TWO-person job!
INSTALL THE BOARDS
Before placing the boards, we made a line on the inside of the board about 8 inches in on both sides (this is extra after the post). We placed the ladder between the posts.
Then, taking one of the 2×6 boards, two clamps, and a level, we climbed the ladder. Our posts were not the same length, so we placed one side of the 2×6 board onto the lower post. We adjusted the board until we could see the 8-inch mark right against the post and the top of the post/2×6 were level. We clamped that side together.
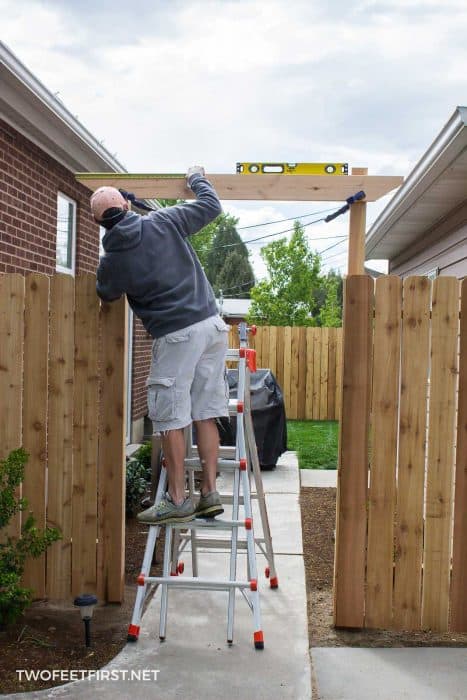
We then moved to the other side (my husband was holding this side the whole time, almost in place). This time, we used our level because the post was not the same length as the other post. We checked the 8-inch mark and the level; then, we clamped the board into place. We carefully took a step back to make sure we liked the look.
Before I continue, I want to address the taller post we had. We decided to add both the 2×6 boards and then mark where to cut the post. But save yourself some time and mark the post before even attaching the first board (do it after clamping).
Once we marked the post, we took our square and marked all the sides.
Next, we took our Sawzall (circular saw would work) and cut along the line. I did take the orbital sander to the top after too. And now, the post is the right height.

Back to installing the boards.
We took our drills, square, and deck screws (we actually used 3.5″ on this part because we had them on hand) up the ladder.
Normally, we would just eye-ball the screws but we wanted them to be in a line. I took the square and marked 3 spots inside the middle of the post. I noted the distance between each screw so I could mark them the exact way on the other side.
Then, we drilled into the marked spots with a 1/8″ bit, after we attached the screws. We did this for the other side also.
Finally, we removed the clamps (it will hold with one or two screws if you need to remove them before).
After installing the first board, we installed the second the same way but this time we adjusted the screws by about 1/4 inch to make sure they would not be placed in the same spot as the other side.
Here is our pergola at this point:

CUT AND INSTALL THE BOARD STRIPS
For the top of the pergola, we wanted the boards to be 2″x2″x24″ and 6 inches apart. In this case, we would need 8 boards. We decided to use a 2″x4″x8ft board because we could cut it in half down the middle to give us about a 2×2 board. Also, we could get all 8 boards out of the one board.
We cut the 2×4 into four pieces (we cut them to 23 7/8 inches); then, we ripped them in half with a table saw (borrowed from a neighbor!).
Next, we found the center of the 2×6 boards, then measured 3 inches to each side. To make things even easier, I created a template from some scrap wood to have one be 6 inches (distance between the 2×2) and another one was 8.5 inches (distance from the 2×6 board to the end of the 2×2).
I placed the 6-inch template between the two marked spots. I placed one 2×2 on one side of the 6-inch template; then, I used the 8.5-inch template to adjust the front of the 2×2.
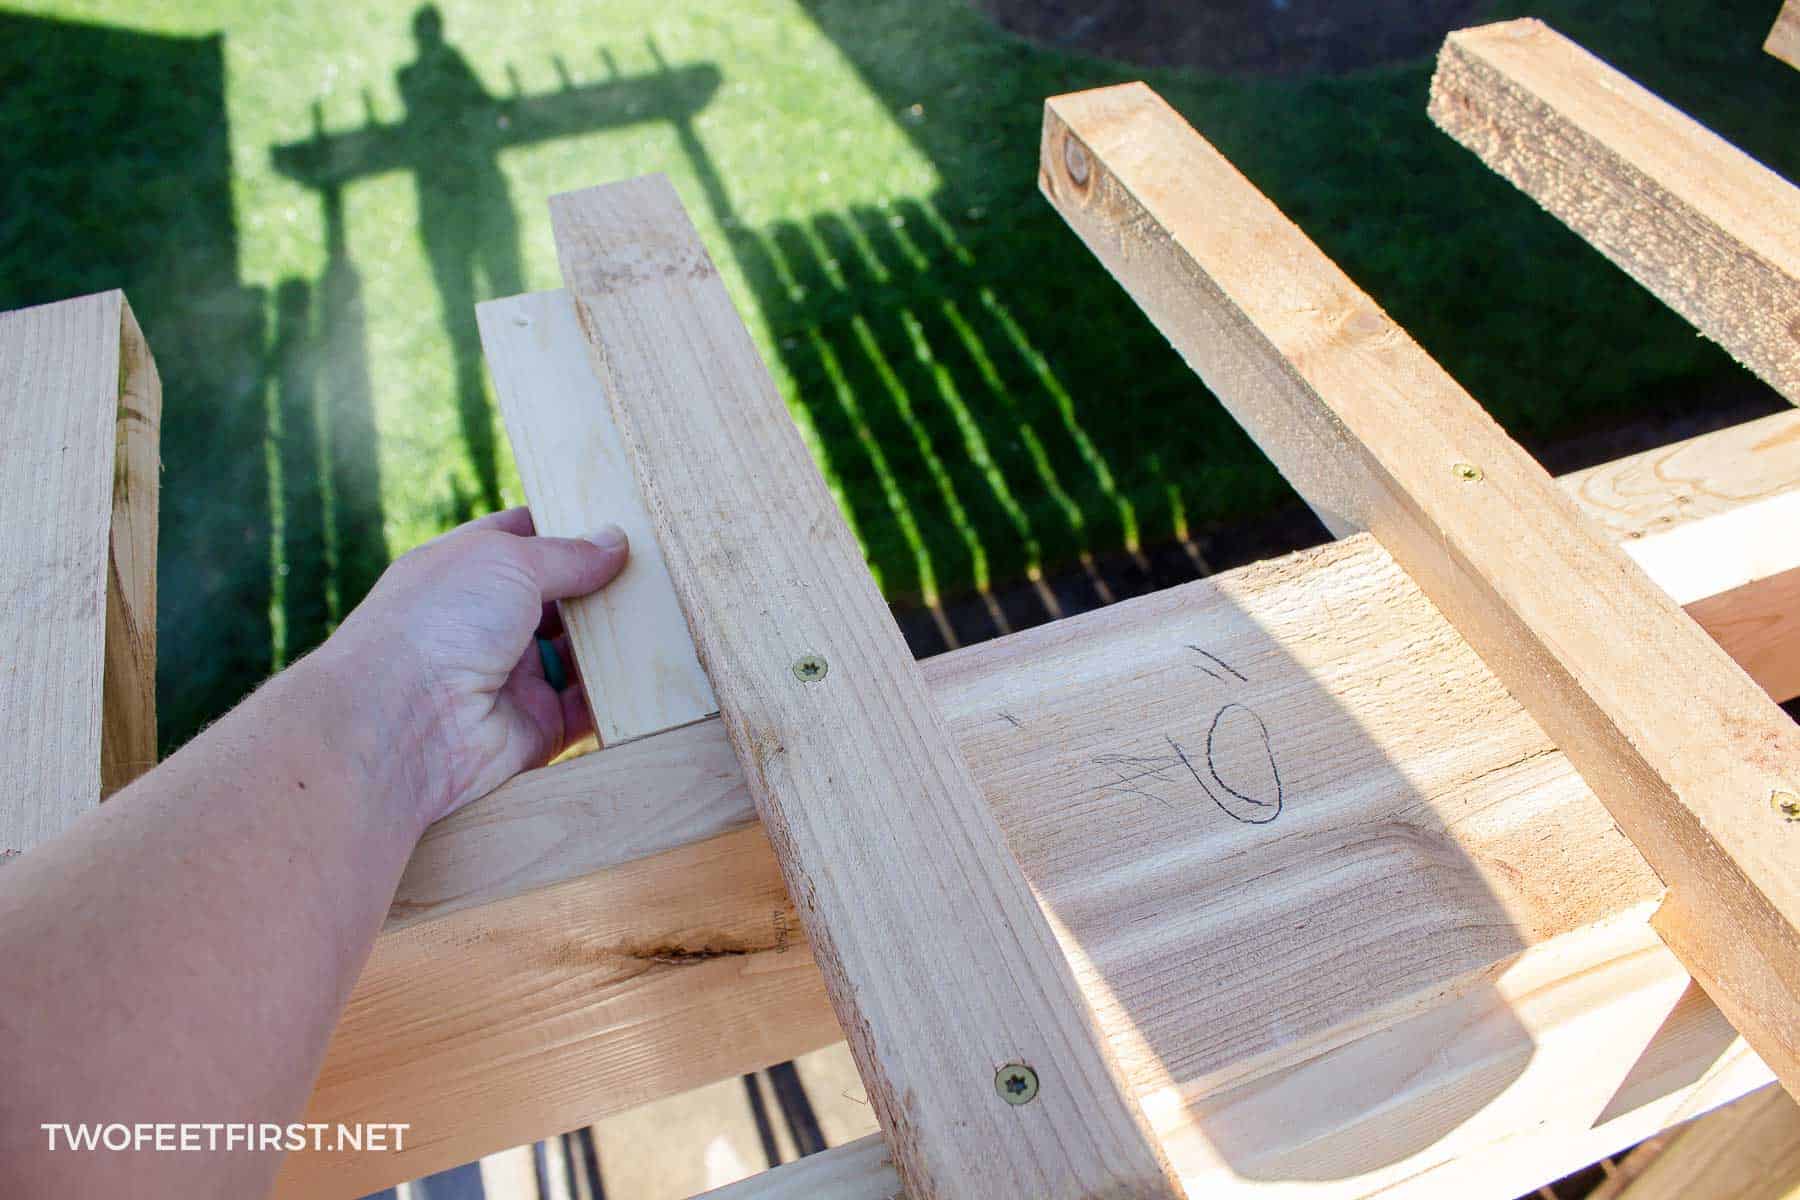
Once everything was spaced correctly, we pre-drilled two holes to attach the 2×2 to the 2×6’s. We then used the 3-inch screws to attach them into place. I continued this same process for the rest of the 2×2’s.
And when we were all done, our pergola looked like this:
What do you think? Do you want your own pergola over a gate? We are really liking the look and it was simple to create. But what about the cost? Well, here is our cost breakdown (we took out the cost of our 3 posts):
COST:
- 4″x4″ boards – $24
- 2″x6″ boards – $11
- 2″x4″ board – $8
- 3″ deck screws – $10.50
- concrete tube form – $23
- concrete bags – $10
- gravel – $4
- water – FREE
- scrap boards – FREE
TOTAL: $90.50
Not a bad price for a custom pergola!!
And that is the process we used to build a pergola over a gate! Anyone one else up for this adventure?
Next, we built a custom wooden gate to finish off the section.

Build a Gate Pergola
Do you want to update your fence curb appeal? How about adding a pergola to the gate? Here is how we built a gate pergola for our fence.
Materials
- 2 – 4″x4″x10ft board
- 2 – 2″x6″x8ft board (depends on your space)
- 1 – 2″x4″x8ft board (we used cedar)
- 28 – 3″ deck screws
- 1 – 10″ concrete tube form
- 3 to 4 – concrete bags (we used about three 60lb bags for 2 posts)
- 60lb – gravel
- water
- scrap boards to brace posts
Tools
- miter saw
- circular saw
- table saw
- drills
- level
- clamps (at least 2)
- shovel
- razor blade knife
- Sawzall (optional)
- ladder
- tub or wheel barrel (to mix concrete)
- speed square
- safety glasses
- face mask (for dust)
- ear protection
Instructions
- Install post for the gate.
- Measure and cut the wood needed for the pergola.
- Install the front/back trim board onto the posts.
- Cut and install the top board strips.
- Stain/waterproof the pergola.


Love the Pergola. It’s a great added touch.
Thanks Jean!!! We really like the look too.
My husband and I used your plan for the pergola and it turned out awesome! Thanks for sharing!
I wanted to post a pic but couldn’t figure out how?. Oh well, we are very happy with the results☺️
Very glad to hear that the project turned out amazing!!!
Megan – your pergola is lovely. Such a nice touch. This project is on my list – my very long list.
Thank you –
Audrey
Good article & excellent way to articulate. Keep it up.