This Before-and-After House Renovation story details the transformation of my brother’s outdated home through wall repairs, kitchen overhauls, and more.
Home renovation can feel like a colossal task, especially when dealing with an outdated house that needs a whole house makeover. Where do you even start?
From peeling paint to load-bearing walls, it’s a maze of decisions and actions.


Luckily, I documented the journey to help you navigate your renovation project.
Read on to get the step-by-step tutorial on how we renovated my brother’s new home.
Disclosure: This post contains some affiliate links or referral links for your convenience. It is a way for this site to earn advertising commissions by advertising or linking to specific products and/or services. Click here to read my full disclosure policy.
Whole House Makeover: The Starting Point
The Big Picture
First, we had to prioritize.
This home needed a fresh coat of paint, wall repairs, a revamped kitchen, and much more.

We also had an outdated breaker box and a cramped laundry room, which needed immediate attention.

So we sat down and talked about the priorities, what needed to be done before something else could be done, and what we were doing vs. what would be hired out.
This brought us to the first thing that had to happen: demoing the kitchen so we could remove the wall.

The Load-Bearing Wall
Before any magic could happen with an open floor plan, we had to address a critical issue—the load-bearing wall separating the kitchen from the living area.

A load-bearing wall must be supported from the roof line to the foundation. So, we had to address this before it could be safely removed.
After determining that we were lucky, the crawl space supports were right where we needed them to remove the wall.
We then removed the wall using roof jacks to support the weight of the ceiling while we removed the wall and installed a beam.

SIDE NOTE: You can build a temporary wall next to the wall that will be removed instead of using these types of roof jacks. We were lucky that my dad had them, so we could use them instead of building the temporary wall.
I also wrapped the beam with plywood. You can see my tutorial on creating a faux wood beam, but this time, I used plywood and cut the sides at 45-degree angles to give me a clean finish.
Updating the Walls
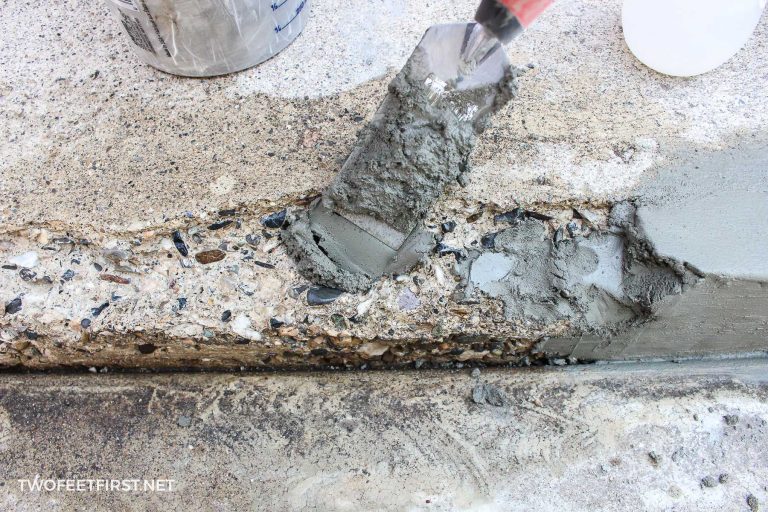
The walls were like swiss cheese, full of holes and inconsistencies.
Also, we had new drywall installed in the kitchen/laundry area due to water damage and doorways being moved.

To patch the wall, we used a drywall joint compound to fill in all the holes to prepare them for a new coat of paint.

Some rooms had paint that was peeling away.
Which meant we had to scrape off the old paint, a tedious and necessary task.
After scraping, we primed the walls to prepare them for fresh paint.

Then, we apply the joint compound to make the walls smooth again.
At this point, we primed and painted all the ceilings and walls.
SIDE NOTE: If you are curious, I have a full tutorial on the basics of painting a room.
Electrical and Plumbing Upgrades
A Modern Breaker Box
The electrical box was like something from a history textbook. And we brought in a professional for this one.

They replaced the old box with a new, more efficient one with adequate breaker slots.
Moving The Water Heater
The laundry room was so tight you could hardly reach the washing machine.
The culprit?
A poorly-placed water heater.
So, the water heater was relocated to a closet in the hallway. But along the way, we discovered that the chimney needed to be removed because it was falling apart and to give us more space in the closet.
We discovered that this unplanned side project was a good thing because the water heater wasn’t vented correctly into the chimney, causing the heat from the vent to melt away the furnace’s venting pipes.

SIDE NOTE: All water heaters must be vented with a double-wall vent pipe from the water heater to above the roof line. But check your local code to see all the requirements.
The laundry room was breathable and functional after the water heater was relocated into the closet.


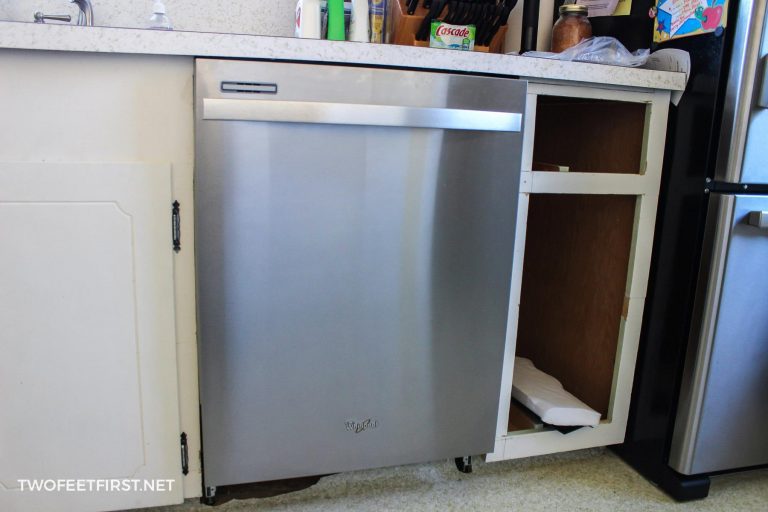
The Kitchen Plus Flooring
After tearing down the load-bearing wall and ensuring the house wouldn’t come tumbling down, it was time for the kitchen makeover.

This involved a whole new kitchen design.

I have a tutorial on how we designed and built the kitchen cabinets, plus there is a workbook you can purchase to help you plan your kitchen renovation.

My brother decided to install a quart countertop on the custom-made kitchen cabinets.


And we also installed new LVP flooring throughout the whole house. The flooring is Lifeproof Hockley Oak from Home Depot.

If you are wondering how to install LVP flooring, I have a full tutorial on installing luxury vinyl plank flooring, so check that project out.
The Other Projects
Doorways and Windows
Did you know there’s a right way and a wrong way to construct a doorway?
We found out that someone before us didn’t properly brace a doorway. Each doorway now has a proper header and support, making them functional and safe.
Here’s a quick diagram of how a doorway and window should be braced.

We also removed the tile sill around the windows and installed a new sill, similar to how we installed new window jambs to our windows.

Plus, we installed a simple modern trim around the windows.

Closet Makeover
The closets got a functional makeover with custom-built systems, allowing for better use of space.

I share the full tutorial in another post called How to Build a DIY Closet Organizer.

The Main Bathroom
The house has two bathrooms, but my brother wasn’t ready to tackle the one yet.

So, we gave the main bathroom a quick makeover by replacing the old tile floor. You can see how I like to tile a bathroom floor in this project linked.
Plus, we installed an Ikea vanity to update the area and painted the walls.

The Grand Reveal
Finally, after months of dust, noise, and non-stop work, the house started to look like a home.
My brother has moved in, and while a few things are left to be done, the transformation is incredible, and I have to share it with you.


Lessons Learned and Tips for Your Own Whole House Renovation
Renovating an entire house is a massive task, but the outcome can be hugely rewarding.
It’s about knowing your priorities, planning well, and sticking to the plan while also being flexible enough to adapt when things don’t go as planned.
And if you’re curious, this whole house renovation cost less than $30,000, which included a new kitchen, water heater, bathroom update, closets, flooring, and so much more.
Thanks for sticking around! My brother’s house has come a long way.
FULL PROJECT VIDEO:
Are you interested in seeing the full before and after house renovation in real time? Check out the video below that documents the whole journey!