Grouting floor tiles can seem messy and frustrating, but with the right tips and techniques, it doesn’t have to be. Grouting is an essential part of any tile installation, as it binds together each tile and creates a seamless, cohesive look. With a few simple steps and some basic supplies, you can quickly learn how to grout a tile floor.
If you’re anxious about grouting floor tiles for the first time, that’s a good thing!
It means you know how important this process is for setting your gorgeous tile floor into place. Each piece of tile should look immaculate right from the beginning and last for years to come.
The last thing you want is grout that’s cracked, missing, bumpy, or uneven.
I’ll show you how to avoid these problems by using the proper tools and taking the time to do each step carefully.
And these techniques will also work if you’re regrouting old floor tile for an easy refresh.
Let’s get started!

Disclosure: This post contains some affiliate links or referral links for your convenience. It is a way for this site to earn advertising commissions by advertising or linking to specific products and/or services. Click here to read my full disclosure policy.
Grouting Tips
MATERIALS:
- grout (color Timberwolf)
- water
- bucket (I like to use a 2 gallon)
- tile and grout sealer
- sponges
- (2) buckets (I like to use 5 gallons for this step)
- microfiber towels
TOOLS:
- drill
- mixing paddle attachment
- scale
- Rubber grout float
- paint brush
- grout scrapper/saw (or flathead screwdriver)
For old tile:
Here’s a great video with different tools you can use to remove old grout to prepare for repairs.
For new tile:
Before you can grout, you need to prepare your floor for tile, and then install the floor tile.
Allow the tile enough time to cure, at least 24 hours, before you install grout to the floor tiles.
STEP 1: Clean the tiles
Before you can grout, spend some time cleaning the tiles.
You might notice that there’s some thinset that has seeped through a few of the tiles.

To clean out the grout line, use a grout removing tool to file away the thinset between the tiles. In my case, I had to file away some of the spacers as well. These didn’t break off completely because of the excess thinset.

After you have cleaned out all the grout lines, take a damp sponge or cloth and wipe all the tiles. You want to remove any dust and thinset from the tile so that the new grout can adhere.
STEP 2: Mix the Grout
SIDE NOTE: The most common grout options are sanded or unsanded. If you want, use the grout I bought, which is a versatile grout that works in any location (sanded or unsanded alternative).

After all the tiles and grout lines are clean and dry, it’s time to mix the grout.
I followed the instructions on the package and also used a scale to weigh the water and the mix to get the correct consistency.
Grout goes a lot further than you think, so mix a small amount at a time. I found it helpful to use 1/4 of a 10-pound bag every time I mixed a new batch.
First, put the water into the bucket and pour in the weighed mix.
Then, use the paddle drill attachment to mix the grout.

Make sure you follow the instructions on the bag – the package will tell you the amount of time that you need to mix.
Also, you’ll think that there is too little water to combine with the grout mix, but it is enough.
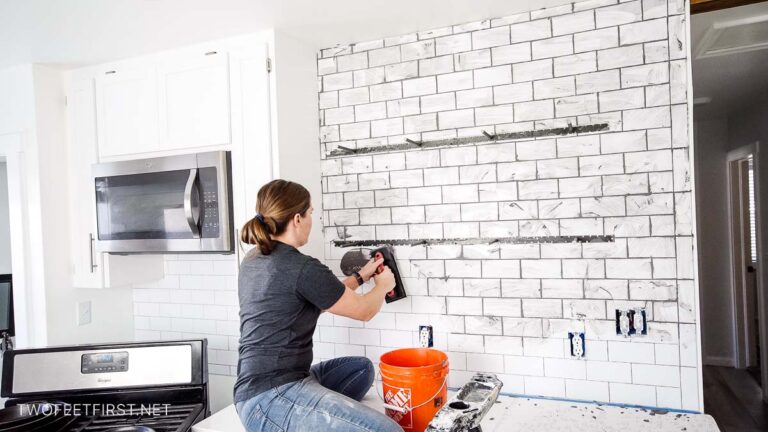
STEP 3: Apply the grout
After the grout is mixed, apply the grout to the floor with a rubber float.
You want to fill the grout into all the spaces around the tiles, and the best way to do this is by holding the float at a 45-degree angle to the tile.
I wasn’t doing this technique in the beginning, and it made it difficult to quickly fill in the gaps.
The most important way to apply the grout is at a 45-degree angle to the tile (at a diagonal to the tile).
The float should also be at a 45-degree angle when you wipe off the excess grout from the tiles.
Work in sections where you apply the grout and then wipe off the excess grout from the tiles.
IMPORTANT: Only apply as much grout as you can manage in 15-20 minutes. Make sure to set a timer. If you allow the grout to sit for longer than 20 minutes, it will start to harden and will be very difficult to remove. I learned this the hard way the first time I applied grout.
STEP 4: Clean the tiles again
After 20 minutes, it’s time to wash off the tiles and clean up the grout lines.
Use a damp sponge, not saturated, and in a circular motion, wipe up the thinset from the top of the tiles.

When the sponge gets dirty, I recommend using two buckets to clean the sponge. One is to wash out the dirty sponge, and the other is cleaner water to give you a fresh sponge for additional cleaning.
While cleaning the tiles, gently wipe the tiles to remove the grout on the surface. You don’t want to remove grout from the grout lines.
Continue this process until there is no more grout on the surface of the tiles.
STEP 5: Additional cleaning
After the first wash, you’ll notice how much cleaner the tiles are, but they will still need more care.
Wipe the tiles with a microfiber cloth. You can use a dry cloth, but I find that a damp cloth works better.

Then, allow the grout to sit for 24 hours.
Later, wipe the tiles again with a dry microfiber cloth to remove the haze.
STEP 6: Apply sealer
Now you’re ready for the final step: seal the tile and grout.
Apply the sealer with a paintbrush and make sure you read the instructions on the bottle to cure properly.
SIDE NOTE: You can apply the sealer to the tile as well, I recommend it. But ensure that the sealer can be used for your tile type (e.g. stone, ceramic, porcelain, etc).

SIDE NOTE: Sealer looks wet and shiny on the tile grout. You can tell the difference between the grout lines that have the sealer installed (before it dries) and the areas that you haven’t applied the sealer.
Allow the sealer to sit for however long the instructions say.
Once the sealer is dry, your floors are ready to be stepped on.

I hope you enjoyed this process. Don’t be tempted to rush or skip any steps. All of these tips will help you create a smooth and sparkling tile floor that you will enjoy for years!
FULL PROJECT VIDEO:
Are you someone that does better with visuals? Check out the full DIY grouting floor tile project video below and don’t forget to subscribe on YouTube so you don’t miss out on future projects!

Use this step-by-step tutorial to help you learn how to grout floor tiles, even if you’re a beginner.