Testing if Rustoleum’s Tub and Tile touch-up paint will repair and fix a chip in a bathtub.
Bathtubs can give your family years of service if you take care of them properly.
But accidents are unavoidable.
One day, someone drops a heavy tool or bottle and you’re staring at a permanent ding in your beautiful enamel tub.
If you have annoying specks or chips in your bathtub, you might be tempted to replace the whole tub.
But wait!
What if there was an easy fix?
We’re trying this tile and tub retouch to see if it actually works. For this project, you only need a few materials.

Disclosure: This post contains some affiliate links or referral links for your convenience. It is a way for this site to earn advertising commissions by advertising or linking to specific products and/or services. Click here to read my full disclosure policy.
Fix a chip in a bathtub
MATERIALS:
- Rustoleum Tub and Tile touchup
- 1500 wet sandpaper (optional)
TOOLS:
- cloth
Step 1: Sand the area (optional)
If your tub has a large chip in it, like mine, you might want to sand the area first to give you a smooth surface.
I used a 1500 wet sandpaper to lightly sand the large chips in my tub.

Step 2: Clean the tub
Clean the area(s) with soap and water, and rinse with water.
Allow the area to dry before moving on to the next step.
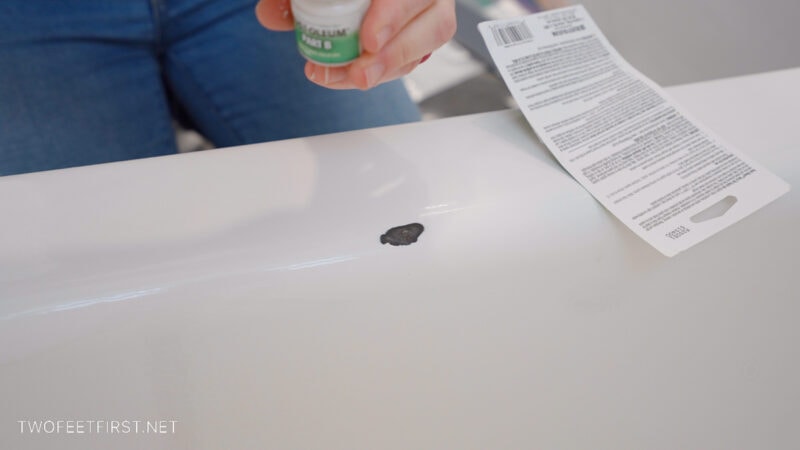
Step 3: Mix the paint
There are two bottle in the kit. To mix the paint, you need to roll each bottle between your palms. Do not shake
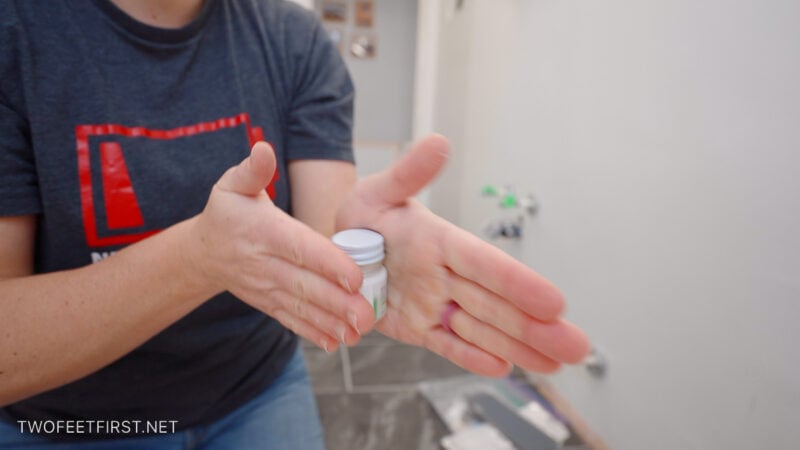
After you feel like each bottle is mixed well, open them up and pour part A to part B.

SIDE NOTE: Part B has the paintbrush in it!
After the contents of part A are poured into part B, you need to mix the bottle again by rubbing it between your palms.
TIP: Do not shake the bottles.
Step 4: Apply the paint
After the bottle is mixed, you are ready to apply the first coat of paint to the fix.
Apply a light layer onto the chipped surface with the paintbrush included.

Allow it to dry for 10 minutes and then apply additional coats if needed.
SIDE NOTE: I applied three coats to my deep chips.
Step 5: Let cure
Once you have applied all the coats you want to apply onto the chipped tub surface, allow the paint to cure for 24 hours before the tub can be touched or used (water).
How did it work and would I do it again?
The touch up worked! The chipped surfaces are covered completely..
The only issue (eye sore) is that the paint color is not the exact color of my bathtub. I knew this was going to be the case before using the product.
If this is something that will bother you, I would recommend repainting the whole bathtub and not using the touch up paint.

But overall, this quick solution worked for me. I no longer have glaring, black chips in my tub and the white, repaired spots do not bother me.
And if you’re in repair mode, check out how to patch and repair plaster walls with drywall. You don’t have to live with shabby tubs or walls!
FULL PROJECT VIDEO:
Are you someone that does better with visuals? Check out the full project of How To Fix A Chip In The Bathtub video below and don’t forget to subscribe on YouTube so you don’t miss out on future projects!