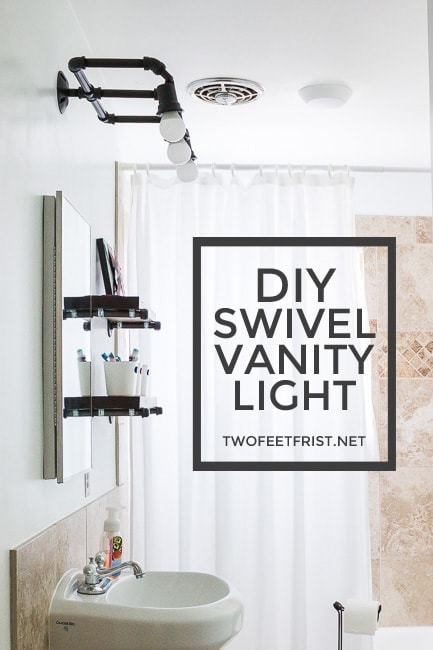
DIY wall sconces are a unique and creative way to customize the look of your walls and add decorative lighting to any room in your home. Here’s how you can build your own DIY wall sconce that you can plug right into an outlet instead of wiring it.
Did you ever want to build your own lighting fixture from scratch?
Today, instead of going to the lighting section of your local hardware store, where they display the gorgeous, pre-assembled fixtures, you’re going deeper.
This time, you will be choosing every single piece that you want to use.
Maybe you have a unique, personal design you want to bring to light, or you saw an expensive piece online that you want to replicate.
If you have basic electrical skills, you can build it yourself!
Sound exciting?
And it won’t be overwhelming either because I’ll tell you which parts you need and how to connect everything for brilliant results.
You will need to buy specific parts for the electrical connections but feel free to choose the hardware you want, depending on your design.
Let’s flip that switch and get started!

Disclosure: This post contains some affiliate links or referral links for your convenience. It is a way for this site to earn advertising commissions by advertising or linking to specific products and/or services. Click here to read my full disclosure policy.
DIY Plug In Wall Sconce
MATERIALS:
- 18ft Cord with Switch
- Canopy (you can pick a different style)
- 1” Hollow Nipple
- Straight Cylinder or Gold Straight Cylinder (or pick another color or style)
- 1” Steel Washer
- Slip Star Lock Washer
- Hex Head Nut
- Porcelain Keyless Socket
- 2-1/4″ Flat Holder (you can pick a different style, just make sure it fits a 2-1/4″ neck)
- Friction Swivel or Gold Adjustable Swivel (or pick another color or style)
- 5” x 1/8ips Threaded Pipe or Gold 5” Threaded Pipe (or pick another color or style)
- Edison Lamp Socket Cup (or pick another color)
- Swivel Cross Bar
- (2) Steel Stud
- (2) Knurled Acorn (or pick another color or style)
- 5-3/8″ Cone Shade w/2-1/4″ Neck (you can pick a different style, just make sure it fits a 2-1/4″ neck)
- Light bulb
TOOLS:
- 5/16” Metal Drill Bit
- Screwdriver
- Utility Knife
- Pliers
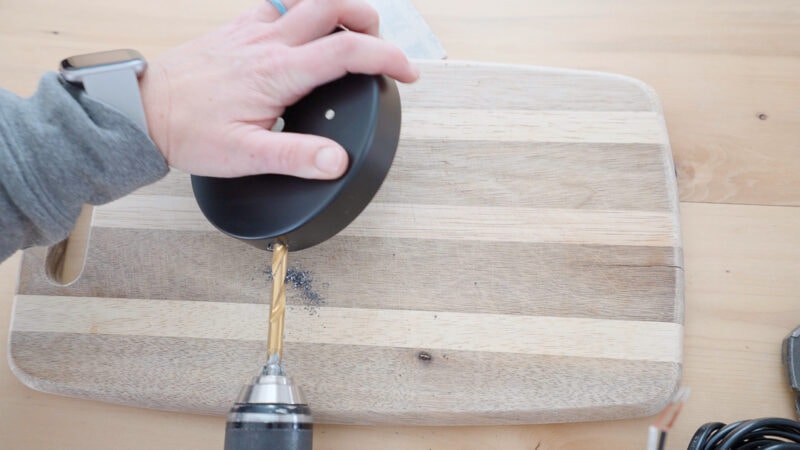
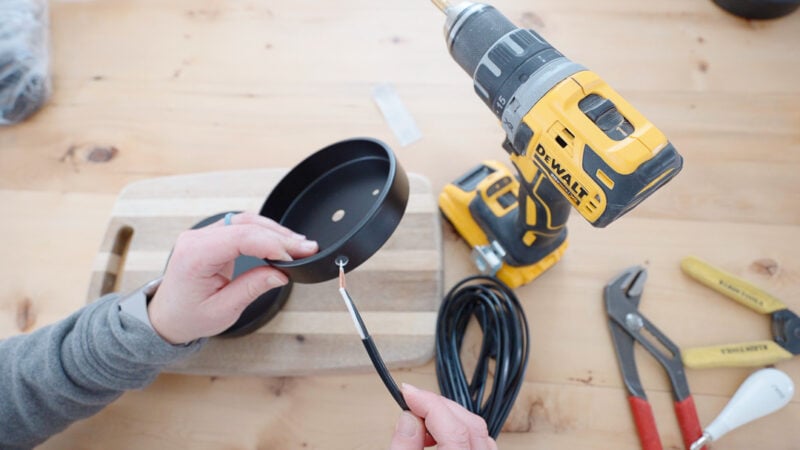
Step 1: Drill a hole through the canopy
The first step is to drill the hole so you can insert the plug wire into the back of the canopy, which is the part that goes on the wall.
To do this, use a metal drill bit and drill a hole in one side of the canopy.
SIDE NOTE: Take your time and watch out for metal shavings.
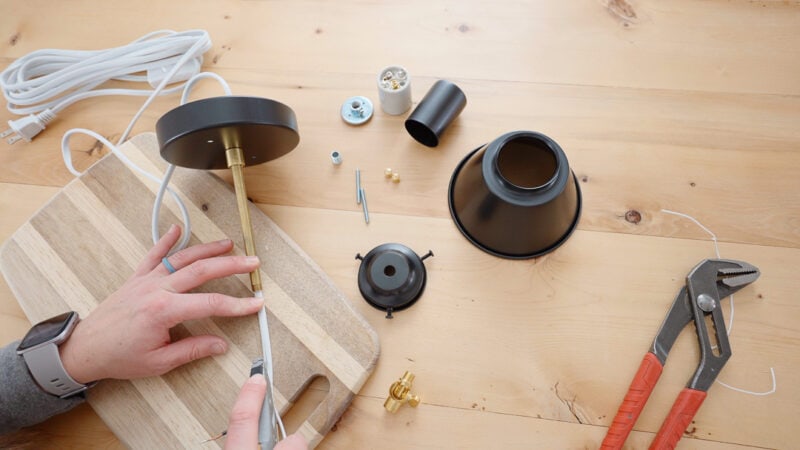
Step 2: Assemble the light
Now, you’re ready to assemble the light.
There are a lot of little pieces, but there’s no need to be nervous. You’ll see that they all come together quickly and easily.
First, take the straight cylinder and thread it into the 5” threaded pipe.

Next, take the hollow nipple and thread it through the straight cylinder.
From here, you’ll insert the hollow nipple into the canopy. Then, attach a washer, the star lock nut, and finally, the hex nut.

Use pliers to tighten this connection.
Now, thread the electrical wire through the hole that you pre-drilled, then through the pipe and all the other attachments that you just installed.
After, you need to cut the cord wire’s jacket (the insulation around the wire).
Do this very carefully, so you do not cut the wires underneath. Cut about 5” off to make it easier to feed the wires through the next part of the light and attach the wires to the light socket.
Next, feed the wires through the swivel, ensuring the female side of the swivel is going towards the pipe.
Then, thread through the flat holder (this is how the cone will attach to the light) and the light socket cup.
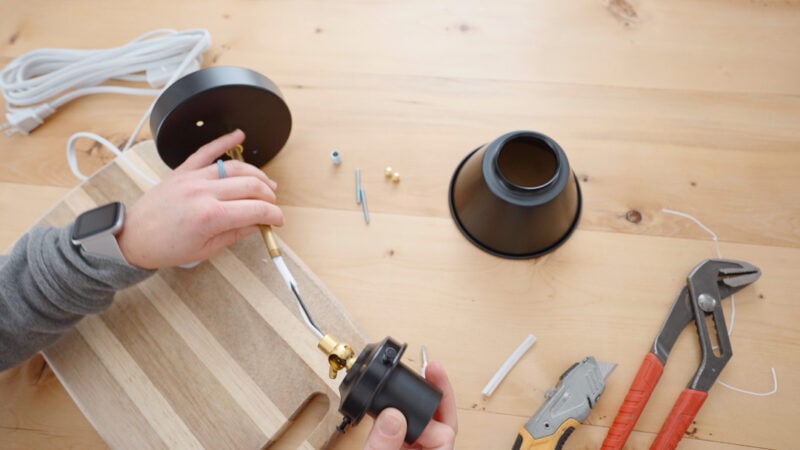
Now it’s time to connect the light socket to the wire itself.
First, detach the top of the porcelain socket (two screws on the inside of the socket where you put the light bulb) so that you can thread it through the wire.
Then, take the wires and twist them so they’re not frayed (makes it easy to attach to the socket).
There are two screws on the socket to attach the wire. You will attach one wire to a screw (it doesn’t matter which side).
TIP: Form a hook with the wires to allow them to wrap around the screws.
Hook each wire around the screw and tighten.

TIP: Hook the wire around the screw in the direction that the screw tightens. This way, as you tighten the wire to the socket, it will wrap around the screw even more to give you a better connection.
Once the wires are tightened to the socket, you will attach the top of the socket together with the screws.
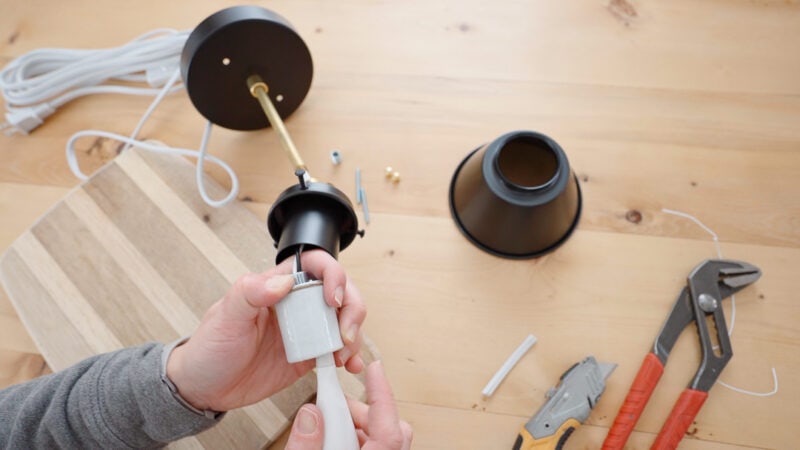
After the socket is connected (the wires are hidden), pull the wire to remove any excess so that you can tighten the swivel onto the socket.
When the swivel and the socket are fully attached, you will thread the wire back through the pipe so you can connect the pipe to the swivel.
After everything is put together, you can attach the shade to the flat holder using the screws.
You might have to use pliers to tighten these screws down to the shade.
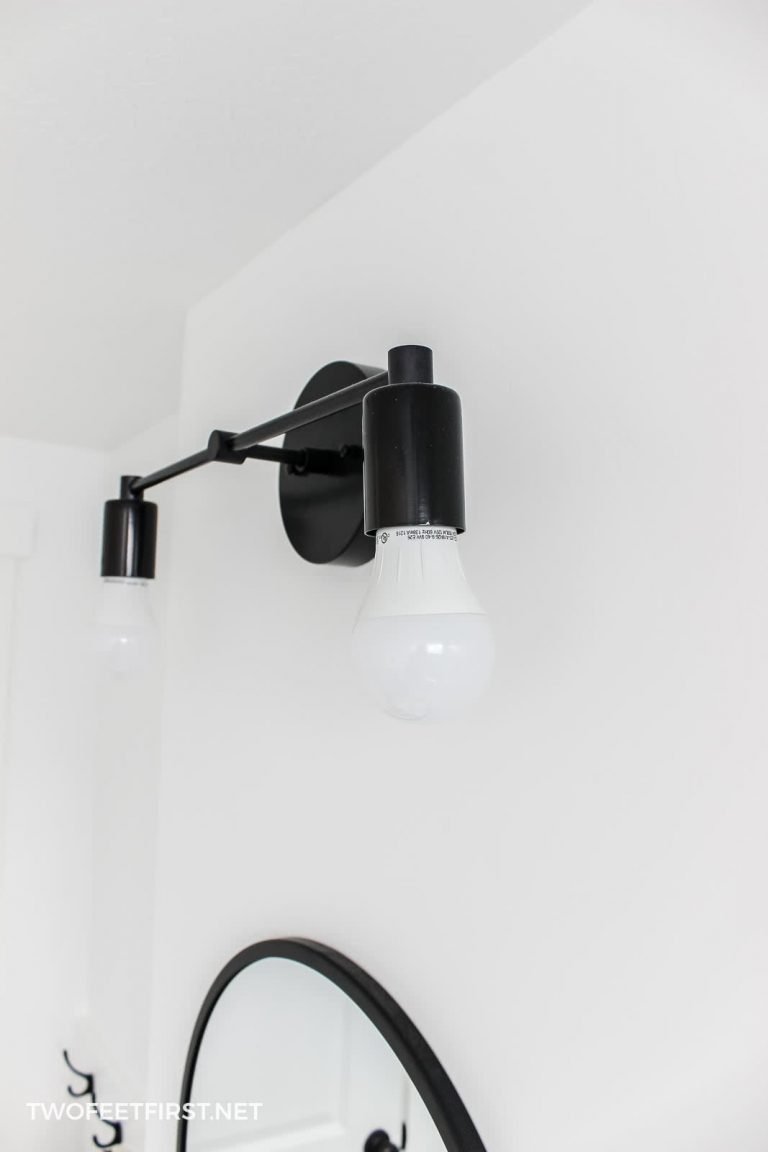
Now, you have just built a ready-to-install wall sconce.

Step 3: Hang the light
Attach the light to the wall by using a swivel cross. Use wall anchors, if needed.
Then, thread the steel studs onto the crossbar and put the canopy through the steel studs. Attach them together by adding the acorn nuts to hold them into place.
If you’re assembling more than one plug in wall sconce, build one completely before moving to the next.
The final step is plugging into a nearby outlet and seeing the beauty of the lights you created.
And now you have the skills, check out which other shady corners of your home could use a new DIY wall sconce.

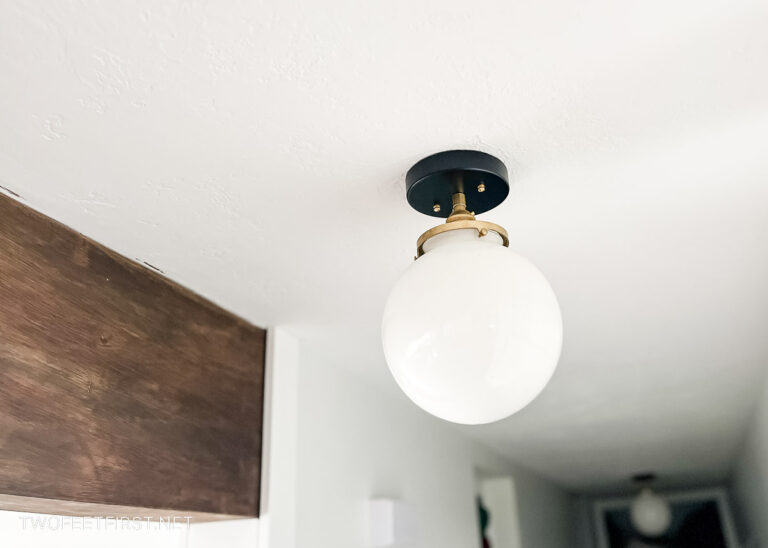
If you want to try a wired design, take a look at this DIY pendant light wrapped around pipe or a DIY pendant light. For a dramatic centerpiece, there’s also a DIY Farmhouse wood beam chandelier.
FULL PROJECT VIDEO:
Are you someone that does better with visuals? Check out the full project video below and don’t forget to subscribe on YouTube so you don’t miss out on future projects: DIY plug in wall sconce