DIY Industrial Shoe Rack with pipe and wood
This post may contain affiliate links. Please read our disclosure policy.
Build your own DIY industrial shoe rack with pipe and wood with this tutorial.
A huge, messy pile of sneakers, boots and slippers have taken up a permanent residence by our back door.
It’s a simple system – just take off your shoes and toss them on top of the heap. Eventually, you will stop noticing the clutter, right?
We’ve been storing the kids’ shoes there for years but it’s always an eyesore. Our house doesn’t have a mudroom so the back door is the best space for easy access.
But it doesn’t have to look disorderly. In fact, I could even make it very stylish if I created an industrial shoe rack using pipe and wood.

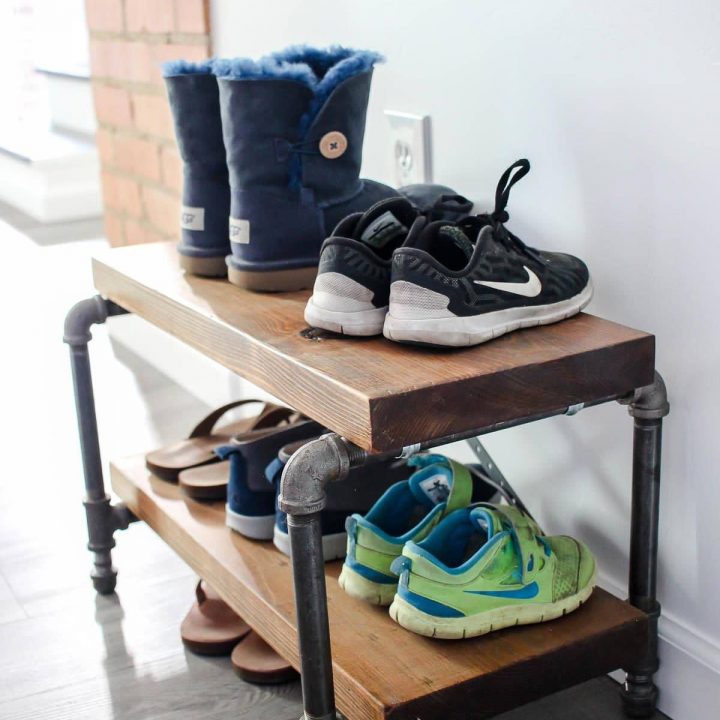
What do you think of our industrial shoe rack? It’s a unique design and it was simple to create. This method could also work for a bookcase (I will be making one later because now I have all the extra pipes!).
Let me show you how easy it was to build.
Disclosure: This post contains some affiliate links or referral links for your convenience. It is a way for this site to earn advertising commissions by advertising or linking to specific products and/or services. Click here to read my full disclosure policy.
DIY Industrial Shoe Rack
MATERIALS:
- 4 – 1/2″ pipe caps or use 1/2″ pipe flange
- 4 – 1/2″x1.5″ pipe nipple
- 4 – 1/2″ pipe tees
- 4 – 1/2″x10″ pipe nipple (this is the width of the shelf)
- 4 – 1/2″x7″ pipe nipple (space between shelves)
- 4 – 1/2″ pipe 90 elbow
- 2 – 2″x10″ wood board, in the length you want
- 8 – conduit straps
- 16 – #10 1.25″ wood screws
- stain & polycrylic
- sandpaper
- 2- strap tie
TOOLS:
- drill
- pen or pencil
- tape measure
- wrench

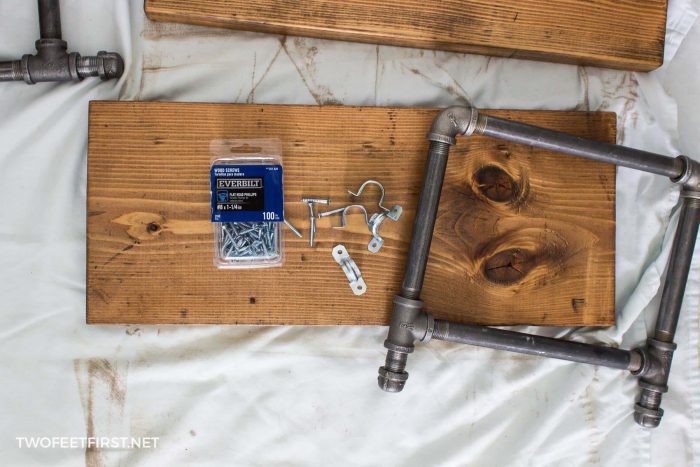
First, I gathered my supplies and had my boards cut at the hardware store to 22″.
NOTE: You can add more shelves to your shoe rack. For each additional shelf, you would need: one more wood board, 4 more pipe tees, 4 more 7″ pipe nipples, 2 more 10″ pipe nipples, and 4 more conduit straps with screws.
Once my pipes arrived, I washed them thoroughly with dish soap because they are filthy! Make sure you dry them immediately so they do not rust. If they do rust, take a wire brush to them or rub them with ketchup (yes, it works!).
Then, I started to assemble the pipe frame. I took the pipe cap and attached it to the 1 1/2″ pipe nipple. I then attached the pipe tee to the pipe, like this.

Next, I attached the 7″ pipe nipple to the tee.
After, I attached the 90 elbow; this was facing the same way as the tee. I did this four times. The legs looked like this:

Note on attaching the pipe: You want to tighten the pipe by hand as far as you can. Then, tighten slightly more with a wrench.
After attaching, I took my tape measure and measured the distance of the 7″ pipe from the fitting to fitting. You will want to make sure all of the 7″ pipes are spaced the same (you can also place them side by side to check). If they are not the same, tighten them until they are.
Then, I added the 10″ pipe to the pipe tees on one leg.
This was the easiest way I found to attach everything together but if you know another way, please share!
I then fastened these pipes as tight as I could with the wrench (but making sure they were still the same length).

After, I placed another leg next to the 10″ pipes I just added. I found it best to place the leg on just one of the top or bottom 10″ pipes. Then, the legs are going different directions, like this:

I then screwed (rotated) the leg to one of the 10″ pipes, until the legs are equal.
Next, taking the wrench, I loosened the 10″ pipe but tightened it onto the other leg. I did this for both 10″ pipes, alternating back and forth between the two pipes. The trick is that you want the 10″ pipe threaded the same amount on both sides. I repeated this process for the other leg frame.

At first, the leg frames were a little wiggly but once I attached the boards to the frame, it was sturdy.
The space we had available near the back door was 22” so I cut the boards to that length.
Then, I sanded them smooth with #220 grit sandpaper and wiped them with a damp cloth to remove any dust. I have also found this helpful when applying the stain.
Finally, after wiping the wood, I applied my stain (I used Provincial by Minwax).
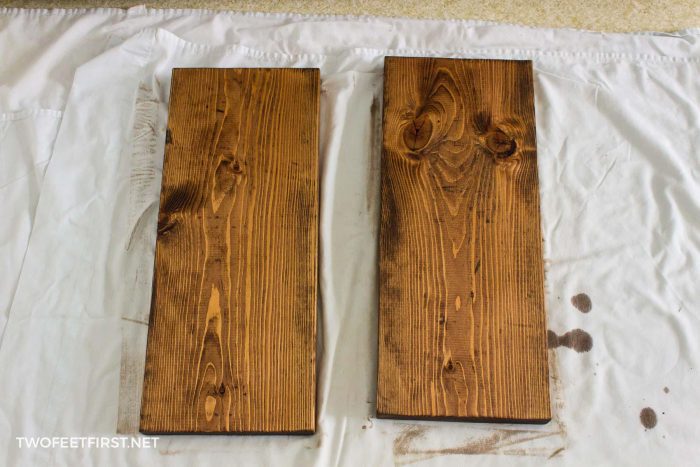
Once the stain dried, I applied one coat of Polycrylic to the board to help seal the board from water damage. After that coat dried, I marked the board to drill holes for the brackets/straps.
I wanted a slight overhang of the wood from the pipe frame so I measured 1/2″ away from the board edge and 1.5″ from the side of the board. I placed the bracket there and marked the two holes. Then, I drilled a small hole onto the marked spots, making sure not to go through the wood.

I did this 4 times for one board but I finished both boards at one time. In the end, the board looked like this.

I added the top board first. To do that, I placed the top of the board on the floor (the drill holes will be facing out) and attached the conduit straps to the pipe (2 on each). Then, I screwed them into place using the 1.25″ screws.
For the bottom board, I attached one screw, with the strap attached, to the inside drill hole on the board (there will be 4). I did not tighten the screw so it would still be loose enough to insert the pipe. I then inserted the pipe onto each strap. Finally, I added the other screw to the strap using the pre-drilled hole as my guide. I tighten all the screws.
I then turned the shoe rack over and adjusted the legs (caps) until the rack was level (not wobbly).

UPDATE 2/2017: We were having issues with the shoe rack collapsing. To solve the problem, we added metal bars (called a strap tie). I found the metal in the plumbing section of the hardware store (2 of them) and attached them using screws on each corner forming an “x”. Here is what they look like:
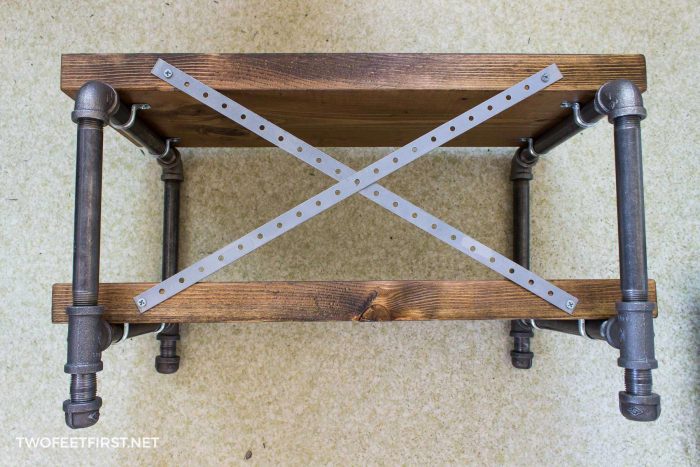
This solved the problem because now you can even sit on the rack without it falling over.

What do you think of my industrial shoe rack? The process was easy and it’s a major improvement over what we had before. Here’s a cost breakdown for you:
COST:
- pipe – $29.00
- 10″ wood board – $8.90
- conduit straps – $1.55
- wood screws – $5.25
- stain & polycrylic – FREE
- sandpaper – FREE
TOTAL COST – $43.15

Hope this tutorial will inspire you to create your own shoe rack!
PS. You can also spray paint the pipe! What do you think? Any place you want to put the shoe rack in your house?
DIY Industrial Shoe Rack
Do you need a way to organize all of your shoes? How about a DIY industrial shoe rack made from wood and pipe? These steps could be your solution!
Materials
- 4 – 1/2″ pipe caps or use 1/2″ pipe flange
- 4 – 1/2″x1.5″ pipe nipple
- 4 – 1/2″ pipe tees
- 4 – 1/2″x10″ pipe nipple (this is the width of the shelf)
- 4 – 1/2″x7″ pipe nipple (space between shelves)
- 4 – 1/2″ pipe 90 elbow
- 2 – 2″x10″ wood board, in the length you want
- 8 – conduit straps
- 16 – #10 1.25″ wood screws
- stain & polycrylic
- sandpaper
- 2- strap tie
Tools
- drill
- pen or pencil
- tape measure
- wrench
Instructions
- Attach metal pipes together to make the legs.
- Cut, sand, and stain wood for the shoe shelf.
- Assemble the wood to the metal legs.
- Add metal bars to the back of the rack.
- Place shoes on the rack and enjoy!


What type of wood did you use?
Sorry I am just getting back to you but I used 2″x10″ pine. The regular stuff at the hardware store. Hope that helps!
Hi Megan and Eric
We just built this shoe shelve and it looks beautiful except it does not stay straight, but rather collapses on one side or the other side (like card house) if you push it a little. Did you experienced such a problem? How would you fix it?
Thanks for your advice!
Hi, Marina! Sorry I was not able to respond to your question yesterday. Yes, we were having the same problem and thank you for informing me that I never updated that post about what we did. I have now updated the post with the info and pictures but we added 2 strap ties to the wood in an “x” pattern. This solved the problem. Sorry again for not having the post up to date but thank you for letting me know. Have a great day!!
https://www.lowes.com/pd/Mueller-Proline-1-2-in-Dia-Galvanized-Floor-Flange-Fittings/4330092
I used these instead of the cap. Too care of the shifting problem
That is a great idea!!! Thanks