DIY Floating Shelf
This post may contain affiliate links. Please read our disclosure policy.
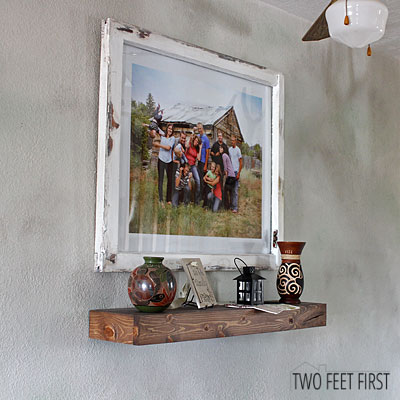
Along with the old window turned picture frame, my sister made my mom a new floating shelf to go under the frame and because she built the shelf at my house, I am going to show you how she built the floating shelf.
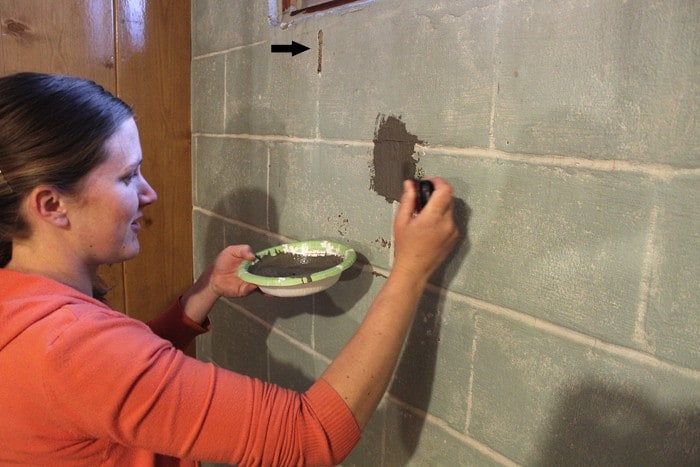
 First, you need to decide the length of your shelf. TIP: See where your studs are on your walls first, making sure you can screw into at least two studs.
Disclosure: This post contains some affiliate links for your convenience, click here to read my full disclosure policy.
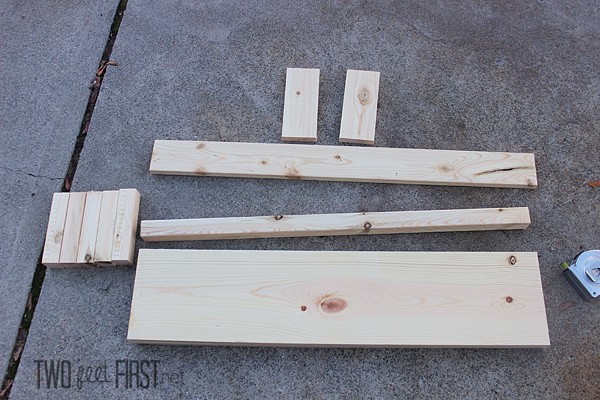
Materials:
– 2″ x 2″ board
– 4″ board, cut to 3″ (but you could use the 4″, really 3 1/4″, to give it a little lip on the shelf)
– 8″ board
Cutting:
5 – 2×2 cut to 5 5/8″ (cut from 4″ board, pocket inside shelf)
1 – 2×2 cut to length of shelf (ours cut to 31 1/2″, pocket inside shelf)
2 – 8″ cut to length of shelf (ours cut to 31 1/2″, top of shelf)
1 – 3″ cut to length of shelf + 1 1/2″ (ours cut to 33″, side of shelf)
2 – 3″ cut to 5 3/4″ (side of shelf)
Next was assembling the shelf frame, the part that slides into the shelf to give it strength. Using the Kreg Jig![]() , create two pockets on the 5 5/8″ 2×2’s. Then screw the 2×2’s together, they will look something like this.
, create two pockets on the 5 5/8″ 2×2’s. Then screw the 2×2’s together, they will look something like this.
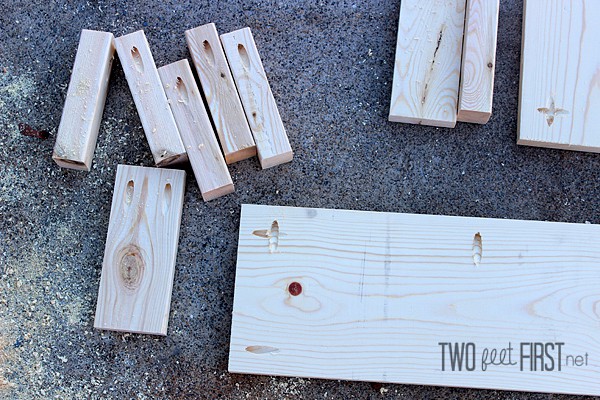
Next is assembling the shelf, you can either use the Kreg Jig or a nail gun. If you use the Kreg Jig the last piece of wood will be harder to assemble because it’s a tight squeeze. My sister used the Kreg Jig and created two pockets on the 3″x5 3/4″ pieces. Then on the 8″ board put pockets like example above (the one pocket in the corner will not be used).
Attach the 3″x5 3/4″ pieces to the long 3″ piece creating the sides and front of the shelf.
Then add one of the 8″ boards to the side and front just created and screw into place. Turn over and attach the other piece the same way, it will just be harder unless you have a longer screwdriver.

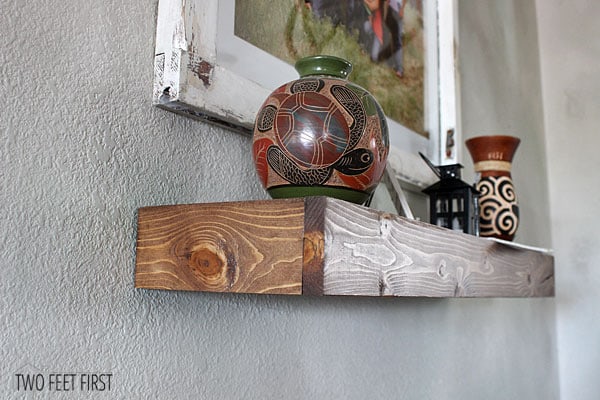
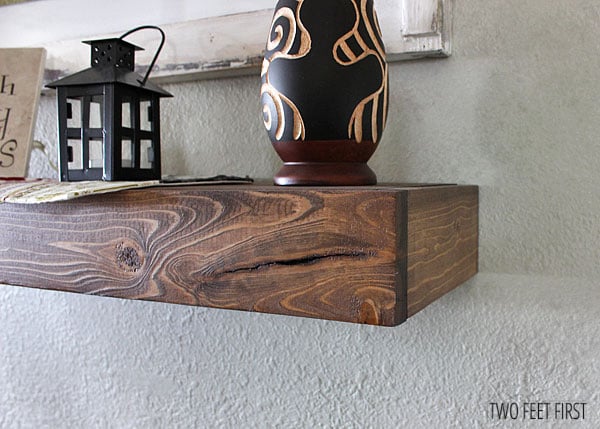
After you have assembled both, take the shelf and stain the wood, my sister used a stain called special walnut. After the stain dried, she applied one coat of poly.
Next attach your shelf to the wall, screwing the shelf pocket first to studs. Then insert the pocket into the shelf and it’s done!
Anyone else building a floating shelf? Or do you want to? I want to add them to my bathroom…


great job,i love this chunky look!
Looks awesome! Love the chunky look too!
Thanks Carrie!
Looks fabulous! This is on my list for the guest bathroom as soon as I can find the time.
Thanks Jesica! Its on my list to add them to my bathroom too. Hope you can find time soon!