The morning sun streams through the windows as you bask in its warmth. Your eyes happily wander over to the latest ambitious remodel you finished just the day before – installing new trim and baseboards. But suddenly, the lingering pride vanishes.
How could you not have noticed that your joints and seams aren’t as perfect as they seemed yesterday?
Before you go and rip it all out, I have one magical item that will save you hours of irritating work.
Caulk is here to save the day!

The pros swear by it and any do-it-yourselfer, like you, must learn to caulk if you want to add the finishing touches to your hard work. The good news is that it’s easy to use. Read on to learn exactly how to caulk your trim and baseboards and fix those little imperfections.
Why should you use caulk?
Caulk is one of the most common supplies for home improvement projects – essentially, it fills in the gaps between two items.
You use caulk when weatherizing a door or window, or in bathrooms to seal around sinks, bathtubs, and showers.
But you can also use caulk to fill joints in trim and boards to give you a smooth seamless finish.
How do I pick the right caulk for trim and baseboards?
SIDE NOTE: Read the label on the tube to see the recommended project, e.g. a silicone caulk is normally used in wet areas of your home (bathroom and kitchens).
Caulk comes in a variety of options:
- Interior and exterior
- Various colors (white, cream, clear, etc…)
- Paintable and not paintable

Because you are working with trim and baseboards, I would recommend using an interior, paintable, latex caulk. I recommend latex because it cleans up easily, dries fast, and it’s also inexpensive. Choose white if you’re painting the trim. If the trim is wood, find a color close to the finished wood color or use clear.
Do you caulk before or after painting?
If you want professional-looking trim, apply caulk before painting. This will give you that seamless finish by the time you’ve washed and packed away your paint brushes!
I found that if I apply caulk after painting it collects dust more and it does start to yellow over time.
Now that you know exactly which caulk you need, let’s learn how to apply the caulk.
Disclosure: This post contains some affiliate links or referral links for your convenience. It is a way for this site to earn advertising commissions by advertising or linking to specific products and/or services. Click here to read my full disclosure policy.
HOW TO CAULK LIKE A PRO
MATERIALS:
- baseboard and/or trim installed
- caulk of your choice (here’s my favorite type of sealant)
- water
- paper towels
TOOLS:
- caulk gun
- small bowl
- razor blade
STEP 1: Prepare the surface
A quality caulking job always starts with a clean surface. Take the time to remove any existing caulk (if you are recaulking) or clean the area with a rag to remove dirt so the caulk can adhere correctly.
SIDE NOTE: You may want to tape the area to ensure a straight line of caulk.
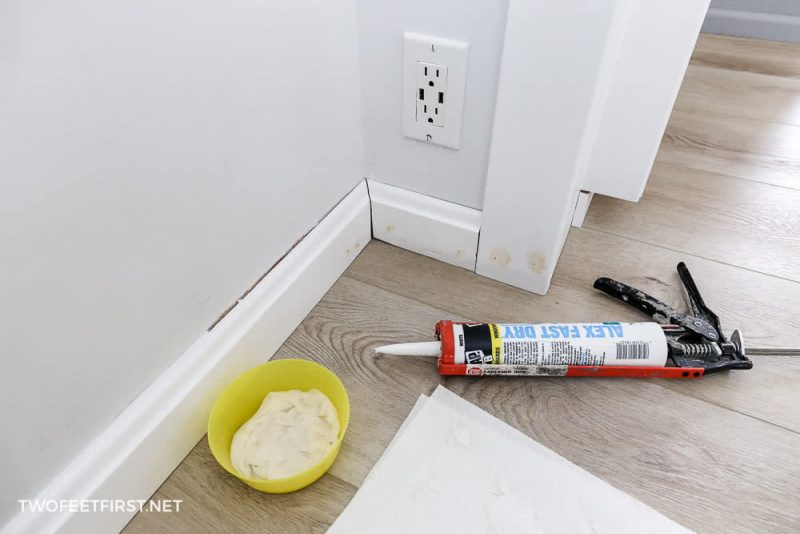
STEP 2: Set up your water bowl
Before starting to caulk, crush up two to four sheets of paper towels and place them in a small bowl.
Add enough water to the bowl until the paper towels are damp.
TIP: You want the paper towels wet but not soaking.
This bowl will be used to wet your finger to prevent the caulk from sticking to it but also provides a smooth finish to the caulked areas.
STEP 3: Cut the nozzle
Cut the nozzle of the caulk tube with a razor blade. Cut the tube at a 45-degree angle about 1/8” to 1/4” away from the tip of the tube depending on the size of bead you want.

Cutting the tip at an angle allows you to better position the tube when applying the caulk to give you a smooth bead.

A line of caulk is called a “bead” and the size or width of the bead is determined by where the nozzle is cut. So, for a smaller bead, cut the nozzle close to the tip (1/8”) or for a wider bead, trim off more from the nozzle.
Then, using a nail, wire, or if your caulk gun has a puncture tool attached to it, break the inside seal of the tube by inserting the wire into the nozzle hole you just opened at the tip.

TIP: Puncture the seal a few times to ensure a smooth flow of caulk.
Adjust the rod of the caulk gun to allow you to insert the tube onto the frame, making sure the plunger is against the bottom of the caulk tube.
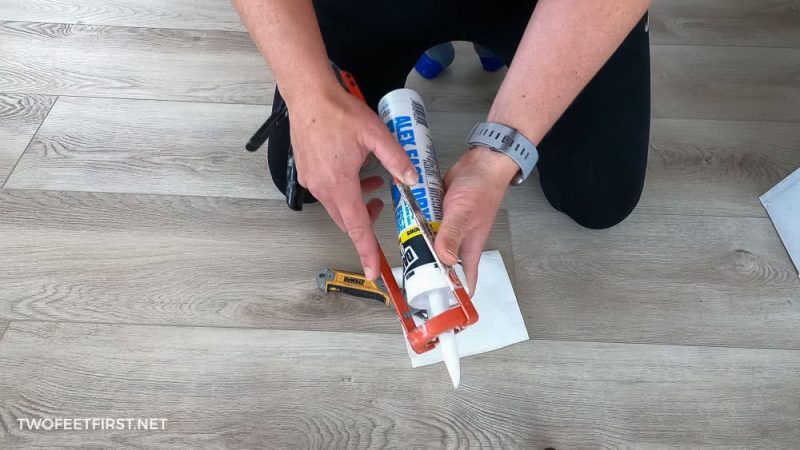
Now you are ready to apply caulk to trim.
STEP 4: Apply caulk to the trim
Starting at one end of the trim, place the nozzle of the caulk at a 45-degree angle where the trim meets the wall or wherever the gap is that you are trying to fill.
Pull the caulk gun trigger slowly to apply enough pressure to force the caulk out of the tube and onto the gap.
At the same time, steadily move the nozzle along the joint to fill the gap with an even bead of caulk. You need to squeeze the trigger of the gun at the same time.

TIP: Work in sections if you have a lot of caulking to do. You don’t want the caulk to dry before you can smooth the bead (I’ll explain this in a later step).
Release the trigger when it reaches the handle and it will spring back to allow you to squeeze the trigger again until your bead is complete. Or, release the trigger when you want to stop applying the caulk.
TIP: I have found it easier to release the rod with the plunger so I can stop the flow of caulk.
SIDE NOTE: In cases where the gap is so large that you are having trouble filling the space, I would recommend using a gap foam filler to help with this.
STEP 5: Smooth the caulk
There are many hardware tools to help you create a professional-looking finish but you can use something even easier, your finger.
First, dab your finger into your bowl of damp towels to moisten the fingertip (I normally use my pointer finger).

Then, lightly run your finger along the length of the bead to give you an even finish.
The goal is to create a smooth bead but not remove all the caulk you just applied (unless you applied too much). Remove any excess caulk from the area using your finger and wipe it onto the damp paper towel. Re-dab your finger after before smoothing out any more caulk.

Once you have smoothed all the caulk you have applied, either repeat step 4 and finish applying caulk to the area or let the caulk dry according to the instructions on the tube.

FULL PROJECT VIDEO
Want to see how it all comes together? Check out the full project video below, and don’t forget to subscribe on YouTube, so you don’t miss out on future projects!

And that’s it! Now you know how to hide those imperfections in your trim and baseboards to give you that professional finish you can be proud of. Now, back to enjoying the morning sunshine!
Don’t forget that you can learn to make your home into something you can love one step at a time. Be sure to click over to see my post popular projects for the home.

How to apply caulk to trim and baseboards
Are you wondering how to apply caulk to trim and baseboards to give you a smooth finish so it looks like a pro did it? Follow these tips and tricks to help you acheive a smooth finish on your trim joints.
Materials
- trim
- caulk of your choice
- water
- paper towels
Tools
- caulk gun
- small bowl
- razor blade
Instructions
- Start by preparing the trim by cleaning the area.
- Put paper towels in a bowl with some water.
- Prep the caulk tube by cutting the nozzle and breaking the seal on the tube.
- Apply caulk to the trim.
- Smooth the caulk with a damped finger.
- Allow the caulk to dry then paint the trim.