A step-by-step tutorial on how to build a refrigerator cabinet to hide your refrigerator.
You know what is holding you back from having a modern, high-end kitchen? No, it’s not money.
It’s clutter. Plain and simple. And it’s everywhere.
But in some places, it’s out of control.
You walk into your kitchen to grab something from the fridge. Each time, you try not to notice how terrible the side of your refrigerator looks in the space.
The bright, mismatched magnets drive you crazy but they hold important reminders and cute photos of the kids. And all of the random junk on the top of the refrigerator – let’s not even go there…
Don’t worry, there is a solution and it can be a perfect weekend project for you.
Today is the day that you learn how to build a refrigerator cabinet to hide the sides of the fridge and give you better upper cabinet storage. Once you’re done, you can finally have a fridge that easily blends into your kitchen.
Disclosure: This post contains some affiliate links or referral links for your convenience. It is a way for this site to earn advertising commissions by advertising or linking to specific products and/or services. Click here to read my full disclosure policy.
How to build a fridge cabinet
MATERIALS:
- 3/4” plywood sheet
- 1”x2” trim boards
- 1-1/4” finishing nails
- 1-1/4” screws (I use the Kreg brand)
- #220 grit sandpaper
- Backer rod (optional)
- Caulk
- Paint and primer
TOOLS:
- Table saw
- Circular saw
- Miter saw
- Jig saw (optional)
- Orbital Sander
- Kreg Jig K5 (pocket holes creator)
- Nail gun
- Drill
- Countersink bit (optional)
- Level
- Caulk gun
- Square
- Paint brush and roller
- Tape measure
- safety glasses
- face mask (for dust)
- ear protection
Plan the design for your fridge surround cabinet
STEP 1: Measure your refrigerator and space
Before you can create custom plans for your refrigerator cabinet, you first must measure the dimensions of your refrigerator and the amount of space you have to build your cabinet.
These dimensions will be how wide the fridge and space is, the depth, and how tall.
If you need assistance on how to measure a refrigerator, Home Depot has a great article to guide you through measuring a refrigerator.
Take a piece of paper and pencil to jot down the dimensions of each.
To create this style of cabinet, you will need enough space for the width of your fridge plus 4” for 1-1/2“ trim surrounding the cabinet or 2-1/2“ for a 3/4” trim. For example, if your fridge is 32” wide, you will need 36” to build the cabinet with 1-1/2” trim.
STEP 2: Create your refrigerator cabinet plan
Now that you have your measurements, you are ready to create the custom cabinet for your refrigerator.
To help you get started, you can download a copy of my fridge cabinet plans. You will need to subscribe to my newsletter to receive the FREE PDF – fill out the form below if you’re interested. And if you have questions, please visit the Q&A page on free printable/plans.
Refrigerator cabinet surround – FREE PLANS
Subscribe to the TwoFeetFirst newsletter and this free PDF plan will be sent to your inbox!
Please use my plans as your guide or maybe you will find that the plans work exactly for your fridge.
The size of your refrigerator will determine the size of your cabinet surround. Also, every refrigerator needs a certain amount of space around it to allow air to circulate.
Here are the guidelines you need to follow while building your plan:
- You need 2” of space from the back wall to the back of your refrigerator.
- There needs to be 1” gap from the refrigerator to the upper cabinet.
- You need a 1/2” gap on the sides of the refrigerator to the trim of the cabinet.
You need to calculate the size of the side panels to determine the size of the upper cabinets. If the side panels go from the floor to the ceiling, you will need to subtract 1” from that measurement to allow the panels to be put in place without damaging the ceiling. If your current cabinets do not reach the ceiling, make the height of the side panels the same height as your cabinets.
For the depth of the side panels, you need to measure the side of the fridge to where the door of the fridge begins, then add 2” to this measurement. You add this measurement for two reasons:
- To allow air to circulate behind the fridge
- This will allow the door of the fridge to open freely.
The width of the cabinet base above the fridge and the braces of the full cabinet surround will be the width of your fridge plus 2-1/2” (if you are using 1-1/2“ trim for the whole length of the cabinet).
SIDE NOTE: If you are like me and need to cut the size of the trim to 3/4” to make the cabinet fit into the space, the width will be the width of your fridge plus 1”.
With these measurements, draw up your cabinet plan.
SIDE NOTE: If you want to reuse the cabinet that was above your fridge, Ana White has a great tutorial on how to box in a fridge with cabinetry.
If you want more detailed instructions or assistance, you can purchase my “Fridge Cabinet Premium Plans”. These plans guide you through creating your own custom cabinet for a bottom-freezer refrigerator, top-freezer refrigerator, french door refrigerator, or side-by-side refrigerator.

STEP 3: Determine your cuts and create a cutting diagram
With your plan in hand, take the time now to identify the cuts needed for each piece of wood and create a diagram from that list.
This will ensure that you have the correct cut measurements for each piece of wood and minimize waste.
TIP: My plan includes all these measurements if you need specific examples.
Then, with those measurements, create a cutting diagram for the sheets of plywood and trim boards. This will let you know exactly how much plywood and trim boards are needed and where to cut each.
In my free PDF, you will find blank diagrams for the plywood and trim.
Start your cutting diagrams by placing the largest pieces first. Then, work your way down the list until you have each piece on a diagram.
TIP: You want to cut plywood into strips so it’s best to group the pieces that are the same width together.
SIDE NOTE: This is where the premium plan will come in very handy!
Now, you can gather your supplies and get ready to cut all the pieces.
Build your fridge surround cabinet
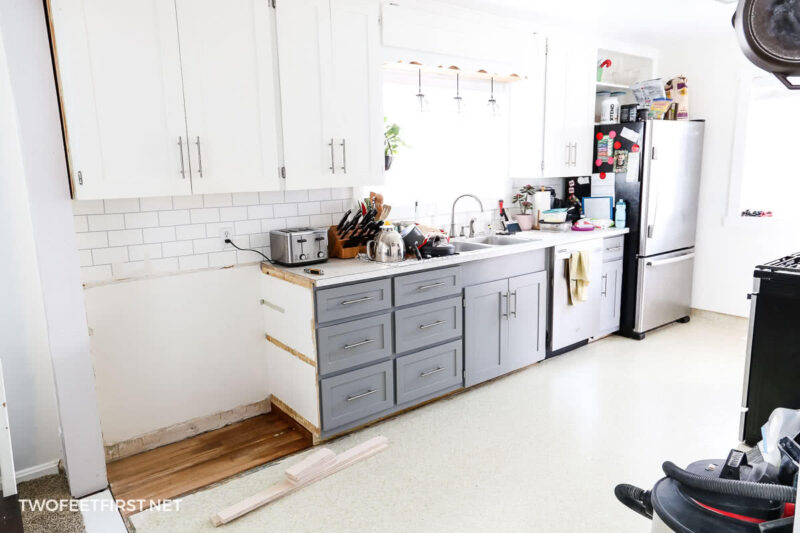
After creating the plan, I prepared to remove the cabinet that was above our refrigerator.
On our kitchen cabinets, the top trim piece is continuous from one end of cabinets to the other. I used an oscillating tool to cut through the trim and cut through the nails holding the shelves of the cabinet to the cabinet next to it.

STEP 4: Cut, add pockets, and sand the wood
Because you have a cutting diagram, this part will be organized – no missed cuts!
Start by cutting your plywood pieces to the measurements on your diagram.
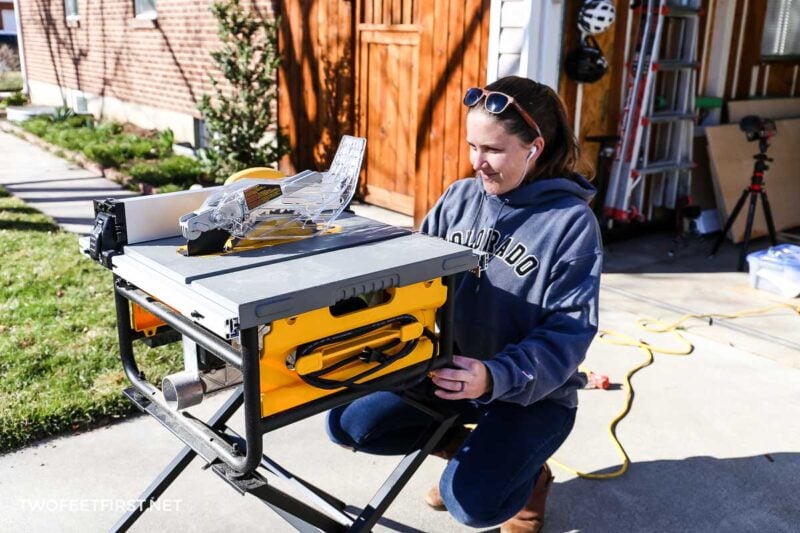
SIDE NOTE: Some of the pieces to be cut were too large for my table saw so I used a circular and a board clamped in place as a guide to cut them.
TIP: Hold off on cutting the 1”x2” trim boards until it’s time to install them; this will allow you to have exact cuts.
After all the pieces are cut, some will need pockets added to secure the plywood pieces together during assembly.
SIDE NOTE: There is a diagram in the printable that shows the placement of each pocket needed.
If you need to secure the cabinet to the floor (the panel is not against a wall or cabinet), you will want to add pockets to the bottom of the panels to secure the panel to the floor so that it doesn’t move.
Next, use #220 grit sandpaper on an orbital sander to sand all the plywood pieces.
Once everything is sanded, wipe with a dry cloth to remove the dust.
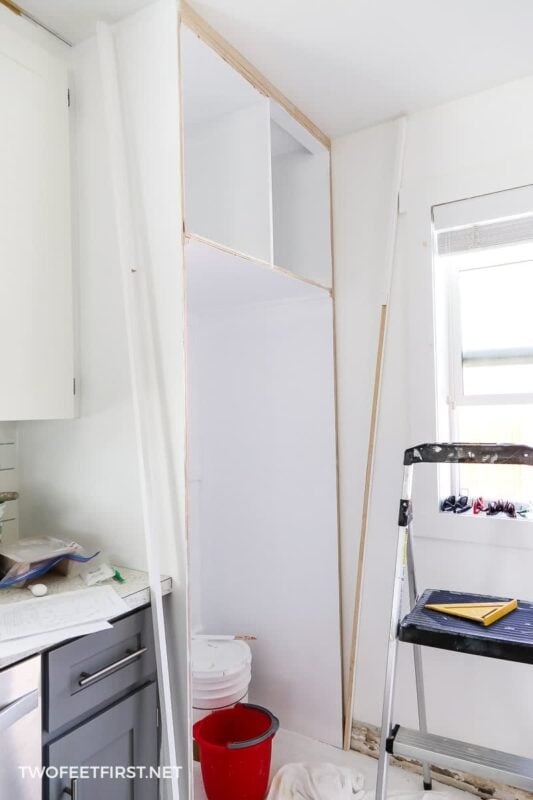
STEP 5: Assemble the side panels into a box
Place one of the side panel pieces on a flat surface, with the inside of the cabinet facing up. Using your plan, mark the location where each brace will be placed. You will have two for the top of the cabinet, one where the cabinet shelf will sit, another one will be 4” from the bottom of the panel, and the last one will be 36” from the bottom of the panel.
Mark the other side panel as well but make sure you are marking it correctly so that the panels can be joined together.
SIDE NOTE: If you are not building the cabinets to the ceiling, you can assemble the full cabinet box on a flat surface, then move it into the space.
Place both side panels into the space. You will notice that it is a tight fit to stand the pieces up straight.

Attach all the panel braces onto one of the side panels using 1-1/4” screws. Make sure the braces are square to the side panel while you are securing them into place.
TIP: It helps to have the panel against a wall or cabinet. I actually leveled the side panel to my cabinets and secured it into place by creating a countersink hole and 1-1/4” screws.

Once all the braces are secured to one side panel, attach them to the other side panel the same way. Make sure the braces are square and level to the other side panel – this is why it’s a great idea to install the side panels in the actual location.
After your box is built, secure the cabinet to the back wall and/or cabinets next to the panel and/or the floor depending on your space. Make sure the panels are level horizontally and use shims to help you adjust the level at the floor if needed.
I secured my cabinet to the wall and side cabinets but my walls were not square with the floor. I had a gap at the back of my cabinet but don’t worry, I share how to fix this further down the post.

STEP 6: Build the cabinet above the fridge
Now that the box of the cabinet is built, you can install the shelf and divider (this divider is optional).
First, you need to secure the shelf braces (the 3/4” braces) to the side panels. These will help you when installing the shelf and provide extra support to the shelf.
Take a tape measure and mark both fronts of the side panels to the distance of the shelf brace that is already installed.
Place one of the braces onto a side panel so that the top of the brace is aligned with the back shelf brace. Your mark from before will give you a guide for the other side of the brace.
Before securing the brace with 1-1/4” nails, check that the brace is level from the front of the panel to the back. Adjust the front of the brace if needed, then secure into place using the nails. You will want to place a nail about every 8”.

Now, install the other brace the same way to the other side panel.
After, you can place the shelf onto the bracing with the pocket holes facing down. Check the level of the shelf, then use the 1-1/4” screws to attach the shelf to the side panels through the pockets.

STEP 7: Adding divider (Optional)
If you want to divide the cabinet in half so you can create a baking sheet organizer, follow these steps.
To determine the center of the cabinet, measure the inside of the cabinet and divide it in half. Then, add 3/8” to this measurement to give you one edge of where the divider will be placed.
This measurement will also be the width of the top board piece needed for the baking sheet organizer. I would recommend cutting a piece of 3/4” plywood to this width and the length of the cabinet (size of side panel).
You will also need to cut out the middle divider. The size of the divider will be how tall it is from the top of the shelf to the top of the side panel and how deep the side panel is as well. But you will notice that this piece needs two notches cut from it to allow the top bracing of the cabinet. So, make sure you cut these out as well.
SIDE NOTE: The premium plans already have these included in the plans.
Sand both pieces and wipe them clean so they are ready to install.


STEP 8: Filling in gaps and seams
Now, you can fill in all the pocket holes with wood filler. I would recommend doing this to give you a clean finish.
Once the filler has dried, sand the areas smooth with #220 grit sandpaper and wipe clean.
If you have any large gaps between your plywood and walls, you can use backer rod to fill in these gaps. This will make the next step even easier.

Use caulk to seal the seams.

After the caulk has dried, apply primer to the wood.
STEP 9: Add trim
Now that the cabinet frame is built, add the trim to the front of the cabinet frame.
I cut my trim to be ¾” by the refrigerator to allow for the space needed for airflow.
Install the trim with wood glue and 1-½” nails, making sure the trim is flush with side panel.

STEP 10: Finishing touches
After the cabinet frame is finished, it’s time to build the cabinet door. I built this door to match my other cabinet doors by adding trim to a flat panel. You can see the full process by visiting my projects on how to update cabinet doors without replacing them by adding trim.
Once the door was complete, I repainted all my kitchen cabinets so everything would match.

We also added new countertops – more on that in a future post!
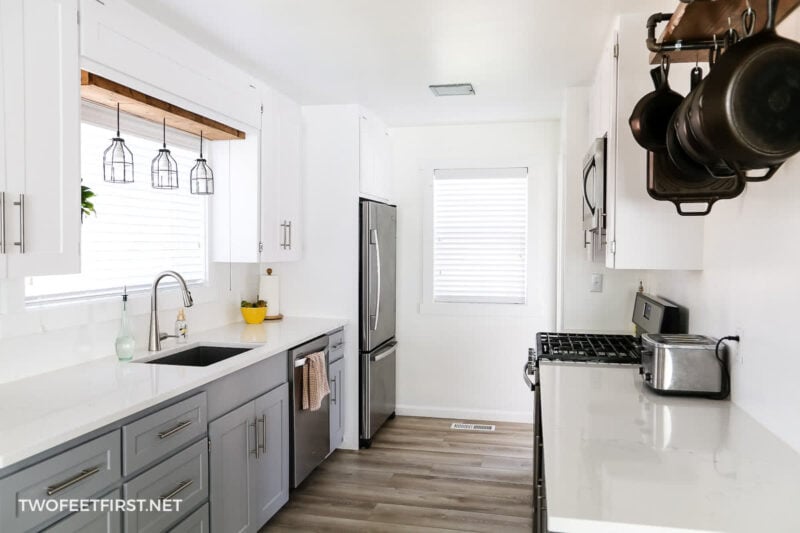
And that’s how we built a refrigerator cabinet to enclose our fridge. Now, the cabinet hides the sides and makes our kitchen look custom-built.

FULL PROJECT VIDEO:
Are you someone who does better with visuals? Check out the full project video below and don’t forget to subscribe on YouTube so you don’t miss out on future projects!

Now when you go into your kitchen to grab something from the fridge, you will be stopped in your tracks! The transformation makes it look like a high-end custom kitchen now that your refrigerator is no longer an eyesore in the room.