Update a Wing Back Chair by removing the wings…
This post may contain affiliate links. Please read our disclosure policy.
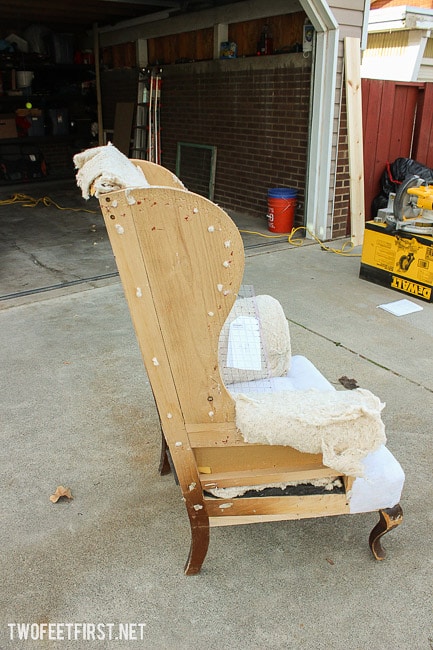
Someone in this family decided they wanted to do another chair makeover and it was not me, I want to do a couch… My parents happened to come across a wing back chair for FREE but it needed some love. Eric jumped on getting it from them because he wants to have his own manly chair. SO this one is his project with help from me of course (I get to add the fabric). But personally I am not a big fan of the wings on this style of chair, reminds me of something I would find in my grandma’s do not touch room. Does your grandma have one of those rooms?? Anyways here is the lovely chair that we got for FREE.

Disclosure: This post contains some affiliate links for your convenience, click here to read my full disclosure policy.
Because I am not fond of this style of chair, I had an idea to update the chair by removing the wings. After explaining my idea of removing the wings from the chair to Eric, he was on board with the idea. The only thing we needed to make sure was that the wood frame under all the fabric and batting was solid wood. So we removed the million staples and old fabric. And guess what?? The wood frame was going to work perfectly for this idea… YAY!!!
First thing we did was to make sure all the batting and staples were removed from the wings of the chair. Did not want to hit a staple with the saw… Next we decided how far we wanted the side of the chair to stick out (the top of the wing), we decided on 5″. We then marked the 5″ and traced a straight line from that mark to the bottom curve of the wing (sorry line is pretty light in the picture below but it is there!!).

Now time for some power tools, we used a Skil saw to cut along the marked line to remove the wing. TIP: Make sure you have a quality blade on the saw.

After cutting the wings off the chair, Eric took the orbital sander and sanded the area smooth (used #120 grit then #220 grit sandpaper). And here is what the chair looks like now. Sorry the picture is not the greatest…

We now need to upholster the chair with some new batting and fabric. Eric picked out the new fabric last week. Pretty excited to see how this one turns out.


You’re doing great all your projects are fabulous. Well done. From maureen UK
Thank you, Maureen!