Spray Paint a Light Pole
This post may contain affiliate links. Please read our disclosure policy.
Find out how to spray paint a metal light pole so it looks fresh and new, year after year, through the harshest climates.
Do you have metal decorative items that you excitedly bought and placed around your house, only to watch them eventually turn into an eyesore on your property?
If you have seen a picture of the front of our house, you might have noticed this light pole near the curb. In fact, I think most of my neighbors have!
It used to look elegant and classy but now, all you see is the faded color and peeling paint.
Well, it’s about time that I finally update the light pole.

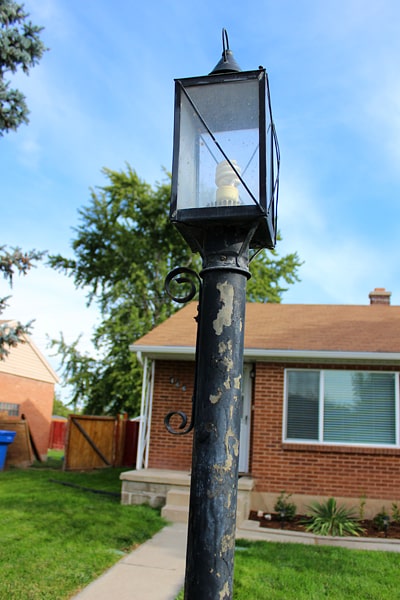
Because of all the chipped paint, I am going to show you how to remove the damaged areas and spray paint the light pole for a smooth, long-lasting finish.
This technique would also work for a metal railing.
Disclosure: This post contains some affiliate links or referral links for your convenience. It is a way for this site to earn advertising commissions by advertising or linking to specific products and/or services. Click here to read my full disclosure policy.
Spray Paint a light pole
MATERIALS:
- spray paint in black
- spray paint primer
TOOLS:
- drill
- wire brush (attaches to drill)
- boxes
- safety glasses
- face mask (for dust)
BEFORE STARTING
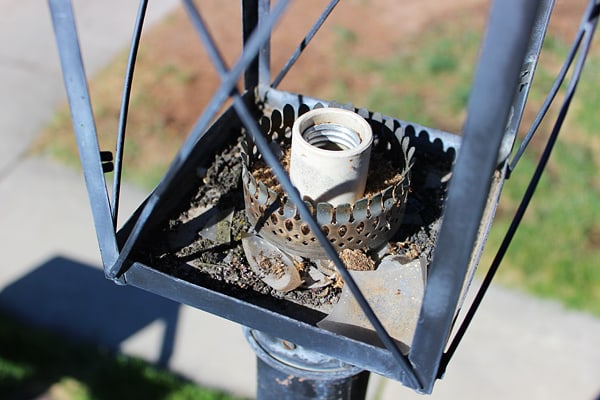
I carefully removed the glass and old light bulb. And, of course, I had to do a little cleaning – there was an old, broken light bulb still in there.
REMOVE THE CHIPPING PAINT PIECES
The first step to giving this light pole a makeover was removing all the old paint that was chipping. This part takes a while but it will be worth it in the end.
To get started, you will need a drill with a wire brush attachment. It looks like this:

The reason it took so long for me was because my batteries only lasted for about an hour before needing to be charged again.

While you’re using the drill brush, apply a little pressure to the damaged areas to remove the chipped paint.
If you want to catch the debris, you can place an old sheet or boxes below the area or use a shop-vac while you’re working.
After removing all the old paint, I cleaned the pole with a soft cloth and prepped for paint.

APPLY SPRAY PAINT
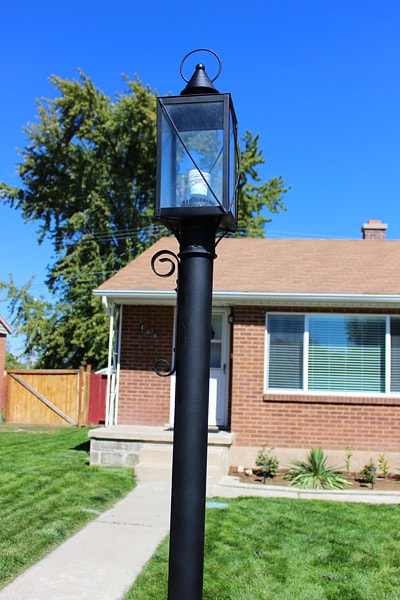
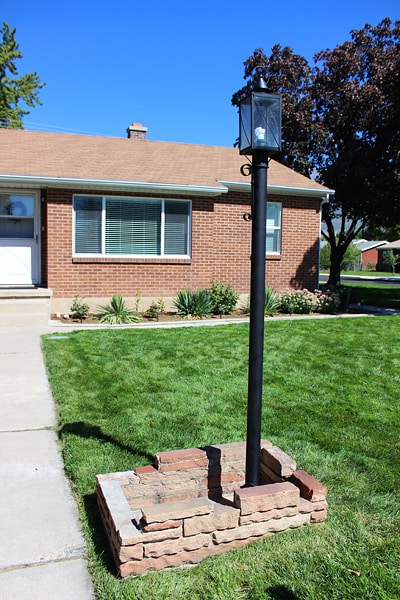
Now, the light pole looked like this and I was all ready for the spray paint.
I combined several boxes to form a barrier when painting the pole; this prevented the spray paint from splattering onto the rock wall and lawn.

Then, I used the primer and sprayed the light pole according to the instructions on the can.

I applied 2 coats of primer.

After the primer dried, I could then apply the paint. This time, I applied 3 coats of paint, in light coats, to give it a better finish.
And here is my not-so-new light pole:
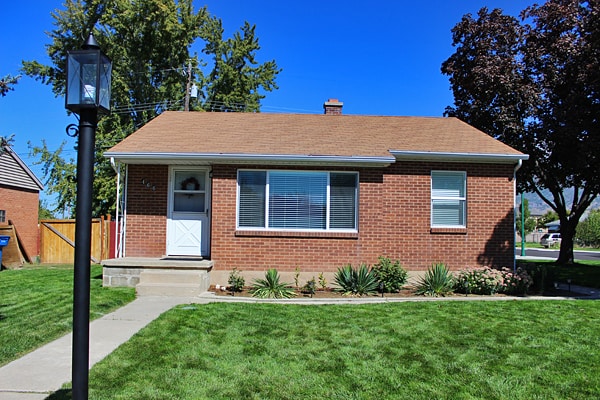
And the view of the house looks a little bit better too.
The cost of this project was minimal, the only materials needed were spray paint (1 primer & 2 paint cans) & the wire brush, which cost less than $24 in total.
It’s a lot cheaper than buying a new light pole and it will last through many more winters and hot summers.
What do you think of my little makeover? Anyone else thinking about updating a light pole or metal railing?


I know what you mean about chippy black metal things around the outside of the house. I have a few my self. Thanks for all the tips and motivation. Now actually on my list to do! Have a good day, Linda
Yes the chipping paint is not that attractive. It’s amazing to me what a coat of paint will do.. Good luck with your list and have a great day!
Looks much better. Some simple homemade black shutters would look nice w/ that newly painted pole. Something along this idea: http://petitelefant.com/how-to-make-wood-shutters-for-your-house/. Just a thought. ;0)
Thanks Anne for the idea! I do have shutters that go on the big window but a big wind storm blew them down, it was a little scary… But I need to take the time and put them back up.
But I would really love to add them to all the windows and I never thought of black, so thanks for the idea and a tutorial on making shutters! I will be adding shutters to my list and let’s see if I can talk someone else into black shutters…
Oh, Megan! This post about painting your lamp post was meant for me. Yes, my lamp post needs the works to make it look pretty again. Thanks for inspiring me to get to work on it. Hope you drop by and see mine.
I can not wait to see how it turns out! Thanks for stopping by!!!