How to Reupholster a Chair
This post may contain affiliate links. Please read our disclosure policy.
A step-by-step tutorial on how to reupholster a chair, see how you can finally transform that old outdated chair.
Our living room was a sad sight – everything needed a facelift.
We decided to take it one step at a time, starting with our yellow rocking chair (see our other makeovers at the bottom of this post).
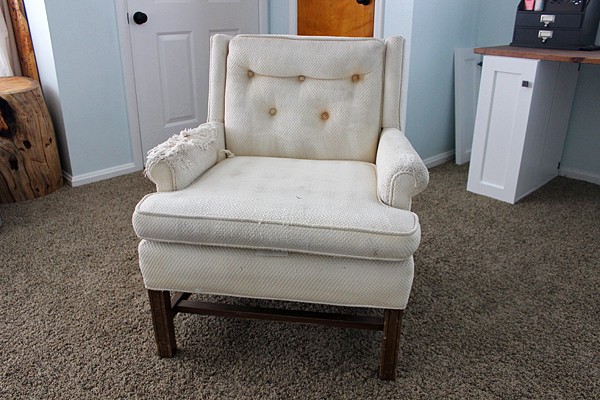
Sagging and dated, this oversized chair was one of the few accent chairs in our living room.
But the slipcover didn’t fit properly and a rocking chair wasn’t the style we were going for.
We debated on making a new slipcover for the chair but in the end, we preferred to replace it with two different chairs.
We sold the old yellow chair for $35, then found this little beauty on the classifieds for only $30. It was a sturdy chair with beautiful lines and a lot of potential.
I gave it a complete overhaul and the results were worth it!
If you’re wondering how to reupholster a chair for yourself, here’s your tutorial.
Let me give you an idea of what you can create…
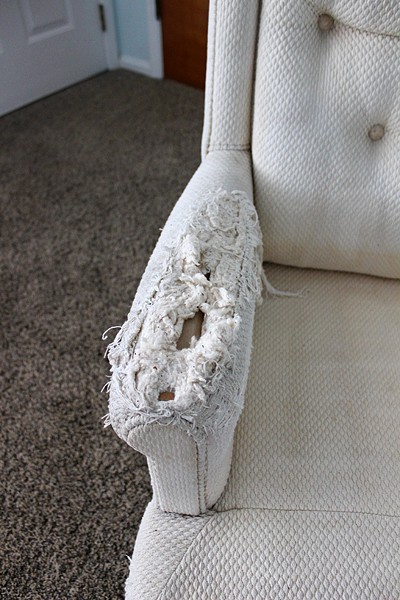
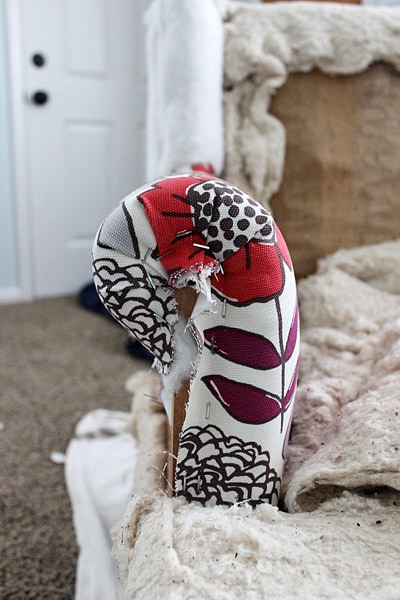
The worst part of this old chair was the arm – it looked like it had been attacked by a great white shark.
My husband wanted to have the chair professionally redone but I insisted it was too expensive and that I could do it myself!
During the reupholstering process, he had his doubts but once I finished, he was amazed! I think this was one of the few times he was truly astonished by one of my projects.
After I read up on how to upholster a chair (here is a great tutorial on how to reupholster an armchair), I was ready to give this a try.
At first, I was a little nervous…could I really achieve the look I wanted?
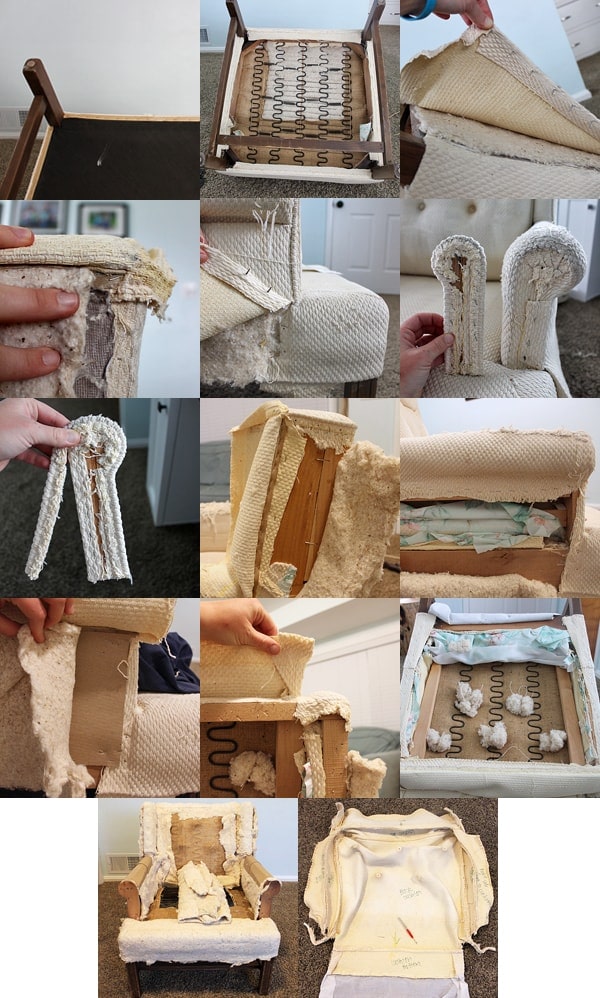
I took lots of pictures of the chair to remind me of how everything looked before.
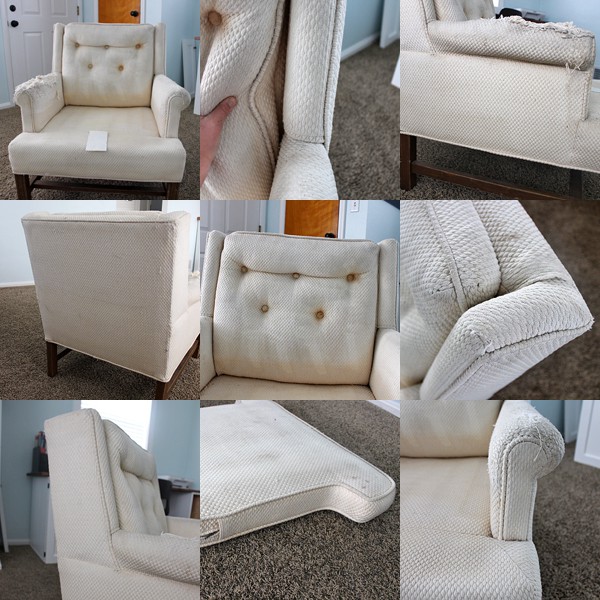
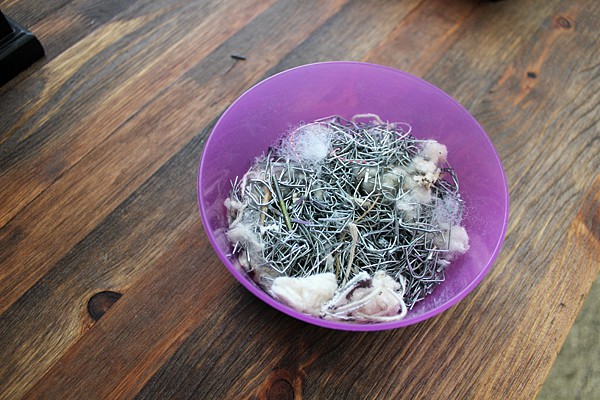
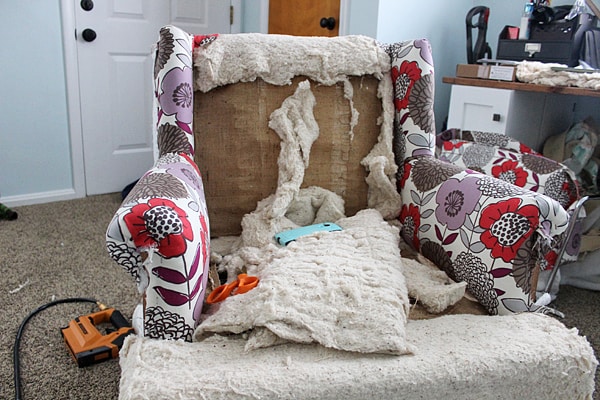
Next, I removed all the old fabric and let me tell you, this was the longest part. There were about a million staples hiding in the corners and sides. Here all the staples I removed from the chair:
When I was removing the fabric, I continued taking pictures to keep track of how everything went together. And as I removed the fabric, I would label the fabric with a marker, also adding arrows in some places to let me know which way was down.
After everything was removed, I bought my supplies.
Disclosure: This post contains some affiliate links or referral links for your convenience. It is a way for this site to earn advertising commissions by advertising or linking to specific products and/or services. Click here to read my full disclosure policy.
HOW TO REUPHOLSTER A CHAIR
MATERIALS:
- 6 yards of fabric of your choice
- 1″ foam batting
- 1″ quilt batting
- 5/32″ piping – I always try to reuse the old but sometimes you need new
- cardboard tack strip – gives a crisp line in the fabric
- upholstery tack strips (buy the metal ones, I will explain why later)
- zipper
- thread
- cover button kit
- staples
- grey bottom fabric
- #220 sandpaper & stain
TOOLS:
Everything else, I either had on hand or was reusing from the chair before.
Now that I had my supplies, I could start redoing my chair.
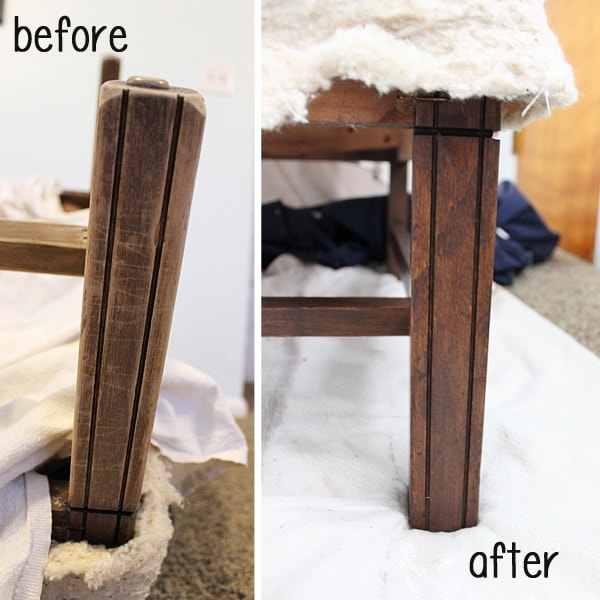
PREP AND STAIN THE WOOD
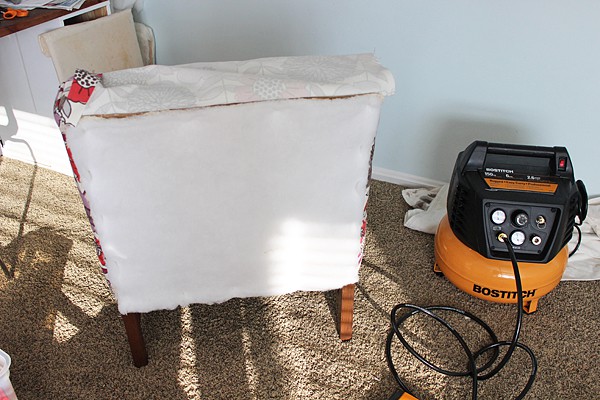
First, I sanded the legs of the chair and gave them a fresh coat of stain.
After staining, I let the chair sit overnight, then wiped the legs with a damp cloth to make sure no stain was going to get onto the fabric.
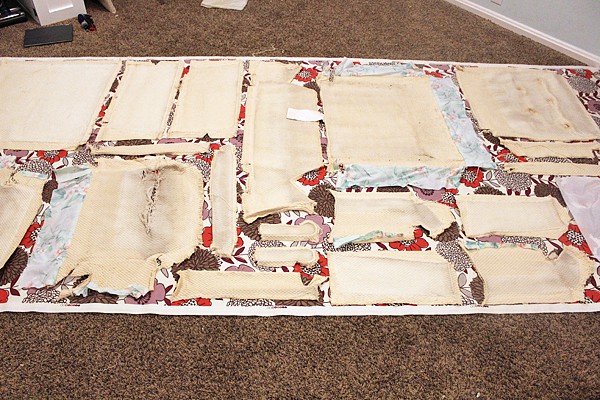
CUT NEW FABRIC PIECES
Next, I cut out the new fabric using the old fabric as a pattern.
TIP: If you plan on adding new or more batting to the chair, cut your new fabric larger than the old fabric to accommodate the extra stuffing.
I added more batting to the whole chair and wished I had more fabric in some places.
REFINE THE FABRIC CUTS
After cutting the fabric, I went to the sewing machine to sew my piping. I used all the old cording since it was in good shape.
Also, I sewed all the connecting fabric pieces together before I started assembling onto the chair. I sewed my cushion the same as this one with a zipper enclosure.
TIP: If using upholstery thread, use upholstery thread only on the top and regular thread for the bobbin thread.
ATTACH NEW BATTING
Next, I added some new batting to the arms to rebuild them. Remember, there was a huge hole in one of them before. I added one layer of the 1″ foam batting, then a layer of 1″ quilting batting to both arms.

ATTACH NEW FABRIC TO CHAIR
The next step was to staple my new fabric to the chair the same way it was removed. I used my Bostitch Air Compressor with staple gun (bought mine cheaper at Lowes).
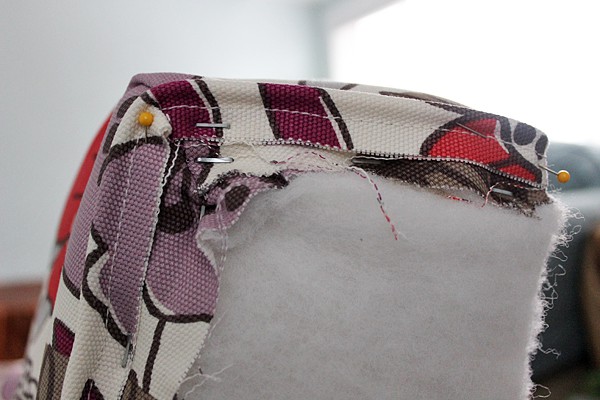
The easiest way to add the fabric and make it stay in place, was by using pins, then stapling the fabric in place.
TIP: Use a lot of staples as you’re attaching the fabric to the chair.
Along with the old batting, I added another 1″ quilting batting everywhere to give the chair a fuller look.
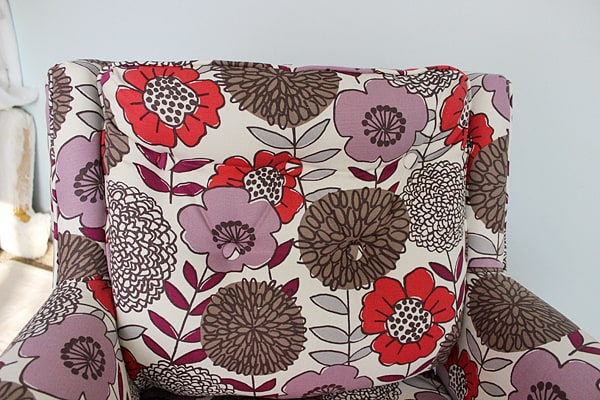
Here are my added buttons:
The cardboard tack strip is used to give the fabric a crisp line.
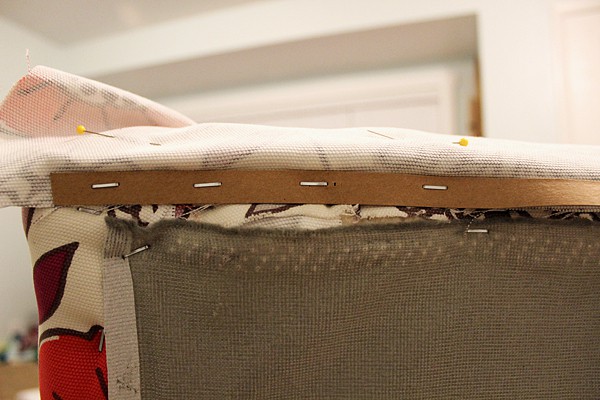
There were parts of the chair where I used nail tack strips to attach the fabric.
I strongly recommend using the metal ones. I found that the cardboard ones are completely useless. I ended up reusing the old ones because they were better.
Also, when attaching the nail tack strip, staple the top, then the bottom. Then, add the nail tack strips to the sides.

Another thing you will need is an upholstery hammer – here is my makeshift one. It has batting, then fabric wrapped around it to give it the cushion it needs. Simple and effective!

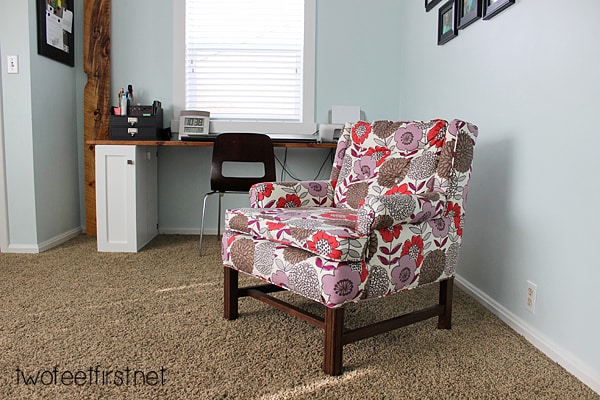
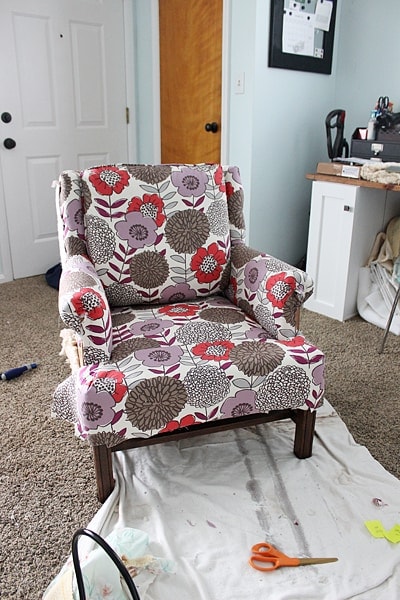
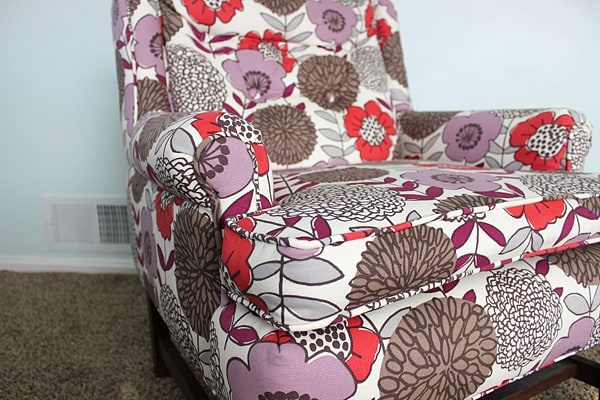
Overall, it took me about 6 days from start to finish to reupholster the chair. What do you think of the new look?

Look at how the updated wooden legs coordinate nicely with the new fabric:

And here is the cost breakdown:
- chair – $30
- fabric – $56
- staples – $3.50
- batting – $27 (I have extra for my other chair)
- supplies – $29 (nail tack strip, cardboard tack strip, thread, zipper, & buttons)
TOTAL COST – $145.50

What do you think of my chair makeover? I took a boring, battered chair and turned it into a statement piece in a pattern that I love! And you can do the same.


This turned out great! Awesome job and I love your blog, just ran across it on The Makers link party!
Thanks Amanda! I still can not believe that I was able to reupholster the chair… I loved checking out your blog! Thanks for taking the time to look around!
This came out so well, it’s really lovely! I would love for you to stop by my blog and join our Something to Talk About link party!
Have a great night!
Karen
Thanks Karen, I will!!!
I am very impressed! Love the colors and th bold fabric=gorgeous!
You gotta love when the hubby is impressed! You did an amazing job! I’m visiting from Tatertots and Jello.
Thanks Cindy for the sweet comments on the chair and our kitchen inspiration! Thanks for visiting!!!
I have redone a few chairs, it is not fun, but they turn out great. I love your fabric, it is so modern, so vibrant. And you did a magnificent job. I used the old fabric too, it is much easier to use it as a pattern although taking it off is painful! I love it!
Thanks Nikki! It’s true redoing a chair is a lot of work but they always look amazing after… We love the fabric! Thanks again!
You have amazing patience and this project shows it off – the re-do looks fabulous! What a great after! Thanks for sharing at the Pretty Preppy Party! xx, b @being-bianca.com
Thanks for sharing your work at the link party! Pinning :)
Wow- I am so impressed by this! Beautiful craftsmanship.
Thanks!!!