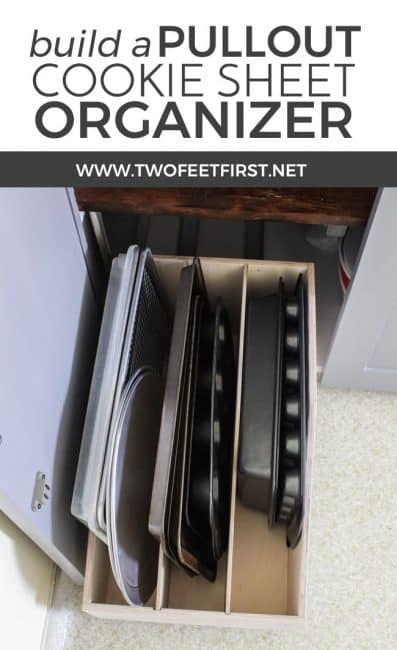
DIY Pullout Baking Sheet Drawer
This post may contain affiliate links. Please read our disclosure policy.
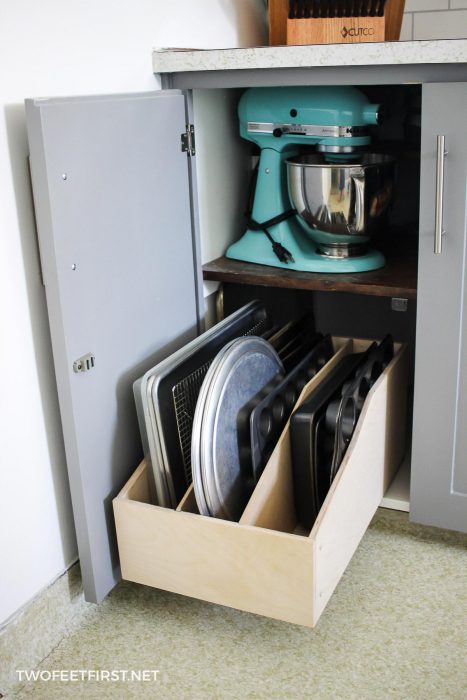
Are you looking for more organization in your kitchen? I was plus I was tired of trying to find a baking sheet under that pile of pans. After remodeling the kitchen cabinets, I wanted to organize the inside of the cabinets. And this is our solution for the baking pans a DIY pullout baking sheet drawer.
What do you think? Do you want to make your own pullout baking sheet drawer, here’s how!
Disclosure: This post contains some affiliate links for your convenience, click here to read my full disclosure policy.
DIY Pullout Baking Sheet Drawer
SUPPLIES:
- 1/2″ cabinet grade plywood (2’x4′) (can use 3/4″ plywood if so buy 1.25″ screws)
- 1″ Kreg screws
- 1/4″ MDF or plywood (2’x4′)
- 2 – 21″ drawer slide
TOOLS:
- Kreg Jig (the mini Kreg Jig will work great for this project!)
- orbital sander
- wood clamps (optional)
- table saw (or router to create the dado)
- jigsaw
- drill
Check out the list of tools we use!
I recommend using cabinet grade plywood because it is a better product. Let me show you want I mean: top is regular plywood and bottom is cabinet grade. Do you see the difference?
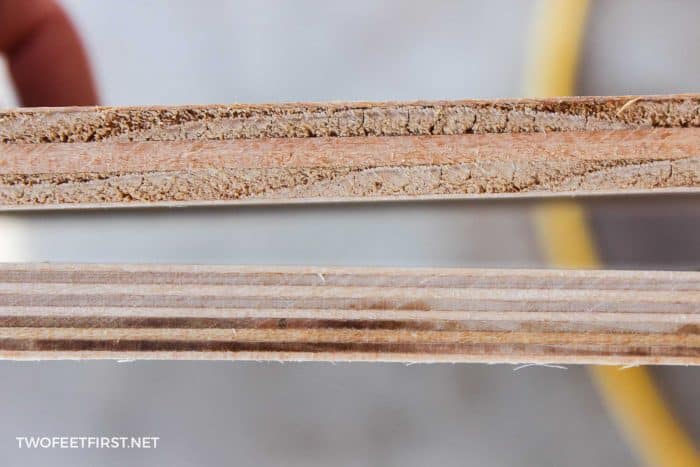
See how the cabinet grade plywood does not have any voids, making it a stronger piece of wood.
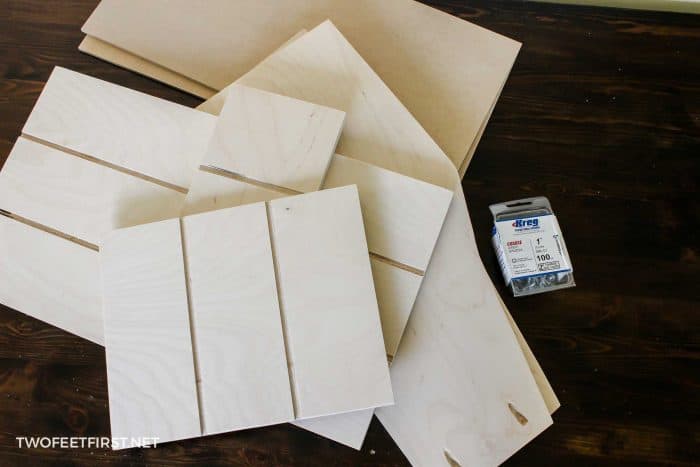
CUT LIST:
1- 13 1/4″x6″ (front)
2- 22 1/2″x10″ (sides)
1- 22″x12 1/4″ (bottom)
1- 12 1/4″x10″ (back)
2- 22 1/4″x9 1/2″ (1/4″ MDF dividers)
After cutting all the pieces, I created two 1/4″ dado’s on the front, bottom, and back pieces. I used a table saw to create the dado, like we did with our kitchen cabinet drawers. I created a dado 4″ in on both sides of the bottom & back pieces (will look like this= 4″ then 1/4″ dado then 3.75″ then 1/4″ dado then 4″). The front piece is 1″ bigger than the back & bottom pieces, so create the dado 4.5″ in on both sides of the front piece (will look like this= 4.5″ then 1/4″ dado then 3.75″ then 1/4″ dado then 4.5″). Making sure all the boards will line up perfectly.
Next, I created the angle of the side pieces (that way it is not a rectangle box). To do this, I marked the front of the of each side piece to be level with the front drawer piece, like the picture below.
After marking, I decided where I wanted the wood to start to angle and tracked a line to connect the two marks together. Next, I took a jigsaw (with a quality blade) and cut along the line for the two side pieces and MDF pieces.

Next, I created Kreg Jig pockets in the wood. For the two side pieces, I placed 2 pockets at the front of the drawer to connect the drawer front to the side pieces, one of the pictures above shows this. For the back of the drawer, I placed 6 pockets, like the picture below.

And for the bottom of the drawer, I placed 14 pockets, just like the picture below.

After creating pockets, it was time to sand the wood smooth using our orbital sander with #220 grit sandpaper. Once I finished sanded all the wood it was time to assemble the drawer.
Taking the drawer front I placed it flat on a hard surface then assemble the sides and bottom pieces around it. I then attached the sides to the drawer to the front piece, the bottom piece is there to make sure the spacing is correct.
I also made sure to put pressure on the drawer sides while attaching to make sure there was no gap (this is when a clamp would be nice). Then I attached the bottom of the drawer to the drawer front the same way.
Next, I rotated the wood to one of the side pieces, keeping it flat on the hard surface, and attached the side piece. After I rotated the wood to the other side piece (flat on the hard surface) but before attaching I placed the back piece in place to make sure it would fit, then I attached the other side piece.
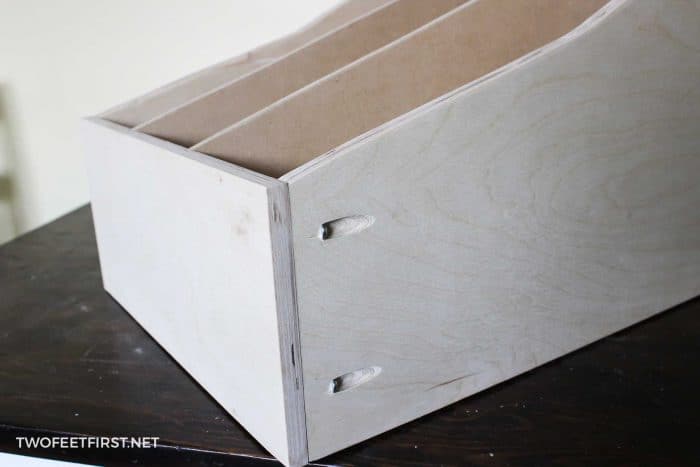
Next was attaching the back piece the same way. TIP: It would be easier to assemble the drawer if you have long clamps but it can be done without them, I did it without! Once I had attached all the pieces, my drawer box looked like this.
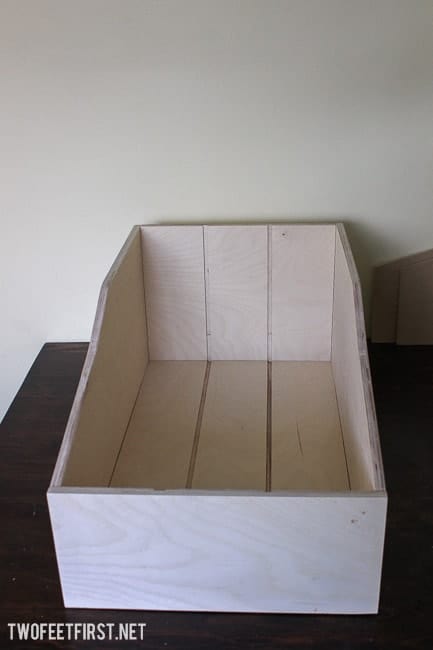
I then added the MDF dividers to the box.

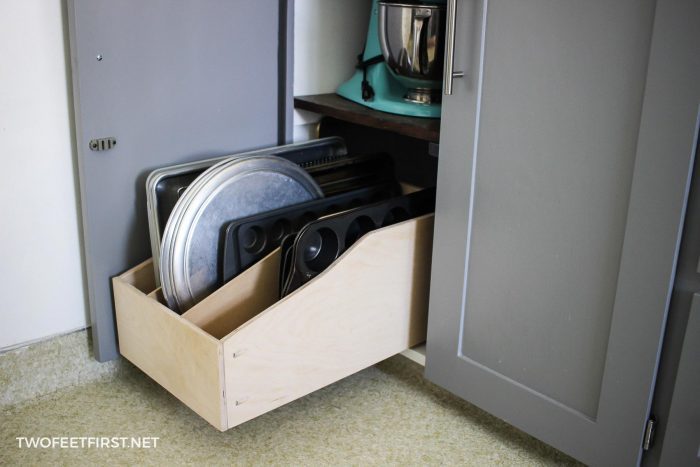
Next, I added the drawer slides to the box. I found these drawer slides at the Restore thrift store for only $2. I decided to add the slides to the bottom of the box, that way you could not see the slides. But note to anyone doing this, I do feel that the drawer slides would work better if added to the side of the box because when the drawer is pulled out it slats down slightly.
 And here is the drawer all installed in our cabinet.

What do you think of our storage solution for our baking sheets? Next, we will be organizing our spice cabinet.


I’m starting to get ideas for how to give our kitchen a facelift while we save up for a big remodel. This would be a great way to corral all those pans!
Good Luck on your kitchen remodel and I hope this gives you some ideas!!
You did a good job. Just a note on the glides, though. This type of glide is only meant to be installed “on edge”, on the sides of the drawer box – that’s how it has the strength to carry the load. It explains why you are seeing the sagging. I just wanted to mention this in case you have future projects planned. :-)
Thanks Juanita! I did know that about these sides but thank you for reminding me! They are working but they would work better on the sides like you said. Thanks for the tip and for stopping by, have a wonderful day!
Nice idea.I think you’re going to have problems down the road with those slides and at some point you’ll need to upgrade to bottom-mount (or under-mount) slides: Spendier, but engineered for the situation. Personally, I prefer drawer-lock joints to the screws (need a router table and special bit and clamps), and easing the edges is easy on the hands.
I have all new kitchen cupboards and seriously thinking of putting sliders in all of them: bookcase types for foodstuff, and drawers for everything else. Makes so much more sense to have a pull out.
I would have to agree with you, we love our pullout drawer. We also have a garbage pullout also and we love that one…